Osteoporosis: Yoga for Strong Bones
Osteoporosis, osteopenia, falling, and breaking a hip—all of these are major medical and lifestyle concerns for many women over 50. Yet, the public health matter reaches far beyond that population. Men and younger women—such as yours truly, diagnosed with osteopenia in my 20s—aren’t immune. Can yoga help? The proverbial jury, scientifically speaking, is still out. But from what we know, we can say that doing a yoga practice for strong bones is likely to help.
The same research showing those positive signs is also showing that, by and large, yoga is mostly safe for those at risk for bone health issues and even for those experiencing them. And unlike medication, the “side effects” are actually positives, particularly for the population that most commonly experiences bone loss. These positives include strengthening, increased balance, better posture, and reduced tendency toward mental health issues such as anxiety and depression.
The latest science is showing that there may be a link between bone health and mood. Thus, the benefit of boosted bone health might compound the benefit of yoga itself! As always, when one is looking to yoga to address a specific medical condition, it should be viewed and used as a complementary, rather than a primary, treatment. Also, be sure to consult your doctor before starting any yoga practice program. All of that said, let’s jump into a quick (5- to 10-minute) yoga sequence for bone health!
How to Practice Yoga for Strong Bones
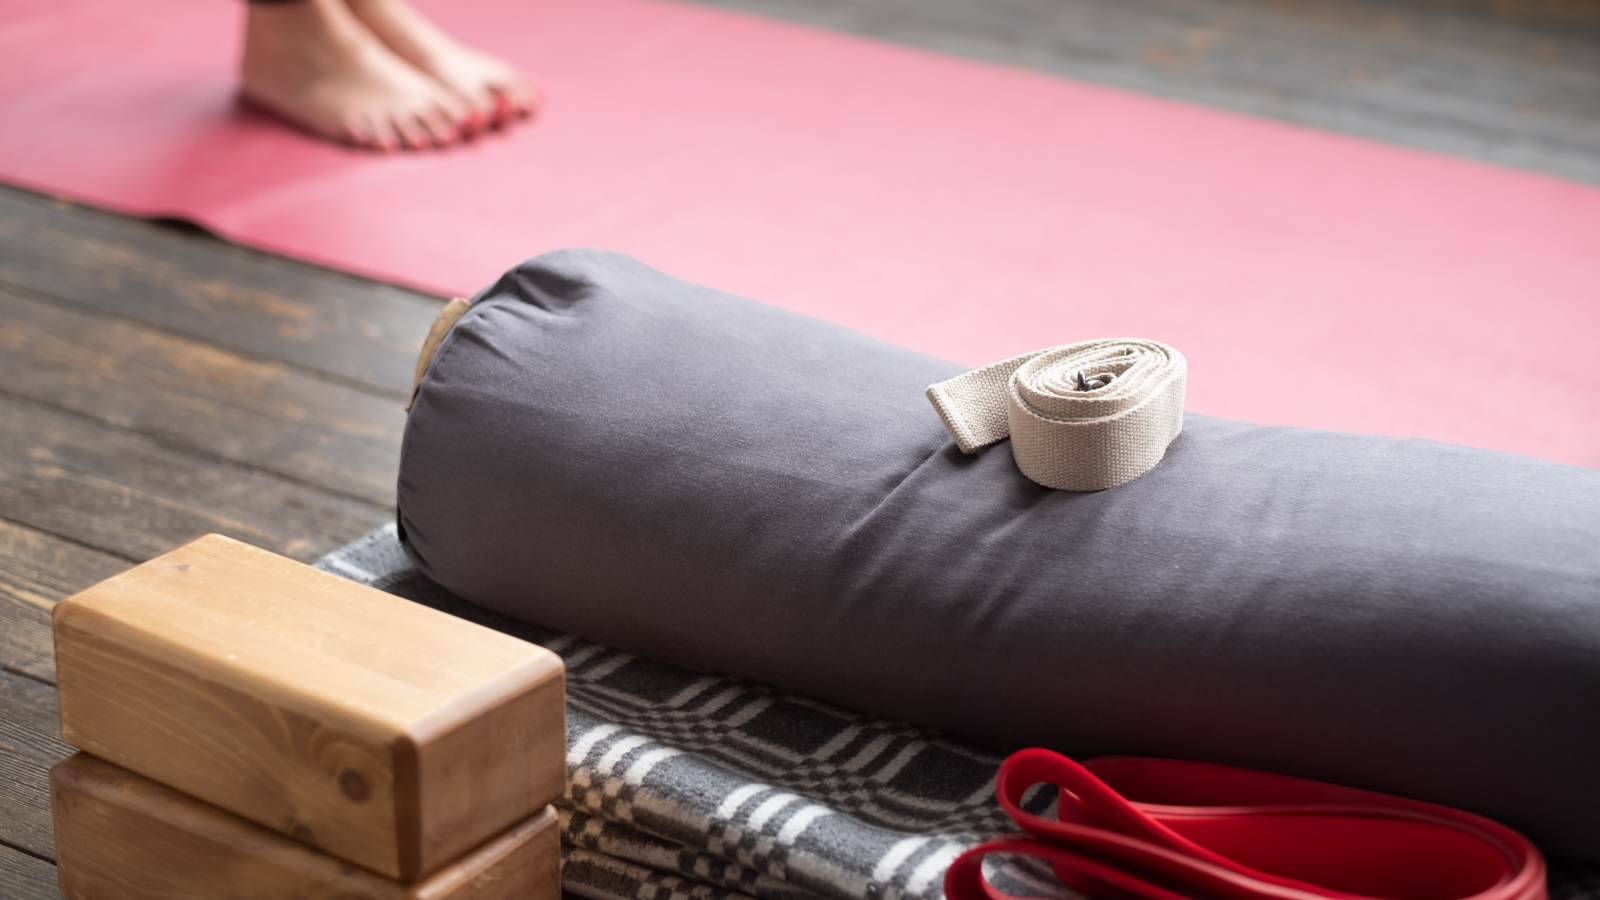
Gather your props. You’ll need a mat or other soft surface and two blocks.
It is advisable to practice this sequence once you are already warmed up, from practicing other asana or from doing other physical activities. If that’s not possible, be sure to proceed carefully. Don’t go to the limits of your range of motion, and pay close attention to your body’s signals.
Practice these three poses as a sequence so that you practice all three on one side, and then practice all of them on your other side.
Gentle Twisting
- Stand in Mountain Pose (Tadasana).
- On a breath in, raise your arms up overhead to Upward Salute Pose (Urdhva Hastasana). Feel length through your spine as well as rootedness through your legs and feet.

- Lower your arms to a “T” shape. On a breath out, rotate your torso to the right, to a mild twist. The point is not a huge twist but a gentle massaging of your organs. It’s especially important to be cautious with your vertebrae in cases of low bone density. Let your gaze be soft toward your right (or if it bothers your neck to look to your right, keep looking forward).
- Check-in with your hips. Because our lumbar spines do not twist, trying to keep your pelvis square to the front can cause the sacrum to rotate in the sacroiliac joint, which can destabilize the joint. So allow your pelvis to twist along with your thoracic spine. Particularly in cases of low bone density, it’s crucial to make subtle and cautious adjustments. Notice how you feel and what your body is telling you as you do so.
- Hold the twist for 30 seconds or 5 to 10 breaths. Staying in poses for an extended period can build strength, which can increase bone density over time. Lengthen through your spine as you breathe in, and try to twist just a bit deeper with each breath out. Soften through your shoulders and face. You’re adding pressure to your vertebrae as you’re twisting, but not too much, which is great for bone health.
- On a breath in, reach your arms back up to the sky, palms pressing gently together, to come back to Urdhva Hastasana. If it doesn’t bother your neck, look up at your hands. Feel spacious through your spine while you remain rooted through your legs and feet.
- Let your arms rest by your sides, returning to Mountain Pose. Then, if it feels best for you, take your hands to your heart and notice how you feel for a few breaths.
Weight-Bearing Poses
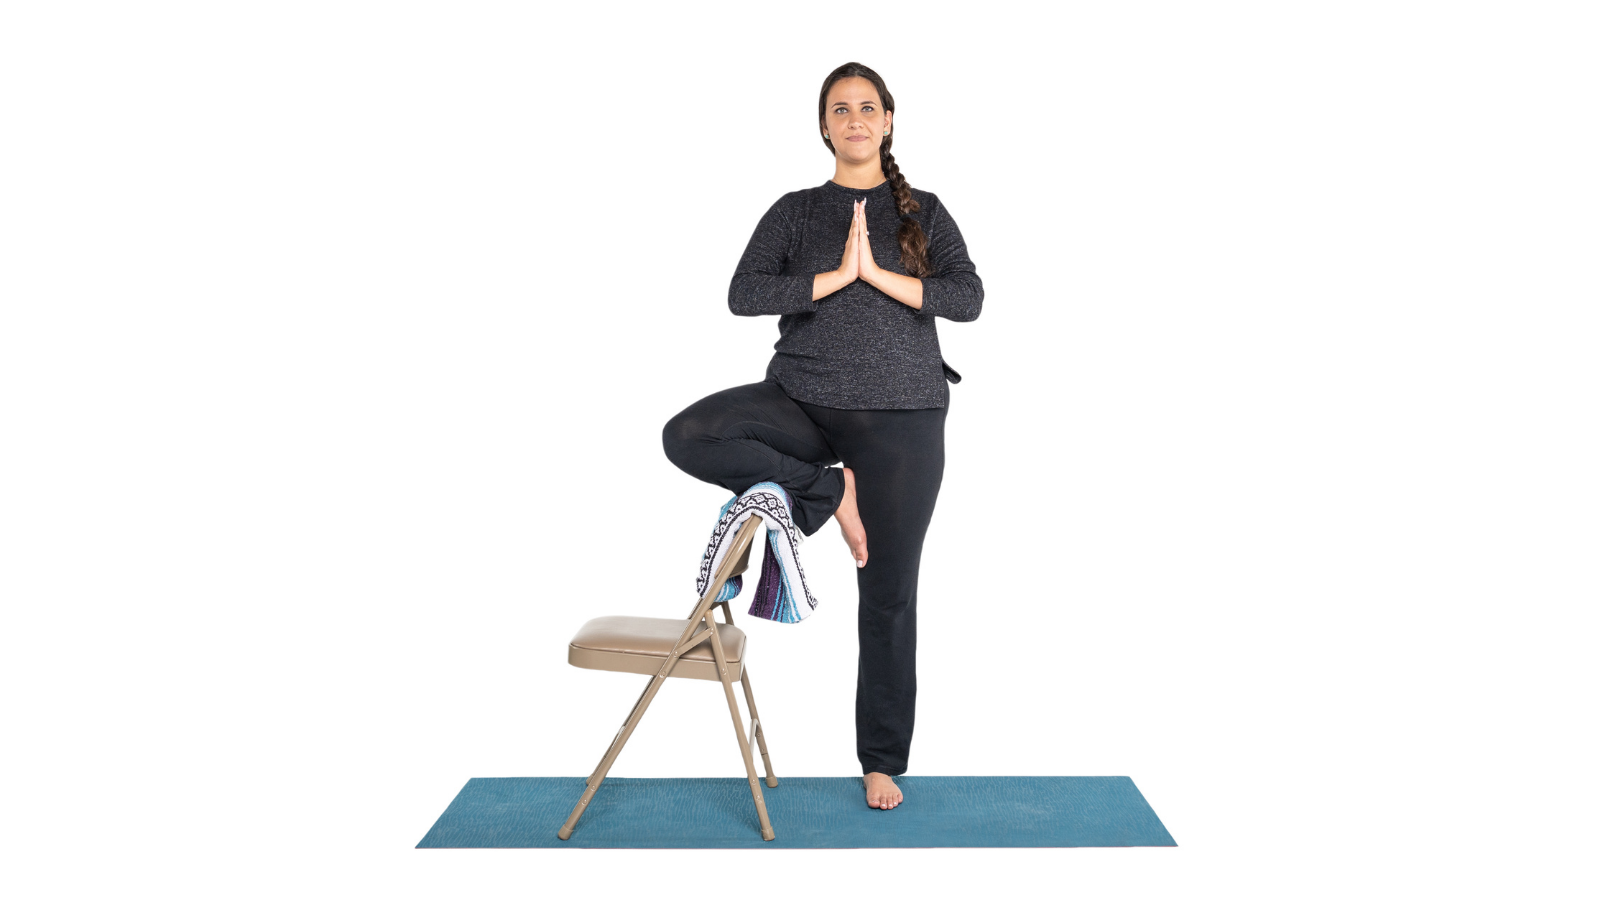
- Come to Tree Pose (Vrksasana), standing on your left leg with your right knee bent. Next, bend your right knee and place your right foot on your calf or ankle. You can, if you want, place the ball of your right foot on the ground to help stabilize your balance. (shown with a chair for support)
- Place your hands in Anjali Mudra (Prayer Position). Keep your hands at your heart until you feel stable and settled in the pose. Then if it feels right for you, raise your arms up to the sky to “sprout your branches.”
- Gazing at something in front of you that’s not moving can help you balance. Feel your strong bones and muscles supporting you in the pose.
- Stay here for 30 seconds, steady and strong. If your body makes minor adjustments, keep breathing easy. Then, like a sturdy tree, you can sway in the breeze and still stand strong.
- When you feel ready, step your right foot back into Warrior I Pose (Virabhadrasana I) (shown with a chair prop). Angle your right (back) foot inward, toward your front foot, and push down through the back edge of that foot. Feel your front thigh roll outward while your inner thighs magnetize toward each other. Keep your arms raised, but if you need to let them rest down by your sides for a breath or two, go ahead and do so.
- Refine the pose further by feeling a lift behind your heart, bringing a Cobra Pose (Bhujangasana) sensation, as if you’re doing a mild backbend because, in fact, you are. Then, gaze straight ahead, fixing your steady Drishti.
- Stay here for 10 to 15 breaths unless your body is telling you to exit through sharp pain. Feel your spine lengthen upward as you breathe in and sink just a bit deeper into the pose as you breathe out.

Grounding Poses
- Raise your back heel up so that you’re in a short Low Lunge Pose (Anjaneyasana) with your back knee raised. Bring your arms down and place your hands on your mat on either side of your left foot. Step your left foot back to meet your right foot so that you’re in Plank Pose (Phalakasana) (shown with the forearm variation).

- Now hone the pose further: feel a lift behind your heart, spin your biceps forward, and look both out and down so that both the front and back of your neck stay as long as possible. Next, push back with your heels while your shoulders stay over your wrists, and feel your inner thighs roll upward.
- Hold the pose for 10 to 15 breaths. If that’s not possible for you, drop your knees to the mat to Half Plank Pose (Ardha Phalakasana) and/or just hold either pose for as long as you can.
- Drop to your belly on a breath out. If you need a rest, point your elbows outward and place your hands one on top of the other to make a pillow for your forehead. Rest there for as long as you may need.
- If and when you’re ready to proceed, draw your elbows inward and spin your forearms forward so that they make an “11” shape. Ground your legs and arch your spine upward into Sphinx Pose (Salamba Bhujangasana). You should be in a gentle Cobra Pose, supporting yourself on your forearms rather than on your hands. Your elbows should fall below or slightly forward of your armpit. Adjust your elbows forward if that is more comfortable for you. Keep your head and neck in a neutral position relative to the spine. Avoid throwing your head back.
- Breathe here for 10 to 15 breaths. Gently engage your abdominals to protect your spine. Fix your Drishti assuredly forward unless your neck feels like it needs a rest. If your neck is tired, you can allow your head to fall forward gently. Soften through your shoulders and face.
- Then practice the sequence on the other side. To return to your starting pose, push back up to Plank Pose, placing your hands back under your armpits. Next, extend your hips back up to Downward Facing Dog Pose. Then jump, hop, or step forward back to the top of your mat or soft surface. Finally, return to Mountain Pose and begin the sequence on your other side.
Also, read...
Yoga for Balance Training: Why Static Poses Don’t Cut It
Yoga for Osteoporosis and Fracture Prevention – Shifting the Focus to Falls
Yoga for Osteoporosis – An Interview with Loren Fishman, M.D. and Ellen Saltonstall
Related courses
Keys to Finding Inner Strength: A Yogic Wisdom Path to Developing Greater Resilience
Somatic Yoga for Fascial Unwinding
Kathryn Boland is an RCYT and R-DMT (Registered Dance/Movement Therapist). She is originally from Rhode Island, attended The George Washington University (Washington, DC) for an undergraduate degree in Dance (where she first encountered yoga), and Lesley University for an MA in Clinical Mental Health Counseling, Expressive Therapies: Dance/Movement Therapy. She has taught yoga to diverse populations in varied locations. As a dancer, she has always loved to keep moving and flowing in practicing more active Vinyasa-style forms. Her interests have recently evolved to include Yin and therapeutic yoga, and aligning those forms with Laban Movement Analysis to serve the needs of various groups (such as Alzheimer’s Disease patients, children diagnosed with ADHD, PTSD-afflicted veterans – all of which are demographically expanding). She believes in finding the opportunity within every adversity, and doing all that she can to help others live with a bit more breath and flow!


