
HOW TO PRACTICE HANDSTAND POSE IN YOGA (Adho Mukha Vrksasana)
Benefits, How to Instructions, Modifications, and Common Alignment Mistakes for Handstand Pose
Handstand Pose (Sanskrit name: Adho Mukha Vrksasana) is one of the most challenging of the arm balancing yoga poses—which is saying a lot! In general, arm balances are challenging to most yoga practitioners. Coming in at the top of that list, then, Handstand is a real force to be reckoned with!
Many students who are able to kick up into the beginning form of a Handstand Pose will only be able to hold the yoga pose for a nanosecond or two, falling out before they can start to work on their form. Finding proper alignment in Handstand requires an immense amount of strength, concentration, and dedication to the practice of mastering this yoga posture.
The ability to hold Handstand Pose is dependent on several factors, including core stability and shoulder joint structure. There’s a strong tendency to over arch the spine and jut the ribs forward in this asana. This can interfere with the ability to both balance and hold the yoga pose steady. A strong, stable core helps you stay better aligned.
Variations in shoulder joint structure can also determine whether this yoga pose is suited to your body. Some people’s shoulder joints are designed in such a way that their arms angle forward at the shoulders rather than flexing all the way to a vertical position. When the arms are straight and vertical, supporting the body weight is much easier than if the arms are angling forward. People with the latter type of shoulder construction will have to work a whole lot harder to support their body weight. So, ironically, people with very strong, muscle-bound shoulders often have a harder time holding Handstand Pose than people with more mobile shoulder joints.
Practicing Handstand against the wall is the best place to start. First and foremost, the wall provides a backstop so that you don’t end up practicing an inadvertent handspring when you kick up toward Handstand Pose. The wall also provides support to allow you to hold the yoga pose long enough to make subtle alignment changes, as well as to build stamina and strength. Over time, you’ll be able to hold this yoga posture for longer periods of time and, perhaps eventually, away from the wall.
Benefits of Handstand Pose
Handstand Pose strengthens the shoulders, forearms, wrists, core muscles, back, legs, and hips. This yoga pose is a superstar strengthening pose that addresses pretty much every muscle group in the body. No wonder it’s such a challenging asana! If you don’t exhaust yourself in the process of practicing, this yoga posture can stimulate mental and physical energy, giving you a little boost for the day. Because of its ability to increase energy, Handstand can be a mood-enhancing yoga pose. Its playfulness can also stimulate a feeling of freedom and excitement.
Basic Handstand Pose

These instructions will teach you how to practice Handstand at the wall. Make sure your body is adequately prepared with yoga poses that warm up the shoulders and core muscles. If you feel uneasy kicking up against the wall, practice an “L-Shape” Handstand at the wall instead. The yoga video tutorial in the Video Practice Tab details how to practice this version of Handstand.
If you are new to Handstand Pose, we strongly suggest that you learn the basics from a qualified yoga teacher before attempting the pose on your own. While Handstand is a fun, invigorating asana, it’s important that you approach it with sound technique and a knowledge of possible misalignments that could cause injury.
- Start by placing your yoga mat perpendicular to the wall so the edge of the mat touches the bottom edge of the baseboard.
- From Bharmanasana (Tabletop Pose) facing the wall, place your palms down so your fingertips are an inch or two away from the wall. This distance will vary depending on your shoulder joints. If your arms angle forward when you extend them up overhead while standing in Tadasana (Mountain Pose), you may want to move your fingers back another inch or two away from the wall.
- Pressing down into your hands, come into Adho Mukha Svanasana (Downward Facing Dog Pose). Emphasize lengthening your torso in Downward Dog, bending your knees if that helps you to lengthen your spine. Draw your abdomen toward your spine as you reach your hips up. If your shoulders feel tight, you can externally rotate your hands slightly. This will also help when you kick up into Handstand.
- Step one foot forward about halfway between your hands and where your feet currently are. Bend the knee of this leg to prepare to kick up against the wall. Maintain length and engagement through the back leg and keep your core slightly engaged.
- To kick up successfully, you will need to coordinate pushing off the front leg as you simultaneously send the second leg and the pelvis up toward the sky and toward the wall. The aim here is to get the hips over the shoulders, maintaining a long spine as you do this. But don’t kick up until you’ve read the rest of the instructions!
- Many yoga students over arch in the back in order to try to reach their top foot to the wall. Try to avoid this by drawing the deep core muscles in toward your spine. Don’t allow your foot and leg to swing way behind you. It can take a lot of practice to master kicking up, so be patient. You can work your way up to it by pushing off your bottom leg several times to feel the weight of your body being transferred to your upper body before trying to go all the way upside down.
- Make sure to bend your knees and yield the weight into your feet before you kick up. It’s easiest to attain the lift you need if you begin with your knees bent. Lifting off the floor requires that you push into it first. Try kicking up a few times without attempting to get to a vertical position. If you are not pushing downward enough through the feet in order to spring up, you will likely come down with a thud. If you spring up correctly, when you come back down, you will touch down lightly. To understand this concept, try jumping upward from an upright position. What is the action that needs to happen in order for you to spring up? Try jumping with straight legs, and then bend the knees deeply and feel how your feet have to press down into the floor just before you lift off. This is the same action needed for kicking up into Handstand.
- It is helpful to have a spotter close by who can let you know if your hips are coming anywhere near the wall as you practice kicking up. If your hips are not over your shoulders when you kick up, it’s best not to try to move all the way up into Handstand, because you will end up throwing your legs against the wall, leaving your pelvis behind. Keep practicing kicking up, with the idea that the hips should move up and toward the wall, and the legs should follow.
- Another important element is to make sure your arms stay straight during the kick-up process. If your elbows bend out to the sides while you’re kicking up into Handstand, you risk falling on your head. If your elbows are unable to straighten, or if you are nervous about the possibility of falling on your head, loop a strap around your upper arms, just above the elbows so that the arms are shoulders-width apart.
- Feel free just to practice kicking up, without ever moving into full Handstand. Just kicking up is a practice in itself.
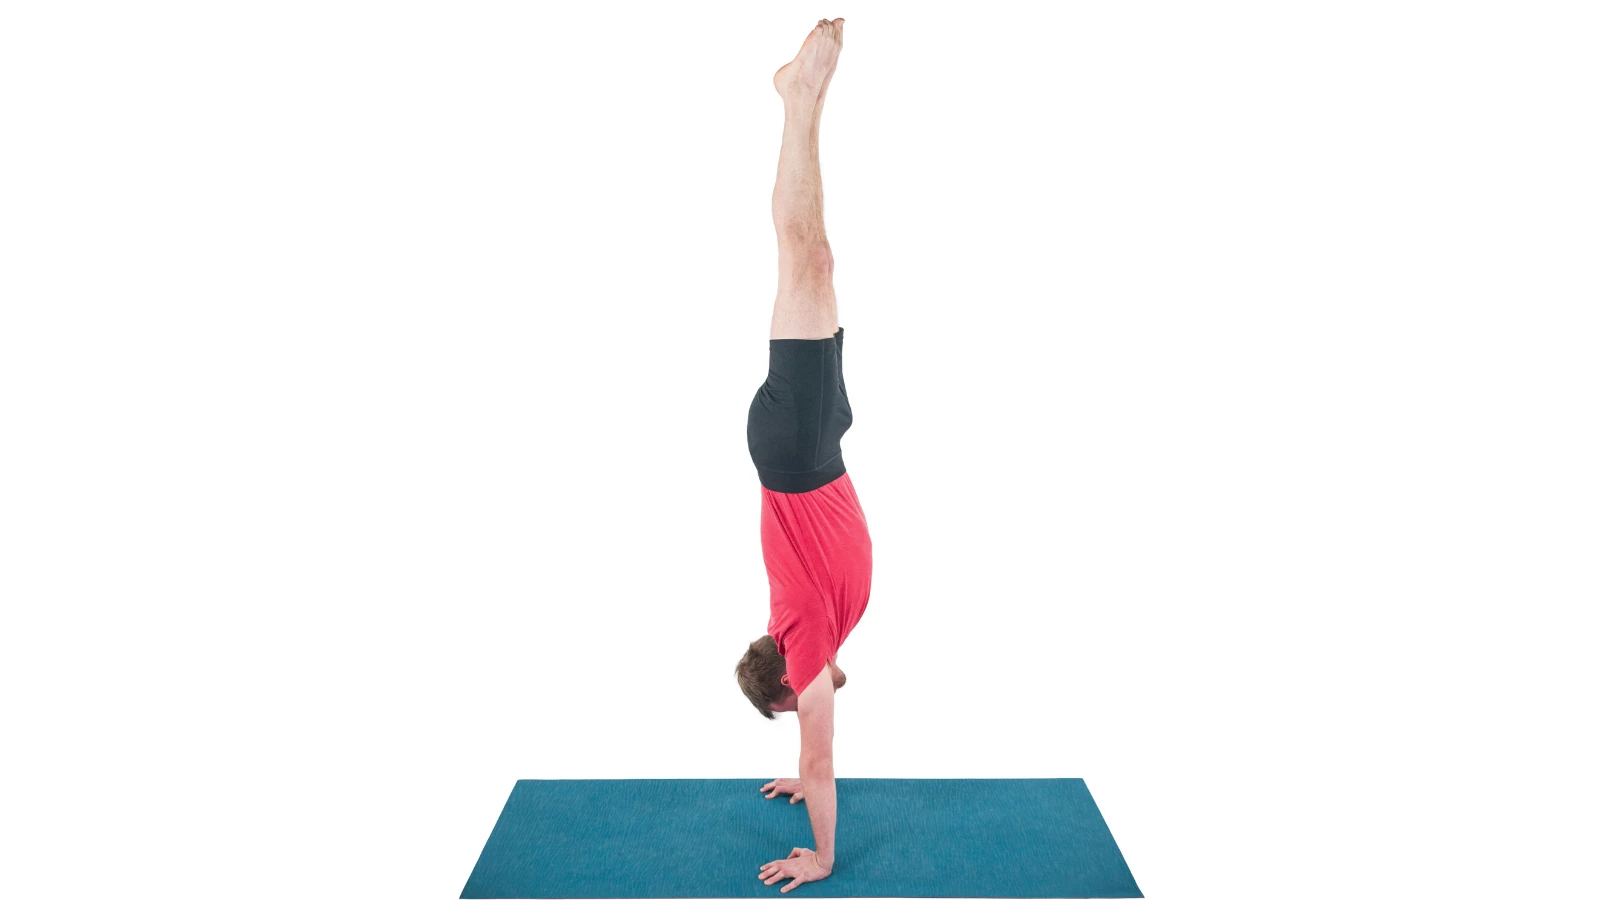
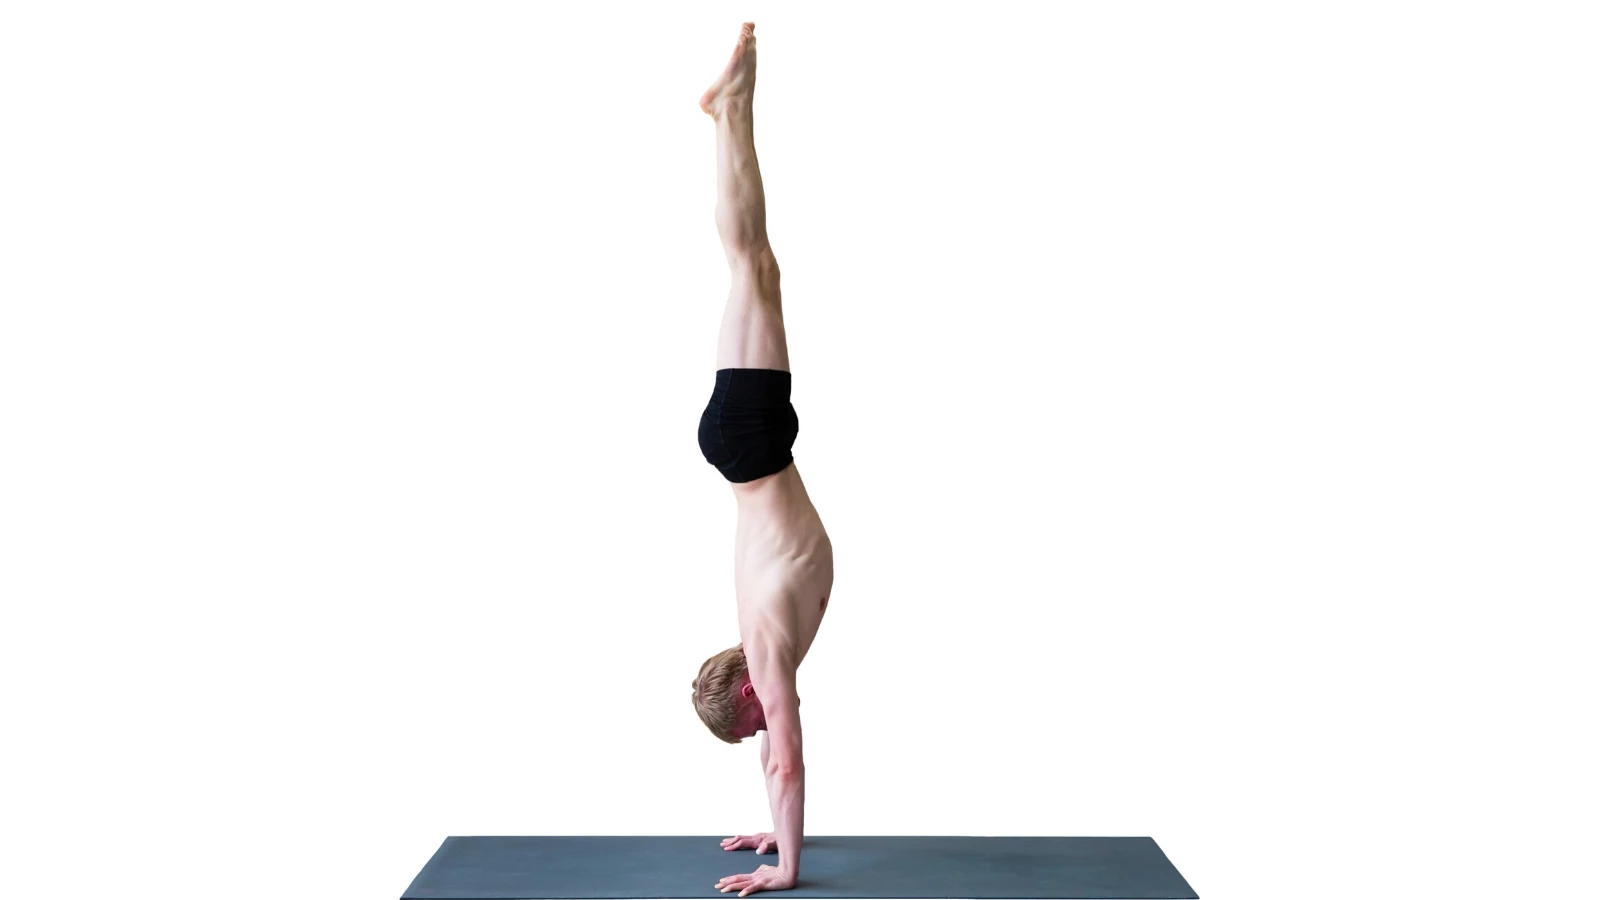
- If you choose to kick up into full Handstand Pose at the wall, once you have successfully kicked up into Handstand, press down firmly into your hands to lift out of the shoulders. Squeeze your inner thighs together and think of reaching your toes up toward the ceiling. You can imagine someone taking hold of your feet and lifting you up toward the sky as you ground your hands.
- Practice Tadasana (Mountain Pose) alignment here: draw in your core muscles while maintaining the normal curves of your spine. Draw your tailbone toward your heels. This is challenging upside down as you need to reach the tailbone toward the ceiling, not the ground! The aim is to become stable in the torso and stacked as vertically as possible, so the heels are over the hips, hips are over the shoulders, and shoulders are over the wrists.
- Especially when you are first learning Handstand, take only a breath or two in the yoga pose, so that you don’t wear your arms and shoulders out while you are still in the asana. When you are ready to leave the yoga posture, bend your knees and lower your legs down, landing lightly on your feet. Then bend your knees into Tabletop Pose and stretch your hips back into Balasana (Child’s Pose) for a few breaths.
