Well, it has started again—with the arrival of winter, my yoga students are sneezing, sniffling, and coughing in class. It’s a clear reminder that we are solidly in the cold, flu and sinus infection season.
Can yoga help with this? In the past, we have provided information on how yoga can help support good immune function, especially as a preventative tool (see 4 Ways Yoga Helps Your Immune System). But what can you do when you still get sick?
To begin, I recommend that if you are at the start of any one of these acute infections—which is usually the time you are most contagious—that you consider skipping your public classes for the next week, both to give yourself the rest and attention you will need to recover more quickly and to spare spreading what you’ve got to your fellow yoga-loving class members.
But if you still have the desire to do some sort of practice at home while recovering from these seasonal intruders, I generally recommend a gentle practice, with slow, easy dynamic sequences and short static holds in the sitting and standing poses (if you have the energy for standing poses) and with restorative postures that keep the chest and head a little elevated to avoid worsening nasal congestion and sinus pressure. If you have a fever, skip practice altogether until you are back to normal temps. Here is a practice for you to try out, subtracting any poses that seem too taxing as you see fit.
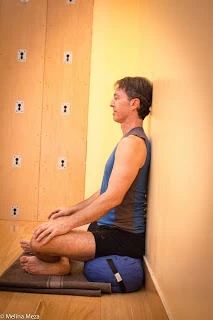
Grounding Meditation
-
Set up in Sukhasana (Easy Sitting Pose) with your back supported by the wall. If you are using a prop for your hips, place it against the wall.
-
Now sit down on the floor or prop, with the back of your pelvis and shoulder blades against the wall, your lower back off the wall, and your legs out in front of you.
-
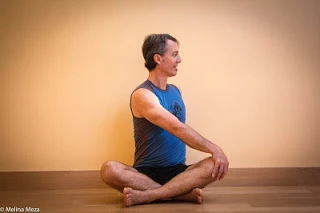
Fold your legs into crossed-legs position with your right shin in front of your left, and your shins parallel with the front edge of your mat.
-
Press your hands into the floor as you lengthen up from your sitting bones to the crown of your head, creating an “inner lift, ” and tip your hips a bit forward to encourage the normal curve of your lower back.
-
Now, using your back and core muscles to maintain your inner lift, rest your hands on your knees, relax your shoulder blades down, widen your collarbones, and align your head with your spine. Release your knees toward the floor, ideally below your top hipbones.
-
As you create your inner lift, keep your pelvis and shoulder blades against the wall, your lower back slightly away from it, and your head over your spine.
-
Take a moment to assess your overall energy level. Notice if your thinking is clear or clouded. Notice if you can breathe through your nose or if you have to breathe through your mouth. These observations can help guide how you practice today.
-
Set an intention for both honoring where you are today and for healing.
Seated Warm-Up
My short seated warm-up sequence (see Seated Warm-Up) is a great option to start your practice with gentle movement. Since you have already done your centering at the wall, you can skip the Virasana (Hero’s Pose) that starts the sequence and begin with the Seated Marjarasana-Bitilasana (Cat-Cow Pose). You can also leave off the last pose, Navasana (Boat Pose) if it feels too strenuous on any given day.
Tadasana (Mountain Pose)
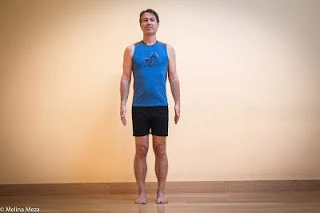
From sitting, come up to standing and hold Mountain Pose for a few breaths to see how standing feels today. If you feel like you have adequate energy, move on to the other standing poses in the sequence. If not, skip them and move on to Restorative Balasana (Child’s Pose).
-
Stand with your feet hip-distance apart and parallel to each other. Distribute your weight evenly on your feet and actively firm your upper thigh muscles evenly toward your thighbones.
-
From your tailbone, lengthen upward through your spine to the crown of your head, as if you were growing taller.
-
Without squeezing your shoulder blades together, widen the front of your chest so your chest and your upper back are both broadening.
-
Position your head directly over your shoulders, with your chin parallel to the floor.
-
Either relax your arms at your sides or actively reach down from your shoulders into your fingers, with your palms facing your thighs.
-
As you maintain these internal actions, gently lengthen your inhalations and exhalations, while remaining active and alert.
-
To come out of the pose, simply relax the physical effort of Mountain Pose and notice the posture your body returns to.
-
If desired, repeat the pose one more time.
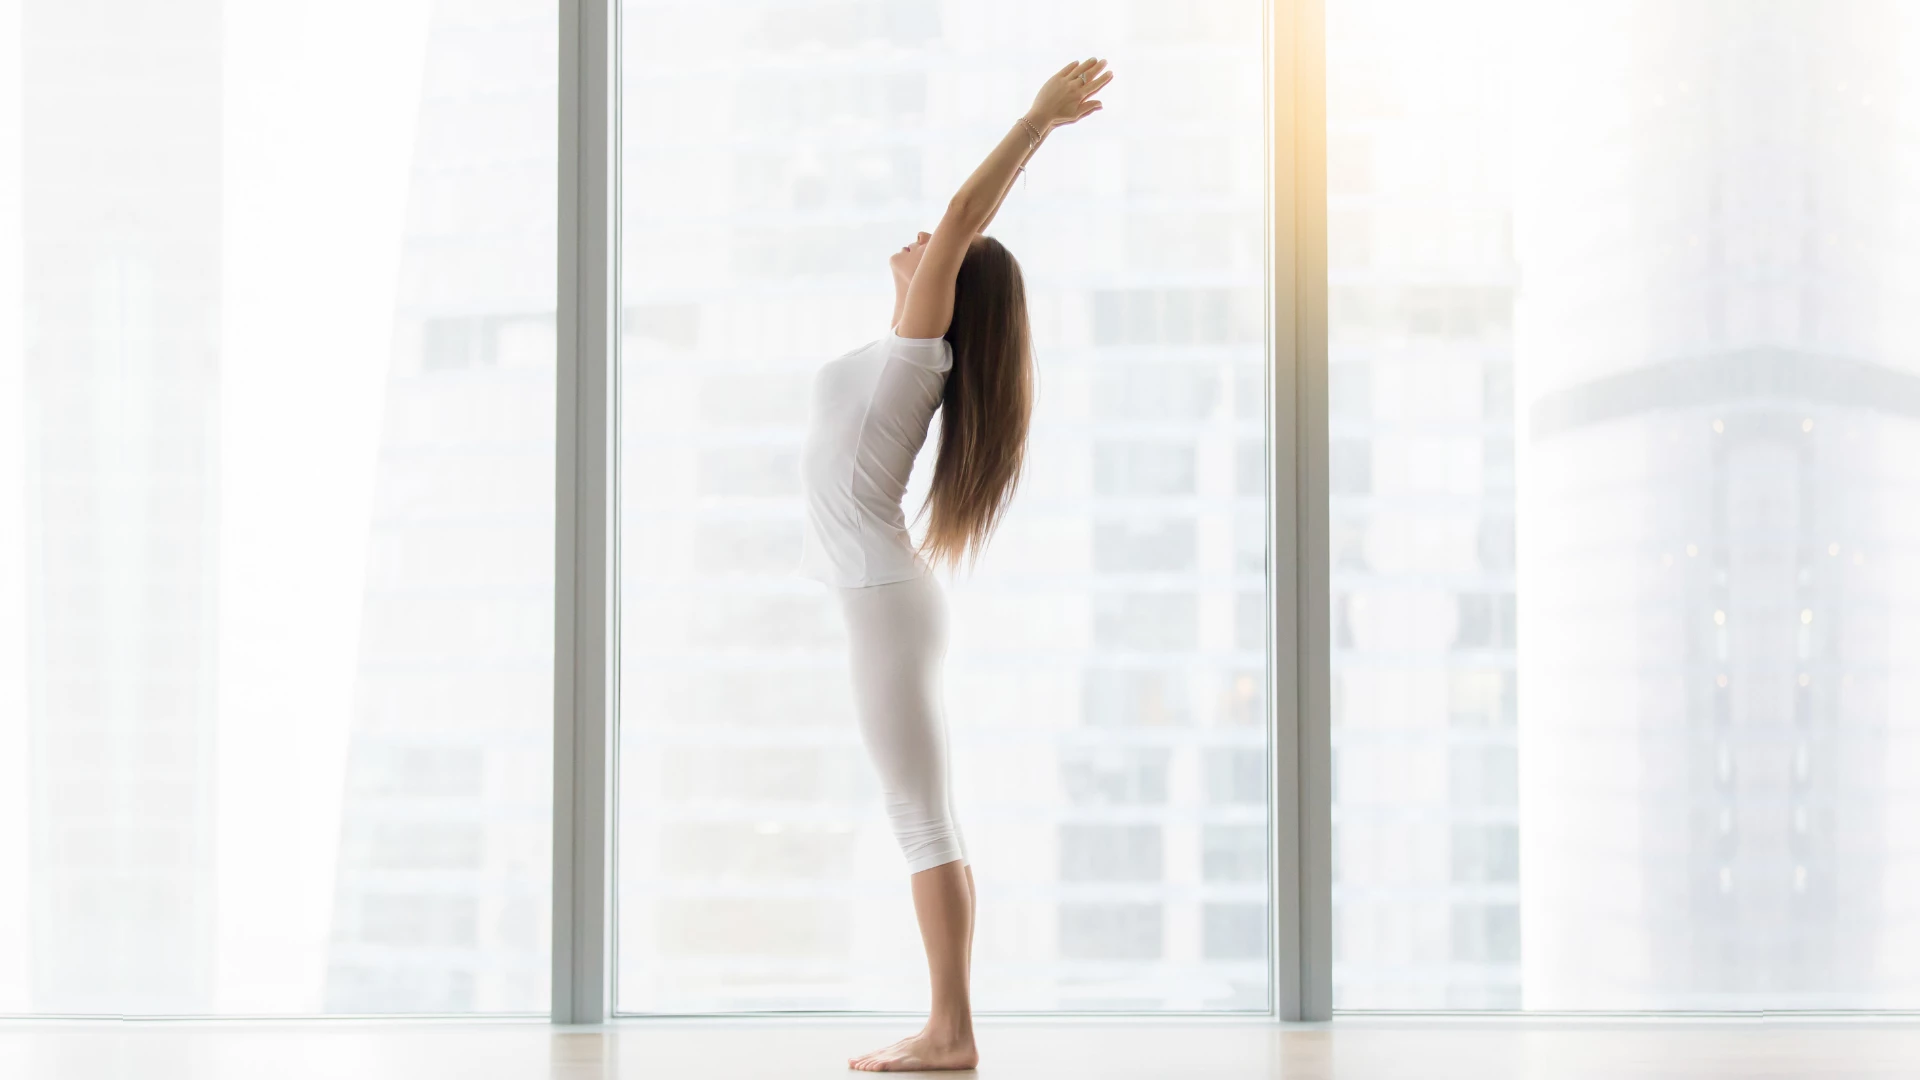
Dynamic Talasana (Crescent Moon or Palm Tree Pose)
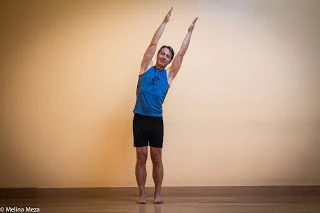
The side bending in this pose is good for releasing tightness in the sides of the chest muscles that you use for breathing and coughing. Go as slowly as you want as you move into and out of this pose.
-
Stand in Tadasana.
-
Raise your arms up alongside your head.
-
On an exhalation, tip gently to the left. As you inhale, lift up back to the center. Then on an exhalation, tip to the right, and as you inhale, lift back up to the center.
-
As you move side to side, keep your head equidistant from your arms, in a neutral position. Also, maintain energy in both arms so that they don’t fall toward the floor as you move side to side.
-
Repeat this movement 3 to 6 times.
Half Adho Mukha Svanasana (Downward-Facing Dog Pose) at the Wall
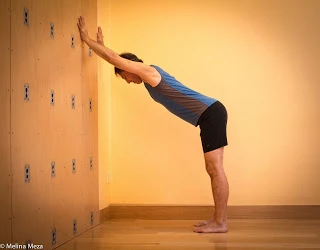
This pose also releases tightness in the sides of the chest muscles that you use for breathing and coughing. But be sure to practice either of the two versions—with your legs either straight or bent—of Half Downward-Facing Dog Pose where your torso and arms are higher up to avoid any partial inversion that could increase sinus pressure and congestion. Hold the pose from 15-60 seconds, depending on your energy level.
Adho Mukha Svanasana with Higher Hands
-
To come into the pose, stand facing a wall, about one foot away. Place your hands on the wall in front of your shoulders, about shoulder-width apart.
-
Then walk back toward the center of the room, stopping when your pelvis is directly over your feet, and your arms and torso are slightly angled, forming a long, even line.
-
Straighten your legs, and allow your head to float evenly between your ears. If your back, hamstrings or shoulders are tight, feel free to keep your knees bent.
-
Stay in the pose, breathing deeply, for 15 to 60 seconds, depending on your energy level.
-
While in the pose, press your hands into the wall as you lengthen back through your sitting bones toward the center of the room.
-
To stay mindful in the pose, focus either on your breath or on your physical sensations of stretching.
-
To come out of the pose, bend your knees and slowly walk forward to standing upright, about one foot from the wall. Release your hands from the wall, shake out your wrists and rest in Mountain Pose for about 30 seconds.
Dynamic Warrior 1

This is a good pose to help open up chest and shoulders. Practice 6 rounds on each side or less if you are feeling tired.
-
Stand in Tadasana in the center of your yoga mat. Step your feet out about 3 feet, toward opposite ends of your mat.
-
Turn your right foot 90 degrees, to face the end of your mat. Rotate your left leg internally, turning your left foot so that it angles mostly toward your right foot. Your pelvis will be facing forward now, toward your front leg.
-
Begin with your arms down by your sides. Then, on an inhalation, sweep your arms up overhead so that your elbows are straight and your palms face each other.
-
On an exhalation, bend your right knee so that your knee is directly over your heel.
-
On your next inhalation, straighten your right knee to come back up. As you exhale, release your arms down by your sides again.
-
Repeat this sequence 5 more times.
-
Then repeat the sequence for 6 rounds with your left leg forward.
Restorative Balasana (Child’s Pose), Supported Version with Block
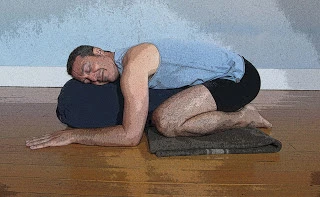
This restorative version of Child’s Pose is always great resting position, but for this sequence, you should add a block under the far end of the bolster, so the bolster is slanted. The block at the far end (under where your head will rest on the bolster) keeps your head higher than your heart, which can be helpful for head congestion. If nasal congestion or sinus pressure still makes breathing uncomfortable, experiment by turning your head to each side for a breath or two.
-
Start by placing a block on its side on a mat in front of you. Place the bolster lengthwise on your mat in front of you so that the end furthest from you resting on the block and your bolster is on a slant.
-
Then come into Child’s Pose from your hands and knees, but as you lower your hips toward your heels, sit upright for a moment and widen your knees about two feet apart.
-
Then, slide the end of your bolster lengthwise toward your hips, right up against your lower belly, taking care that it continues to rest on the block. Do not slide it under your hips, just up to the front of you.
-
Then lower your belly, chest, and head onto the bolster, turning your head to one side and resting your cheek on the bolster, as you release your buttocks gently toward the floor (do not force them). Rest your forearms on the floor along the sides of the bolster.
-
Make sure that your entire front belly and chest rest on the bolster. If any part of you is lifted off the support, try adding a blanket folded into a thin rectangle on top of the bolster or placing a block under the far end of the bolster to raise the bolster.
-
Turn your head in the opposite direction midway through the pose.
-
Stay in the pose for 2-3 minutes on each side at first, though you should, of course, come out of the pose if you experience any discomfort. With experience, you can work your way up to even longer holds. As you relax onto the support of the bolster, focus your attention on the sound of your breath.
-
When you are ready to come up, use your hands and arms to slowly roll up to sitting.
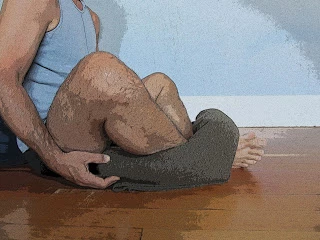
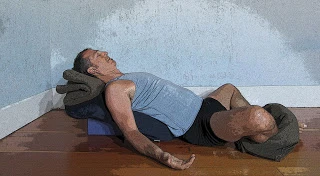
Supta Baddha Konasana (Reclining Bound Angle Pose – Restorative Version)
This restorative pose is deeply restful. So, I recommend you stay in this pose for up to 10 minutes, but you can also stay longer if desired. However, I’d set an alarm to make sure you don’t fall asleep for too long.
-
Start by assembling your props. You will need two blankets, a bolster, and a block, as shown right.

-
Roll one of the blankets into a long, thin roll. Fold the second blanket into a square and set it aside. Place the block under the bolster, so the bolster is at an angle. If you don’t have a block to put under the bolster, you can use a thick book, a piece of wood, or whatever. If you don’t have a bolster, you can make a thick roll of two blankets or perhaps use a couch cushion. Be creative!

3. After you have set up your props as shown below, sit down in front of your bolster (but not on it!). Now bring the bottoms of your feet together into Baddha Konasana, with your knees dropping out to the side.

4. Next, take the rolled blanket and place it on top of your feet and then pull the ends around and underneath your ankles. Check to make sure your legs can rest comfortably on the blankets. If your hips are very tight, you may need additional support, such as blocks or a thicker blanket roll. (shown below)
5. To come into the pose, place your hands on the floor by your hips and slowly lower yourself so your back is resting on the bolster.
6. Now take your folded blanket and slip it underneath your head and neck (but not under your shoulders), making sure your head is tipped, so your chin is pointing toward your chest.
7. Rest your forearms and the backs of your hands on the floor out to your sides. If your elbows don’t make it down to the floor or if you arms are strained, try using extra blankets or towels to support your arms. (shown below)
8. While you are in the pose, to help you quiet your mind (and trigger the relaxation response), choose a focus for your mind. You can practice breath awareness or focus on the gradual relaxation of your body, or you can practice pranayama such as mental alternate nostril breathing (alternate nostril breathing without using your hand to close off your nostrils) or simple breath awareness.
9. Stay in the pose 10 to 20 minutes, setting a timer to make sure you don’t fall asleep.
10. To come out of the pose, bring your hands to your outer legs, using your hands to bring your knees back together. When your feet are flat on the floor, roll slowly onto your side, rest there for a couple of breaths, and slowly come up to sitting.
Cautions: If you have active low back pain, try reducing the arch in your back in this pose by putting a folded blanket under your hips or by moving your hips forward an inch. If you have shoulder injuries, having your arms out to the side could cause pain, so add support, such as folded blankets or towels, under your arms. If you have neck stiffness or arthritis of the neck, you may need an additional blanket under your head.
If you have arthritis of the hip or a hip replacement, make sure that dropping your knees out to the sides is not painful. Try adding more support under your legs (blocks or a thicker blanket roll), but if you can’t get comfortable, come out of the pose. The combination of a backbend with your legs out the side in this pose can compress your sacroiliac joints. Adding more support under your legs might help, but you may want to avoid this pose if you are currently having SI problems.
Keep in mind that this pose is not for everyone. So if it doesn’t work for you, try some other restorative poses instead, either those that we’ll be presenting in the coming weeks or ones your teacher recommends.
BodySensing: Intuitive Yoga for Myofascial Release – A course from YogaUOnline and Yasmin Lambat.
Reprinted with permission from yogaforhealthyaging.blogspot.com
Photos courtesy of Melina Meza

 Baxter Bell, MD, C-IAYT, eRYT 500, is a yoga teacher and educator, physician and medical acupuncturist. These days he focuses on teaching yoga full-time, both to ordinary students of all ages and physical conditions and to the next generation of yoga teachers, to whom he teaches anatomy and yoga therapy along with his accessible, skillful style of yoga. Baxter brings a unique perspective to his teaching, combining his understanding of anatomy and medicine with his skill at instructing people from all walks of life and all levels of ability. Baxter is the co-founder and writer for the popular Yoga for Healthy Aging blog, where he shares his knowledge of medical conditions, anatomy, and yoga with practitioners and teachers across the world. In addition to being a frequent presenter at Yoga Journal Alive events and yoga conferences such as IAYT’s SYTAR, he is often quoted as an expert on yoga and health by major national news outlets such as The Washington Post and Wall Street Journal. To learn more, visit www.baxterbell.com, www.yogaforhealthyaging.blogspot.com, and his YouTube channel Baxter Bell Yoga. Baxter is the co-author with Nina Zolotow of Yoga for Healthy Aging: A Guide to Lifelong Well-Being.
