Happy Hips: 3 Yoga Poses for Pelvic Alignment

Article At A Glance
What simple changes can you make to go from achy to happy hips? In this article, we explore a yogic perspective of common pelvic misalignments. Read on to learn yoga practices and everyday postural shifts to reduce pain and align the pelvis.
First, my disclaimer: Anatomy is not my strongest suit, but through training, mentoring, and study, I’ve learned enough of the basics to execute and modify yoga postures to work with my body and those of my students. That said, here’s what I’ve learned about the importance of pelvic alignment generally, and my own pelvis specifically.
I’ve always tried postures in the classic ways, but after menopause, I began to experience a lot of discomfort in my hips, especially the right hip. Two years ago, during a yoga training at Kripalu Center for Yoga and Health in Massachusetts, I learned the how, the why, and what I needed to do to address the issue.
Although the training I attended had nothing to do with anatomy, one of the free evening programs focused on it, always interested in beefing up my knowledge of anatomy in bite-sized pieces, I attended.
3 Pelvic Misalignments
Lee Albert, NMT, a recognized expert in neuromuscular pain relief, is a massage therapist. A yoga teacher asked for volunteers experiencing pain in the hips, back, neck, arms, shoulders, jaws, knees, etc. He put each of them in different physical positions, kept them there for about two minutes, and then asked them how they felt. Without exception, all said that their pain was either greatly reduced or gone. Then he explained the relationship between muscle imbalances and pain. In terms of the hips and pelvis, he said that the three main types of pelvic misalignments due to muscle imbalances are:
- Elevated Pelvis: One hip appears higher than the other.
- Rotated Pelvis: One side of the hip is more forward than the other.
- Tilted Pelvis: A forward tilt that results in an exaggerated curve in the lower back.
Resetting The Pelvis: Encouraging Pelvic Alignment
The next day, I went to the spa desk to see if there was any chance to have a private session with him. There was one slot left, and I took it.
At the appointed time, he greeted me and invited me to take a seat in the chair at the far end of the room. We then chatted briefly about why I was there. He nodded, smiled, and said that the way I had walked across the room and the position I took when I sat down told him a lot. He then had me lie on the massage table while he checked the natural external rotation of my legs. The upshot was that I have all three pelvic misalignments, most likely the result of muscle imbalances. After a few minutes of positional neuromuscular magic, he asked me how my hips felt. They felt great!
He listened to how I’d been doing my yoga postures and suggested that I might be over-stretching and making my imbalances worse. He then gave me a list of changes to make in how I sat, drove my car, and executed forward bends. The advice about forward bending confirmed Lee’s recommendation and validated how I’ve been forward bending since 2016! I also left with three yoga postures (see below) to address my muscle imbalances. He suggested that I do them three times a day for two weeks and said that if I did not find relief, I was to contact him.
I literally floated out of the room. My whole lower body felt open, light, and full of energy. Because his recommended yoga practice was accessible and could be accomplished in six to eight minutes at a time, I followed it exactly. It worked. Those three postures had been part of my practice, but doing them as a series, with modifications and holding each for one to two minutes completely changed my experience of them.
I practice them regularly, and my hips and pelvis are, for the most part, quite happy.
Everyday Pelvic Alignment
Shakira, the Colombian pop singer, titled one of her albums, “Hips Don’t Lie.” Too true! Now, when my right hip screams, I have the tools to turn the scream into a whisper. Here are the changes I’ve made to everyday activities:
Sitting: I sit with a rolled pillow to support my lumbar spine (most of the time).
Driving: My hands are now placed at the 8:00 and 4:00 positions on the steering wheel, and a lumbar pillow is a permanent fixture in my seat. I’ve shared this tip with a few of my students, and several have reported positive results.
Working on the Computer: I keep my elbows close to my body with my arms bent at 90 degrees. Where I fail with this one is keeping the screen at eye level. I work on a laptop so until I purchase a separate keyboard and elevate the screen, I’m only halfway there with this change.
How To Align Your Pelvis with Yoga
To manage my pelvic misalignment with yoga, I needed to work with three key muscle groups: quadratus lumborum (the hip hiker), the abductors (outside of the thigh), and the quads (front of the thigh) and learn how to stretch them correctly. That meant not stretching to my limit, which I am prone to do as an overachiever and perfectionist.
Instead, I have learned to back off and stretch to roughly 80 percent of my limit and hold each posture for one to two minutes to focus the stretch in the belly of the muscle and not at the insertion points. If the stretch deepens during the hold, that’s okay as long as the impetus comes from the body and not from the ego.
The following series is now an indispensable part of my practice. I’ve found ways to do them standing, seated, or lying down, so I have no excuse to neglect my hip and pelvic issues.
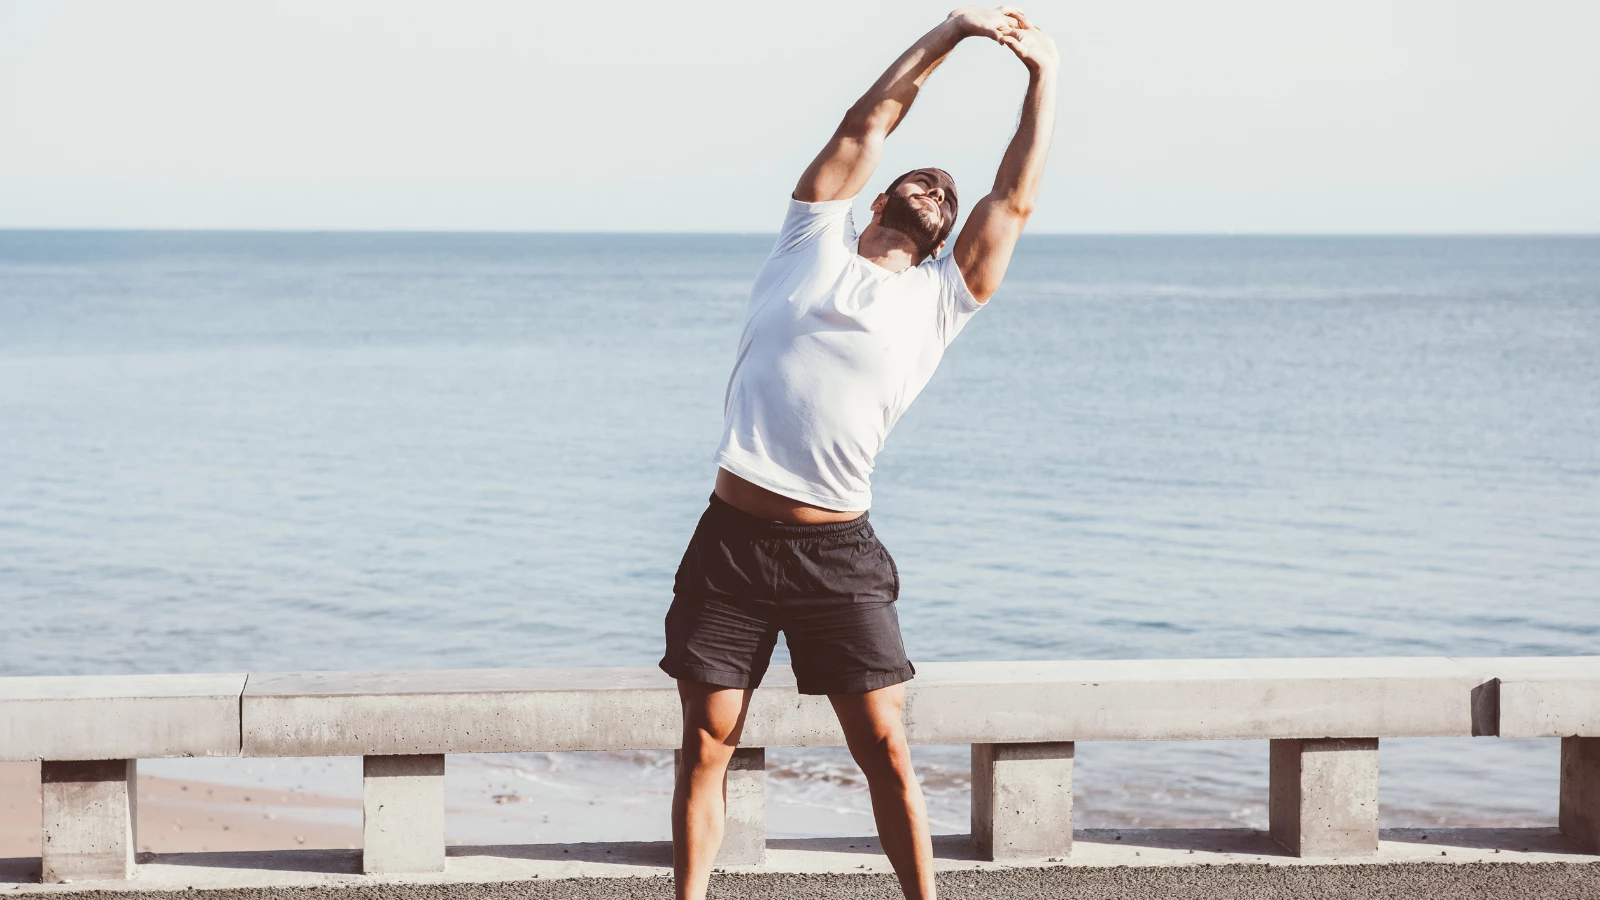
Quadratus Lumborum Stretch: Standing Side Bend

- Stand in Mountain Pose (Tadasana).
- Step your feet apart, so they are slightly wider than your hips.
- Place your left hand on your left hip or leg.
- Inhale as you lift your right arm out to the side and up overhead.
- Bend to the left until you feel a stretch along the right side of your upper body.
- Hold comfortably while breathing easily. Start with 30 seconds and work up to 1 to 2 minutes. If your arm gets tired, rest it on top of your head.
- Inhale to come up, and exhale as you lower your right arm to rest in Mountain Pose.
- Repeat on the right side.
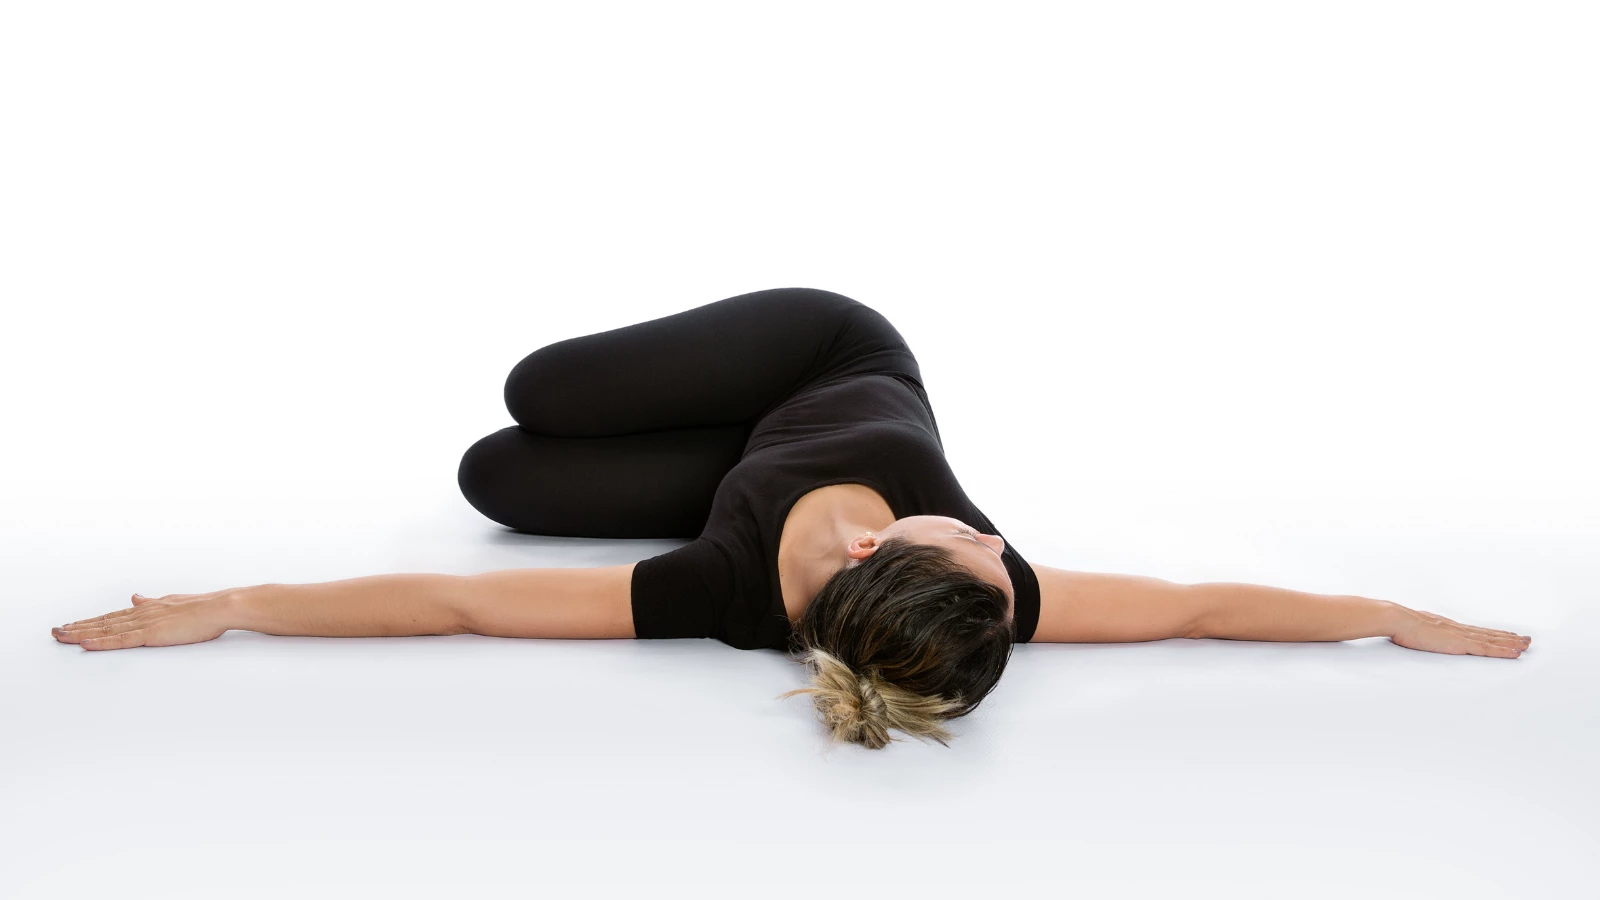
Abductor Stretch: Supine Spinal Twist with a Focus on the Pelvis

- Lie on your back with both legs straight.
- Bend the left leg and place the sole of your left foot on top of the right leg at a comfortable position, depending on your personal level of knee and hip joint flexibility.
- Use your right hand to gently pull your left knee across your body and toward the floor. Feel the stretch on the outside of your upper leg and in your buttocks.
- Hold comfortably while breathing easily. Start with 30 seconds and work up to 1 to 2 minutes. If your left foot slips off your right leg, you can let it hang in the air if that feels comfortable.
- To come out of the pose, inhale and release back to center.
- Repeat on the other side.
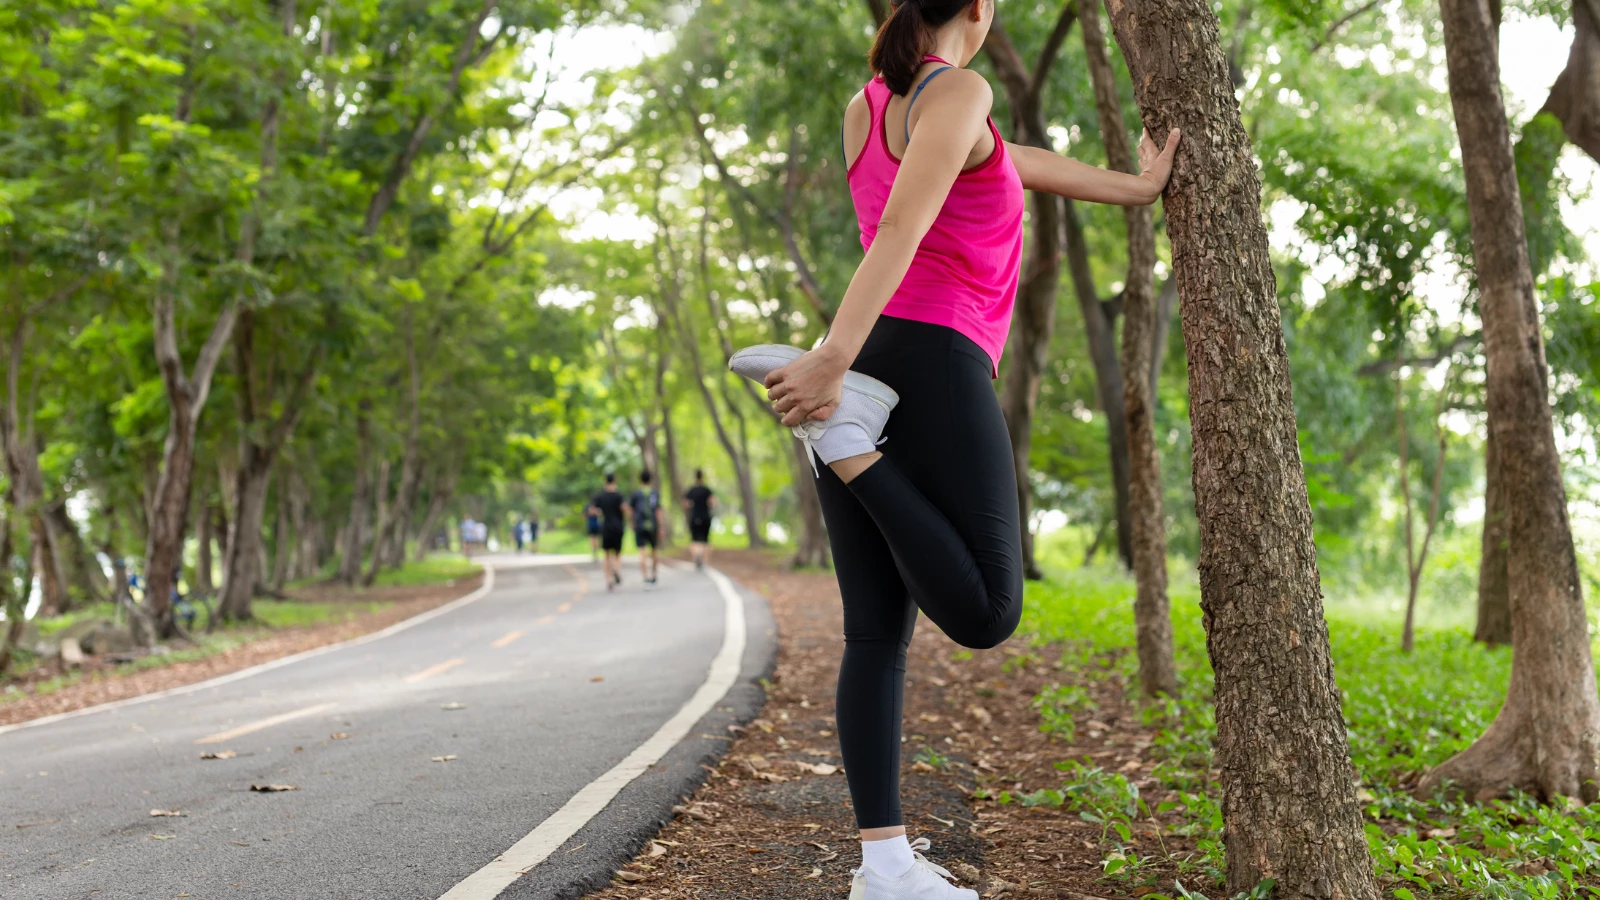
Quadriceps Stretch: Modified King Dancer Pose

- Come to Mountain Pose (Tadasana) with your feet about hip-width apart.
- To help keep your balance, hold onto the back of a chair, or place your hand on the wall.
- Shifting your weight to your right foot, lift your back foot up behind you, and bend your left knee. Then reach back with your left hand and grasp your left foot. If your hand doesn’t reach easily, you can loop a yoga strap around your ankle, holding the ends with your left hand.
- Draw your left heel toward your buttocks and press your thigh gently backward. Feel the stretch in the front of your upper leg, and be careful not to over-arch your lower back.
- Hold comfortably while breathing easily. Start with 30 seconds and work up to 1 to 2 minutes.
- To come out, release your left foot and come back to Mountain Pose. Rest there for a couple of breaths.
- Repeat on the right side.
There are other yoga postures that address pelvic alignment as well as those three muscle groups, and you can find several in the book Yoga for Healthy Aging by Baxter Bell and Nina Zolotow. If you would like more information about Lee’s work with pain and muscle imbalance, visit his website at www.leealbert.com.
Also, read...
A Daily Yoga Sequence for Pelvic Pain
3 Yoga Practices to Support Pelvic Floor Health
Around the World with Your Hips: A Yoga Mini-Sequence
Related courses
Breath as Medicine: Yogic Breathing for Vital Aging
Yoga and Myofascial Release: Releasing Chronic Tension with the Bodymind Ballwork Method

Beth Gibbs, MA, is a faculty member at the Kripalu School of Integrative Yoga Therapy. She holds a master’s degree in Yoga Therapy and Mind/Body Health from Lesley University in Cambridge, MA. She is the author of Soul Food, Life-Affirming Stories Served with Side Dishes and Just Desserts, Enlighten Up! Finding Clarity, Contentment, and Resilience in a Complicated World and Ogi Bogi, The Elephant Yogi, a therapeutic yoga book for children. Beth is an experienced workshop leader and public speaker. She blogs at bethgibbs.com


