If you were asked to describe the first thing that comes to mind with the words “core workout,” you might very well picture “crunches” (sit-ups). You know—drawing the head, neck, and shoulders up while the lower body stays stable. For both safety and efficacy, however, Plank Pose (Phalakasana) might be a better answer for most people. Yoga Plank Pose variations can also be a fun, dynamic way to find movement and modulate challenges as you build strength and muscular integration.
You might love those traditional crunches—or at least the results that you may have seen from them—and feel doubtful here, but hear us out. Modern biomechanical science is finding that Plank Pose can be more effective and even safer when it comes to building comprehensive core strength. Even the US Army is on board with this evolving fitness science understanding.
For those not at the Army level of physical fitness, there are many ways to modify Plank Pose and poses related to it. So you can find something that’s accessible and can offer you a healthy challenge. The flow described below takes all of that into account.
The Core is More Than “Washboard Abs”

One key reason why Plank Pose is generally more effective than sit-ups is because of what it challenges and therefore builds strength in (1). Sit-ups mainly work the frontal abdominal muscles (the rectus abdominis, the “washboard ab” muscles). Yoga Plank Pose variations, on the other hand—if practiced mindfully—work the core comprehensively. This includes the rectus abdominis, back muscles, low belly muscles, pelvic floor, glutes, and even the quadriceps and hamstrings (fronts and backs of thighs, respectively).
Indeed, the core involves a lot more than those “washboard abs” muscles. When we’re considering core strength, integration, and functionality, we need to think beyond aesthetics and—dare I say, in some cases—vanity. Core health matters for a lot more than what we look like in a bathing suit. We need a strong, integrated, and functional core for a myriad of reasons that affect health and well-being. These include digestion, functional day-to-day movement, and simply feeling supported and connected in our bodies.
Safety is another consideration. Crunches can stress the lower back over many repetitions and even lead to lower back injuries. Note that crunches are often practiced in a series of many repetitions, making it easy to slip into faulty, unsupported alignment. Sustainability in how we work and engage our bodies is another thing to value beyond physical aesthetics.
Yoga Plank Pose Variations: Contraindications
Just like with all poses, Plank Pose might not be right for all practitioners. I’ve said it before and will say it again: there is yoga for everyone, but not everything in yoga is for everyone. For one, Plank Pose puts a lot of pressure on the wrists.
For those with hand and wrist complications, such as carpal tunnel syndrome or hand injuries, Forearm Plank Pose (Phalakasana II) might be a wiser option (more on practicing that below). Keep in mind that this can be a more challenging variation since being closer to the ground creates a greater need to resist gravity. This can be advantageous for some but maybe not be aligned with the current needs and abilities of others.
Some individuals may not currently have the core strength, integration, and awareness to hold Plank Pose in a safe, supported way. The pose might not be appropriate for those experiencing abdominal hernias or diastasis recti (separation of the abdominal wall as a result of childbirth). Thankfully, various Plank Pose options are available and can even, over time, help build those ingredients to help a practitioner practice Plank Pose safely and in a supported way. It could be as simple as dropping the knees (keep reading for more details!).
Yoga practice involves assessing the available modifications and making the best choice for ourselves on any given day. That goes for Plank Pose variations as well. Let’s look at a short Plank Pose variations sequence for more on how to safely and effectively practice these modifications. This will give you the tools to practice in the ways that are most supportive of and beneficial to you!
Plank Pose and Modified Plank Pose Variations: The Classics
- Sometimes the standard, classic pose is the best option! It’s a great starting point for further options, as well. There are multiple ways to enter the pose, but I like to set it up from Tabletop Pose (Bharmanasana). Start there with your shoulders over wrists and hips over knees, and push your mat away, pressing into every fingertip and every knuckle—Yoga Hand Lock (Hasta Bandha). Feel your belly draw gently in and up toward your spine, creating almost like a shelf for your back body.
- Keeping all of those actions, step your feet back to Plank Pose, tucking your toes under. Ensure that your shoulders stay stacked over your wrists. Press out through your heels.
- Gaze (Drishti) is key here. Look both out and down, just ahead of the top of your mat, so that both the back of your neck and your throat area stay long and spacious.
- Feel a slight lift through your hips to add low belly engagement. To fire up through your front body, even more, try energetically drawing your toes and the heels of your hands toward each other. These parts won’t move in space, but you’ll create more muscular engagement—an isometric contraction.

- If this classic version of the pose isn’t right for you today, drop your knees for a modified version, making the slope of the Plank go from your knees to your head rather than heels to head. Some practice this variation with tucked toes, meaning that the shins aren’t resting on the ground. I tend to practice it with the tops of my feet and my shins down on the mat, simply for less pressure on the knees. Both options are available, and one may be more fitting for a given practitioner than the other.
- Hold either version of the pose for 5 to 10 breaths. Release and circle and/or shake out your wrists to relieve any pressure that may have built up there.
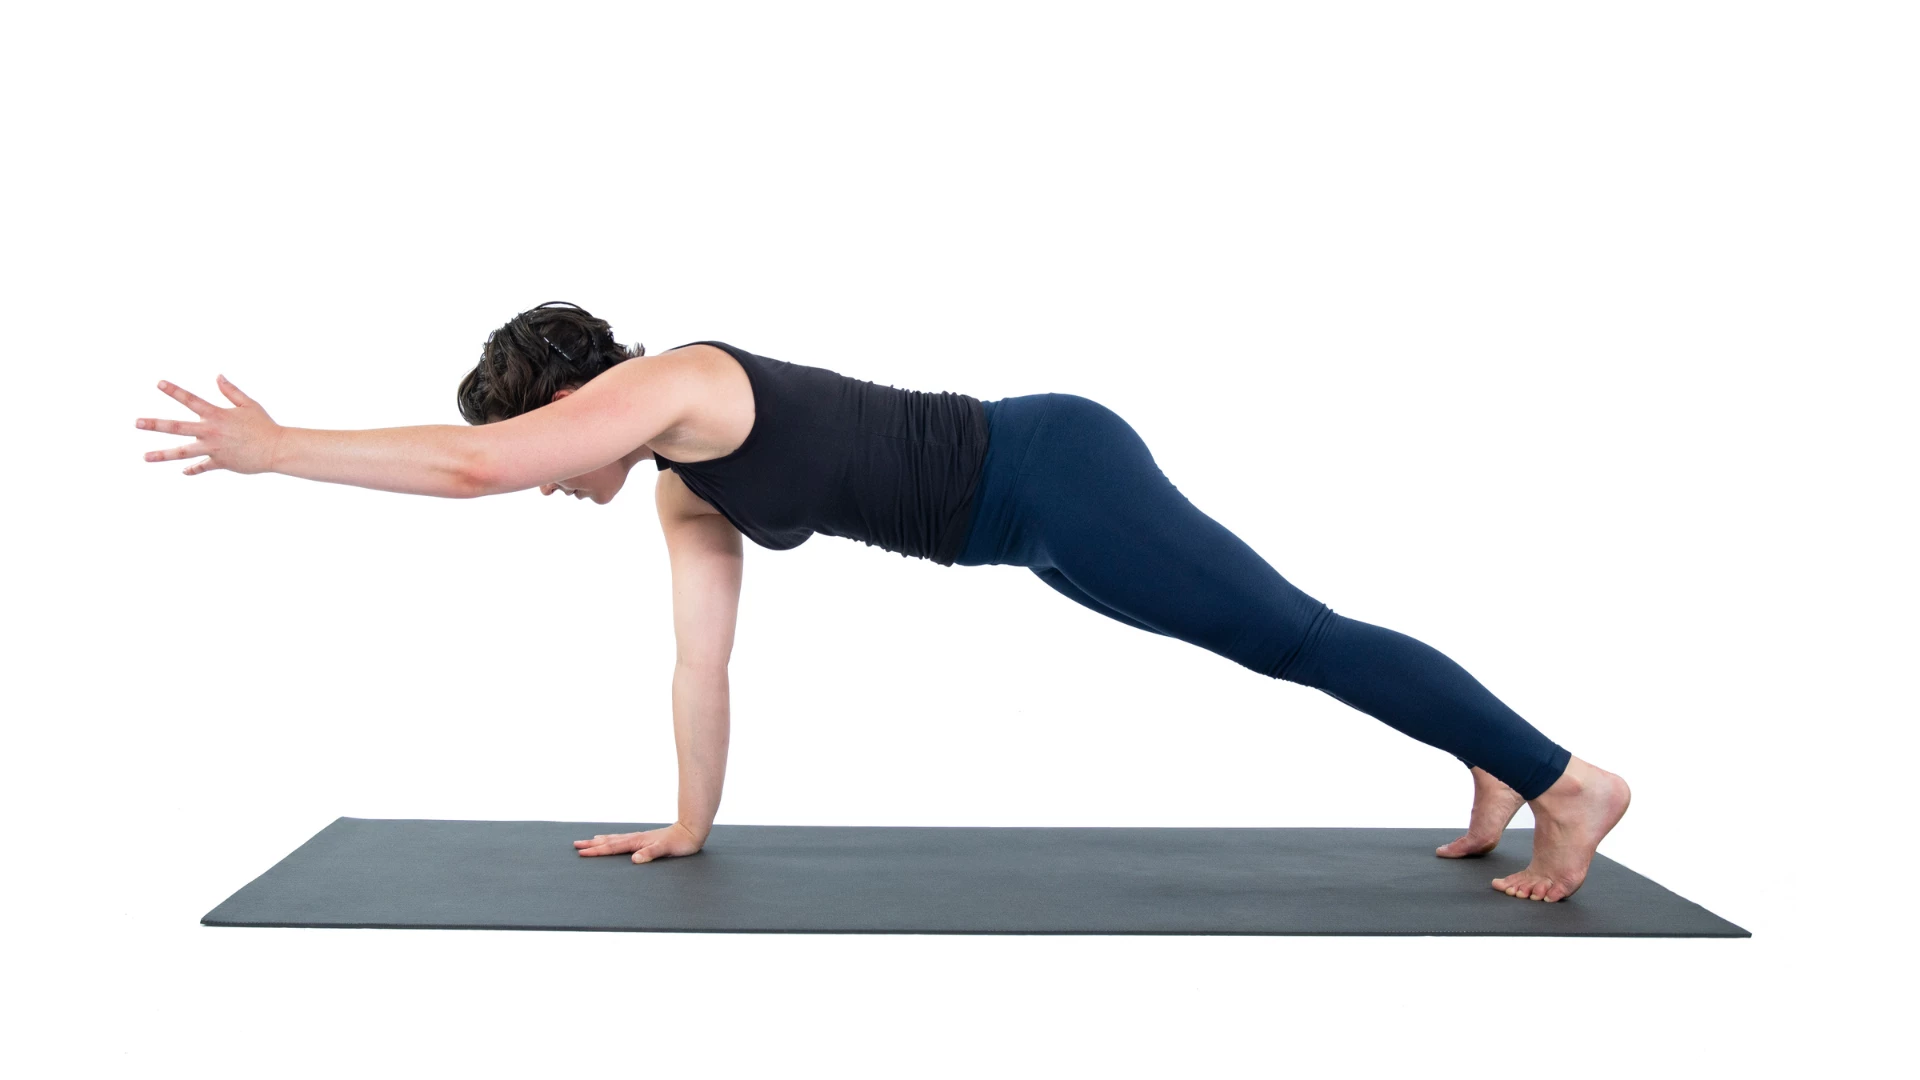
Three-Legged Yoga Plank Pose Variations: Taking One Limb Away
- When we take one limb out of the picture, the demand at hand doesn’t change, but the other limbs have to work harder. If the regular Plank Pose is a challenge for you, it may very well be better for you to build strength and awareness there. Or, the following can be practiced from a Modified Plank Pose, lifting a limb just the same as in a full Three-Legged Plank.
- From your version of Plank, lift your right leg an inch, which is less than many people might think! Try to maintain all of the actions that you found in Plank Pose or Modified Plank Pose.
- If this variation is not accessible to you today, again, perhaps work on Plank Pose or Modified Plank Pose instead of advancing to a three-limbed version. You'll be building strength and awareness toward maybe someday practicing the more challenging three-limbed version. But if that day never comes, that outcome was never really the point, anyway.
- Hold for three full, deep breaths, or as long as you can do so, and stay sufficiently supported through the pose. However long you hold, you’ll be getting some amount of Plank Pose strengthening!
- If it feels appropriate to go further from the standard Three-Legged Plank variation in Step 3, draw your right leg toward your right tricep, doing your best not to change anything else in your shape or muscular actions.
- Then take your knee across your chest, drawing it toward your left tricep, for a little twisted core action. If you want one more challenge, and it feels right for you today, draw your right knee toward your nose and take a Cat Pose (Bitilasana) back, arching your spine and letting your head drop.
- Lengthen back to the first version of Three-Legged Plank Pose with your right leg lengthened back but floating an inch off the ground.
- Practice steps 1 to 7 on the other side of your body, starting with your left leg lifting an inch from the standard Plank Pose.
- Drop your knees and come off your hands. Circle and/or shake out your wrists to give them a little release and relief before proceeding.
Yoga Plank Pose Variations: Forearm Plank Pose (Ardha Phalakasana) 
- From the classic Plank Pose, drop your forearms down to set up Forearm Plank. You can place your forearms in a number “11” shape, with your hands down, or have your fingers interlaced and your forearms in a narrow “v” shape, the arm shape for Dolphin Pose (Catur Svanasana).
- Draw your elbows inward toward your sides. If that’s notably challenging to maintain, that could have something to do with how your skeleton is aligned (something that you can’t change). In that case, it could be helpful to let your hands go a little wider, a little closer to the long edges of your mat if you’re taking the “number 11” arm shape.
- Lift your hips a hair to engage your low belly again to keep your pose supported. You’ll likely need it. This pose is even more challenging than the standard Plank Pose because being closer to the ground means a greater need to resist gravity.
- Keep feeling your whole front body drawing in toward your spine for even more support, and maintain that out-and-down gaze that you found in Plank Pose.
- If this pose is not accessible to you today, or you can’t currently practice it in an integrated, safe way, drop your knees, just as with standard Plank Pose. Or, as with anything in this practice, skip this variation entirely! The only requirements are to do your best to breathe smoothly and deeply and to listen to what your body is telling you. Again, yoga practice is about responding to those messages by making intentional, mindful choices.
- Hold whatever you’re practicing for 3 to 5 deep breaths, then come out of the pose. If your wrists and hands feel like they could use it, do more circles and shakes or any other movements that feel good anywhere in your body.
- Take a few breaths to simply notice how you feel. You can do hard things and do them intentionally and mindfully!
Side Plank Pose Variations (Vasisthasana): Flip It
- Come back to Plank Pose, and then roll unto the outer (pinky) edge of your right foot to face your body to the left. Raise your left arm to the sky, extending it directly over your right shoulder. If practiced with care and intention, this pose can target your side-body muscles even more than its cousin, Plank Pose.
- Maintain all of the actions that you had in Plank Pose. The only difference is that you’re flipped on your side. That said, check that your top hip is stacked right on top of your bottom hip (it tends to roll backward). For shoulder safety, also ensure that your right shoulder is aligned right over your right wrist.
- This full version of the pose might not be the best idea for you today, whether it feels physically inaccessible or simply unsupported. One option is to stagger, rather than stack, your feet. Placing your left (top) foot in front of your right (bottom) foot on your mat rather than directly on top of it. Another modification is to drop your bottom knee, aligning it under your hips, for a Supported Side Plank Pose (Salamba Vasisthasana).
- Whichever option you choose, practice it for 3 to 5 breaths, keeping in mind the important actions discussed. You’re strong, and you can do challenging things!
- Practice the pose on the other side. Start by flipping to rest on your left hand and the outer edge of your left foot.
- Take a moment to end your yoga Plank Pose variations practice in a pose that feels supportive and restful to you. Close your eyes, or simply gaze softly forward if that feels better for you. Observe your breath and anything else that you feel. Notice the resonance of energy and strength coursing through you.
- Continue with your day, having tapped into your own mindful and integrated strength in a way that met you where you are today. Breathe into and enjoy these Plank Pose benefits!