Learning to Love Downward-Facing Dog

Downward Facing Dog has been served up as a light appetizer of a yoga pose to beginner yoga students for years and years. But the truth is: It just IS NOT A BEGINNER YOGA POSE! This article sets the record straight about this ubiquitous pose because beginner students deserve better!
A common question new students ask about Downward Facing Dog is: “I am just starting out in yoga and I cannot do Downward Dog Pose with my legs straight. Are you able to show how to do Downward Dog for beginners and then how to slowly build up?”
This is an AWESOME question! What’s the answer?
The Struggle Is Real
So many students, especially those who gravitate toward a Vinyasa, Ashtanga, or flow-style class, will struggle with what feels like endless repetitions of Downward Facing Dog. There always seems to be a flood of frustration and despair from students when yoga teachers quip, “Remember, Downward Dog is supposed to be a resting pose. So, just relax!”
In response, students often stare at the teacher, quivering and trembling in the pose, just trying to hold it together. The common thought running through their minds is often: “Relax?! Is this teacher nuts?!”
Whether you find it relaxing or not, here are a few tips for how to modify Downward Facing Dog with bent knees, while still getting all the benefits of the pose. This is not just for beginners! In fact, yoga teachers often ask intermediate and advanced students to practice this pose with bent knees in order to really get a sense of where the focus of the pose is.
First, it’s important to remember that a yoga pose is not about “the pose” – it’s about what the pose is doing for you. So, when we modify a pose, we want to keep in mind what the pose is really about. In Downward-Facing Dog, the primary anatomical focus is the elongation of the spine.
So, it doesn’t matter if your knees are bent, because this pose is not really about lengthening the hamstrings. Let’s repeat: It doesn’t matter if your knees are bent.
Basic Alignment Tips in Downward-Facing Dog

- Lift your hips high enough so that gravity can work its magic, and your whole spine can extend downward from the pelvis
- Broaden, lengthen, and soften your upper back and maintain your center of gravity in your legs and feet
- Lengthen your back, from your tailbone all the way through the back of your neck
Two Bent-Knee DOWNWARD FACING DOG POSE Variations:
So, let’s have a look at two Downward Facing Dog pose variations with the knees bent, one in which you are still getting the benefits of the pose, and one in which you are not:
-
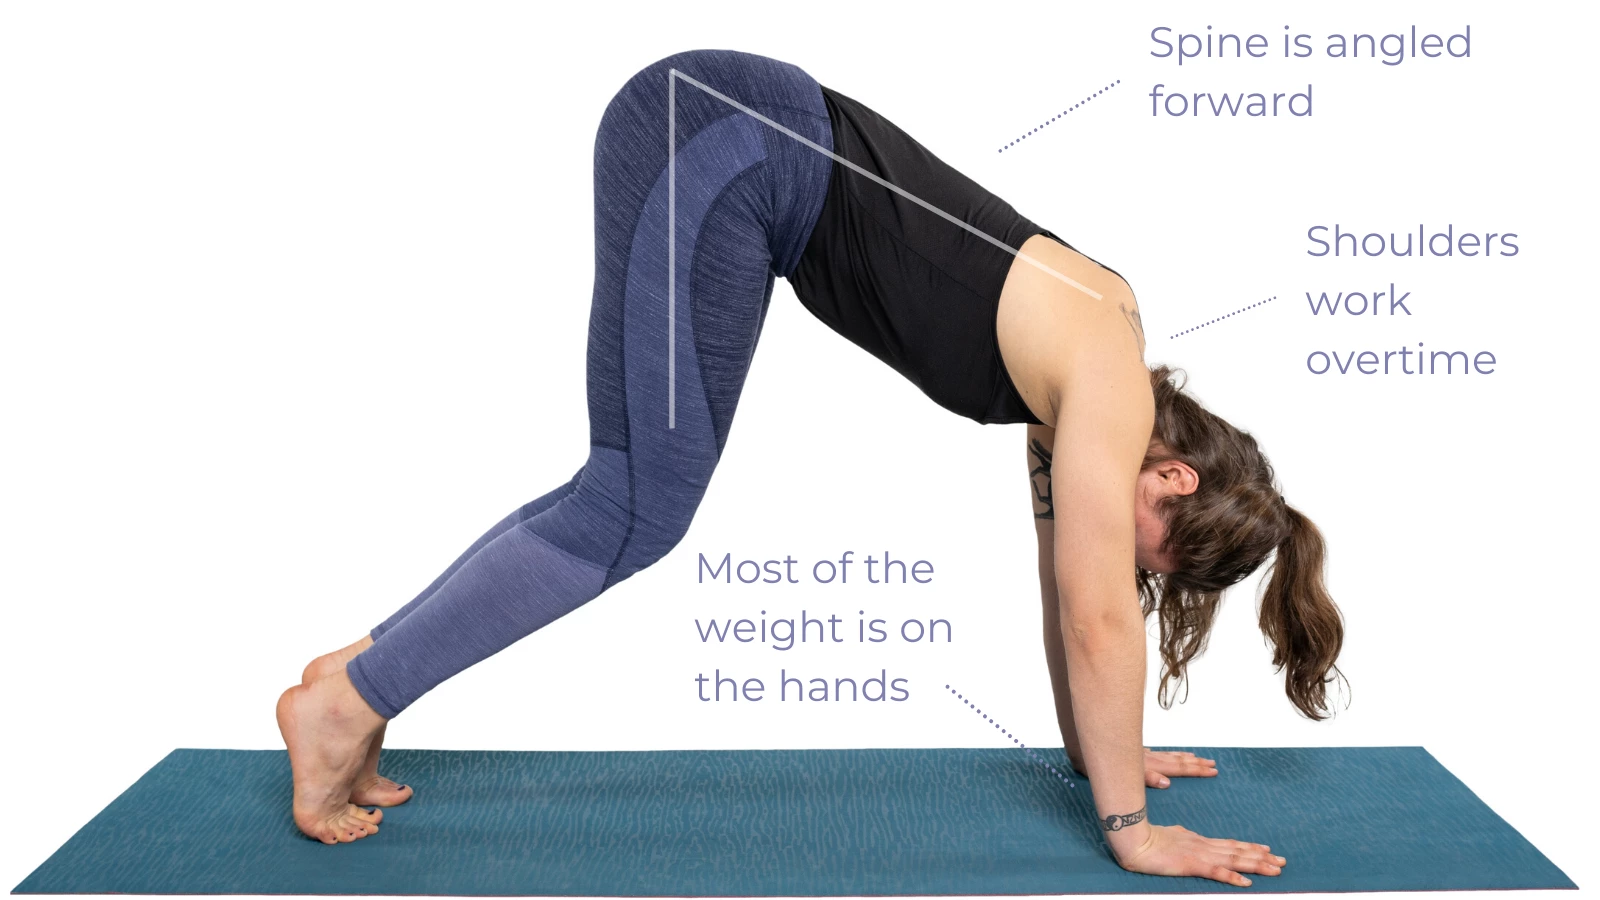
A Less-Than-Ideal Bent-Knee Downward-Facing Dog

In the first picture, the model is making a common mistake. As you can see, her spine isn’t really getting the extension that we’re looking for. Her hips are leaning forward (rather than up), which moves the center of gravity in her whole posture. Now the pose becomes more challenging to hold because she is in somewhat of a Plank position with a lot of weight in her arms.
She has to fight against gravity in this position instead of allowing it to help her stretch. The result is hard work, which is certainly strengthening, but it doesn’t really offer the same benefits of a more traditional Downward Facing Dog.
-
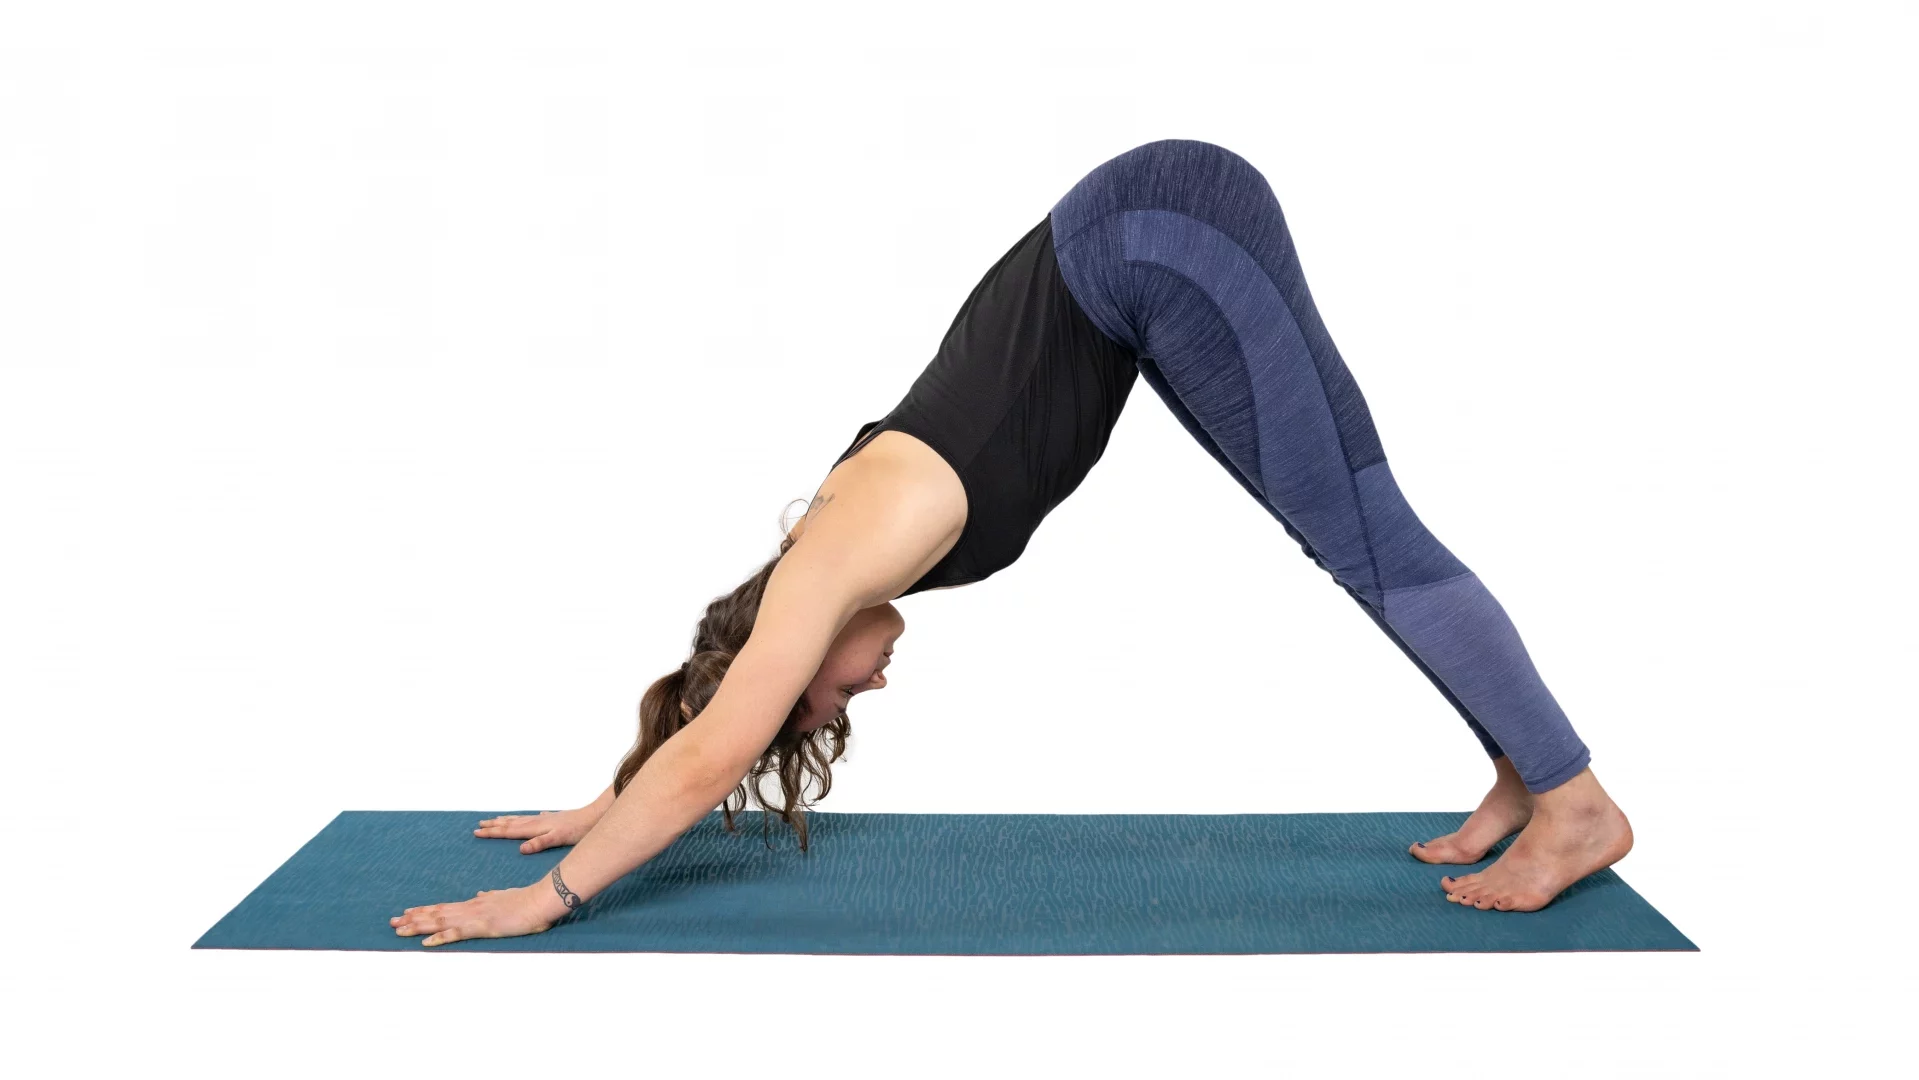
A More Ideal Bent-Knee Downward-Facing Dog

In this second picture, her knees are also bent. But in this version, she has also shifted her pelvis. By lengthening her sit bones toward the sky, she has slightly tilted her whole pelvic bowl forward to allow for her spine to lengthen.
To do this:
- Bend your knees as little or as much as you’d like.
- Press your hands into the mat to send your hips up and back. Slightly draw your belly button toward your spine, using a bit of core engagement to help keep your lower spine long.
- Spread your toes and press strongly through the balls of your feet – don’t worry about working your heels down to the floor.
- Broaden your upper back by wrapping your lower shoulder blades toward your armpits, and feel the backs of your shoulders opening.
- Keep your neck extending in line with the rest of your spine.
Depending on your body, you may need to take a longer stance (i.e. more distance between your hands and feet) in order to make this work. Don’t worry if that’s the case – just focus on finding that long stretch in your whole spinal column
Utilize Props and Alternate Poses
-
Play With Blocks

A really helpful modification if you are just starting out is to do Downward-Facing Dog with your knees bent and with each hand resting on a yoga block. This little bit of elevation helps you to bring the center of gravity of the pose back so that more of the weight of the pose can rest in your pelvis, legs, and feet. This will allow you to start to feel some of the “lightness” that really lets your spine lengthen.
I highly recommend doing this if your practice space has yoga blocks available, at least during those moments in class where you are asked to hold the pose for several breaths. This modification is especially helpful if you are feeling the strain of the pose mainly in your wrists, arms, or the backs of your neck and shoulders.
-
Play in Puppy

Finally, an excellent alternative to those long holds in Downward Dog is to come down onto your knees and take Puppy Pose, pictured here. As you can see from the photo, by taking the hamstrings out of the equation altogether, this pose allows you to get the same awesome stretch in your spine, without putting much strain on your wrists, arms, or legs. You can also do this with your hands resting on blocks for a bit of an extra shoulder opener.
It’s a great idea to do Puppy Pose and then Downward Facing Dog to compare the sensation of stretch in your back. If they feel more or less the same, then you know you’re getting the same benefits from these poses.
Get Creative With Props at Home!

If you’re practicing at home, there are SO many everyday props available to help you do Downward Facing Dog. Essentially, these are similar to your in-class modification with your hands on blocks, but at home, you have so many more options that you can use to find exactly the right stretch for you.
Try doing the pose with your hands on a chair, at a wall, on a coffee table, the edge of your bed, your sofa, or the stairs to figure out what feels right for you. The higher your support, the more you should be able to straighten your legs to get a stretch in your hamstrings while still maintaining the long spine that is the essence of the pose. Please make sure that whatever you use is firmly anchored so that it doesn’t slip out from under you! These are some helpful Downward Facing Dog pose variations.


