
HOW TO PRACTICE Reclining Hand-to-Toe Pose IN YOGA (Supta Padangusthasana I, II, and III)
Benefits, How to Instructions, Modifications, and Common Alignment Mistakes for Reclining Hand-to-Toe Pose

Reclining Hand-to-Toe Pose (Sanskrit name: Supta Padangusthasana) and its variations are among the safest, most accessible yoga poses for stretching the hamstrings, adductors and abductors. Because these asanas are practiced in a supine position, it’s much easier to maintain spinal integrity while stretching. The floor provides a built-in reference point for maintaining proper alignment. Unlike in standing or sitting yoga poses, the supine position imposes no gravitational strain on the vertebrae and their intervertebral discs.
Supta Padangusthasana I focuses the stretch in the hamstrings. If you have tight hamstrings, or your back rounds when you do seated yoga postures, Hand-to-Toe Pose should be part of your daily practice. Often times, chronic pain or stiffness elsewhere in the body, such as the back of the ankles, hips, or lower back, is really a function of inhibited movement due to tight hamstrings. Flexible, resilient hamstrings are key to easeful locomotion and movement in your hips, knees, and ankles.
Hand-to-Toe Pose Variations II and III focus the stretch in the adductor muscles (inner thighs) and the group of muscles located on the outside of the hip, thigh and calf.
Using straps and other props to support these yoga poses makes them almost universally accessible. In the reclining position, it’s easier to relax the attention, which supports softening into each asana.
Benefits of Reclining Hand-to-Toe Pose
Regular practice of Hand-to-Toe-Pose is a good move for all yogis, but for yogis with tight hamstrings, or people who spend a lot of time each day sitting, it should be a daily yoga practice. Sitting for long stretches, as many of us do in our daily jobs, has the effect of shortening the hamstrings and, in some cases, the adductor muscles.
Because the hamstrings cross both the hip and the knee joints, hamstrings that are locked short can result in inhibited movement of the knees, hips or ankles, imbalance or an unhealthy tilt in the pelvis, and unexplained low back pain.
Over time, Hand-to-Toe-Pose can lengthen the hamstrings, calf muscles, adductors and abductors. This can help to realign the pelvis, relieve tension in the lower back and free up the joints of the lower limb, both for more fluidity in yoga practice, and more functional movement overall.
Like all yoga poses that focus on the lower body, this series can be deeply soothing and calming to the nervous system and mind. The effortless support of the floor allows you to release tension more easily. Lying down also shifts us to a more easeful mindset. This is key, because asana practice is all about relaxing into wherever you are in a yoga posture, rather than pushing and forcing into what you think a pose should look like.
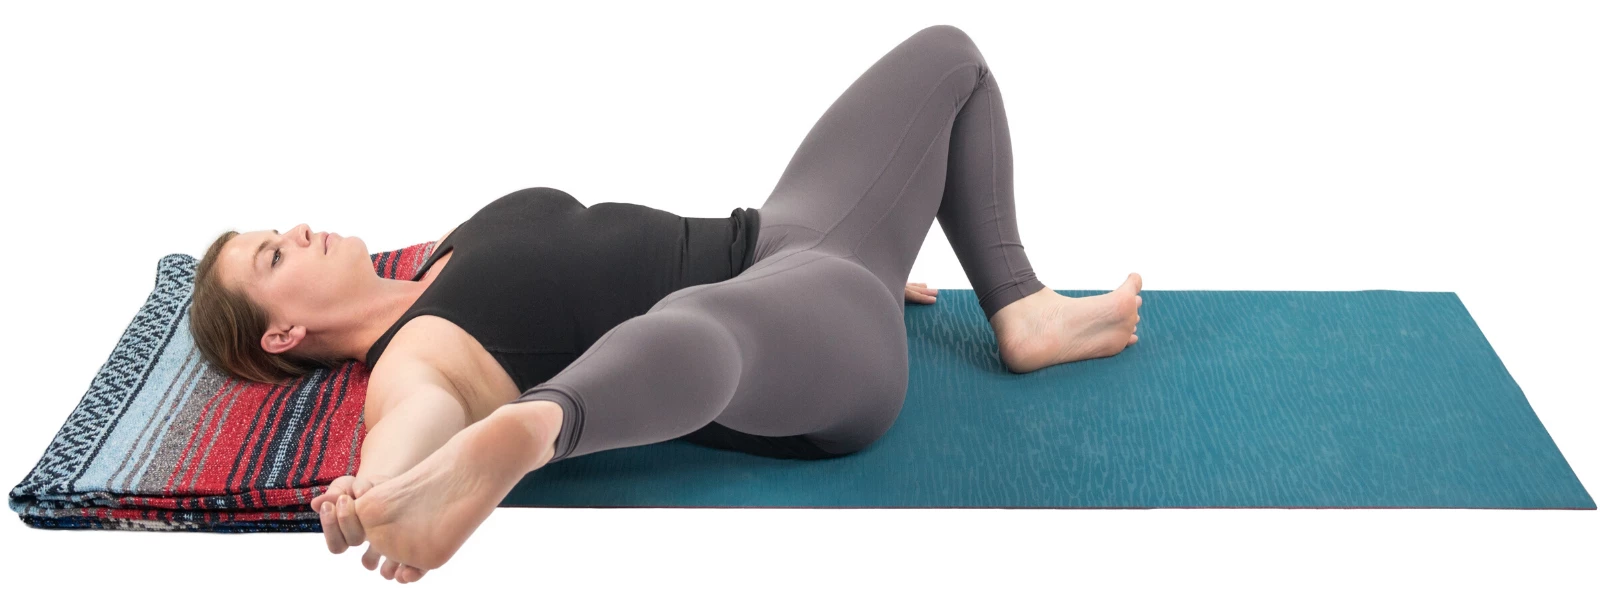
Basic Reclining Hand to Big Toe Pose
To practice this series of asanas make sure you have one yoga strap and a block handy. You may want to have several blankets as well. Place a folded blanket under your head and neck if your head tilts back when you lie in a supine position.
- Lie down on your back on a yoga mat with both legs extended long and your yoga strap nearby.
- Bend your right knee into your chest and place the yoga strap around the ball of your foot. Straighten your right knee and extend your right leg to whatever angle allows you to feel a gentle hamstring stretch. Adjust the angle so that your knee can be straight.
- Your right hip will tend to hike up, shortening your right waist. Take your strap into your left hand and place your right thumb into your right hip crease. Press your hip down toward your left heel to even out the hips. Stay in this position for a few breaths and then release your right hand from your hip, continuing to breathe deeply into the stretch.
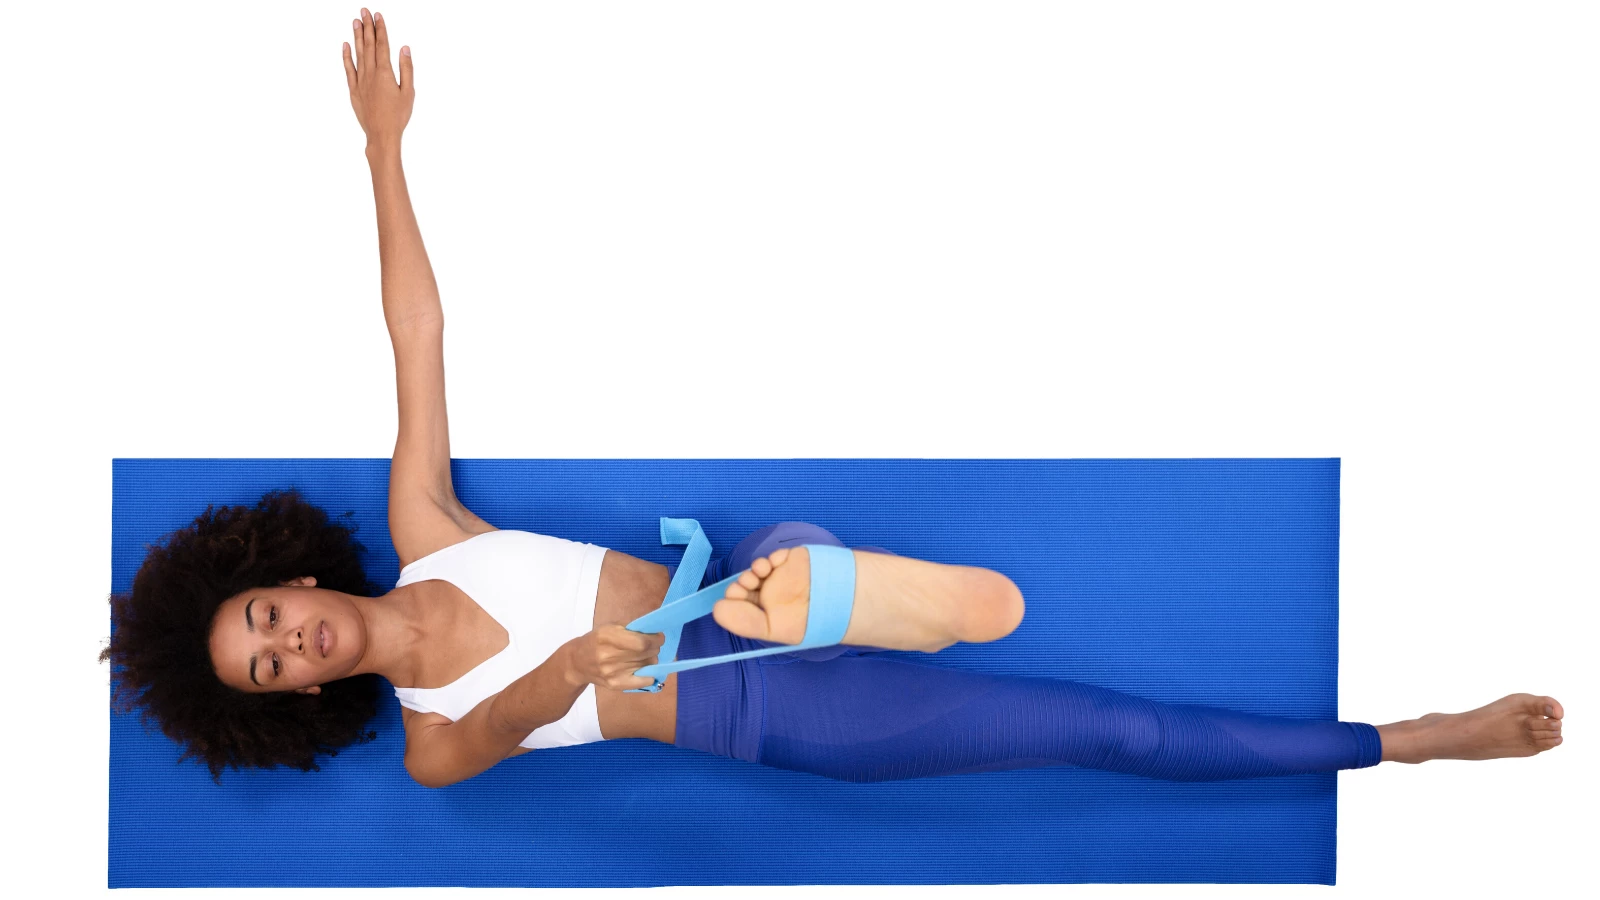
- To move into Supta Padangusthasana II, take both ends of the strap into your right hand and place your left hand on your left hip bone. Keep the left side of your pelvis on the ground.
- Externally rotate your right leg at the hip and then extend it out to the side. Think of drawing your foot toward your shoulder so your leg moves on a diagonal. Keep your left buttock and left ribs rooting down into the ground.
- Some prefer to have a block or folded blanket ready to support their leg. Try placing whatever yoga props you choose under your thigh close to your hip.
- After spending several breaths in Supta Padangusthasana II, draw your leg back up toward the ceiling. Transfer the strap into your left hand.
- Internally rotate your leg slightly so the toes point to the left. Keeping the right side of your pelvis on the ground, slowly draw your leg across your midline. Your right hip is going to want to come off the ground. Extend your leg to the left only to the extent that your right hip can stay on the floor. For some, even a small movement to the left creates intense sensation in their outer thigh and hip.
- After a few deep breaths, return your right leg to vertical. Then lower your leg to the floor and extend your left leg straight out onto the floor as well. Tune into your legs. How does your right side compare to the left side?
Rest for a few breaths, and then repeat all of the above steps on the second side.
