
HOW TO PRACTICE Supported Shoulderstand Pose IN YOGA (Salamba Sarvangasana)
Benefits, How to Instructions, Modifications, and Common Alignment Mistakes for Supported Shoulderstand Pose
Inversions are some of the most essential poses in yoga. Shoulderstand (Sanskrit name: Salamba Sarvangasana) provides the experience and benefits of being upside down but without the balance challenges of other inversions.
Practicing Salamba Sarvangasana without support can compress and injure the neck. It’s important to practice and teach this yoga pose mindfully and with care.
We suggest the supported version of Shoulderstand, using a stack of folded blankets to elevate the shoulders. Practicing this asana with the shoulders flat on the ground can compress or damage the cervical spine. The neck is not designed to flex to a 90-degree angle. Practicing Shoulderstand without props can compromise your neck by causing it to bear weight while flexing beyond its healthy range of motion.
Shoulderstand is best performed once you have developed strong core and back muscles to be able to move safely into the yoga posture with control. You should also possess good kinesthetic awareness and familiarity with preparatory yoga poses. Some schools recommend students learn Sirsasana (Headstand Pose) before Shoulderstand, and we tend to agree with this thinking.
Based on the unique needs of your body, the best strategy may be to forgo this posture in favor of an inverted yoga pose such as Viparita Karani (Legs Up The Wall) or one of the other variations in the Yoga 2.0 section that delivers the benefits of an inversion without the risk. (You’ll find step-by-step instructions for practicing Legs Up The Wall there.) For instructions on practicing the full Shoulderstand Pose in a supported way, check out our video demonstration.
Given the risks we’ve identified, especially pertaining to the delicate structures of the neck, we recommend first practicing Shoulderstand under the guidance of an experienced yoga teacher.
Benefits of Shoulderstand Pose
Being upside down has many benefits to the body and nervous system. Inverting can promote healthy blood circulation and can support lymphatic flow. Overall, inversions calm and gently stimulate energy throughout the body, and should be considered an essential part of a well-rounded yoga practice.
The calming benefits will only accrue, however, if you are able to be relaxed in the yoga pose. If you are straining to stay upright or if your breathing is inhibited, Shoulderstand can end up being agitating instead. This is another reason why it is important to practice with the shoulders propped up on blankets. Shoulderstand can be almost effortless when your body is vertical in the yoga posture. A stack of folded blankets—two to five or more—under your shoulders makes a vertical Shoulderstand much more possible.
Inverting while on your menstrual period is believed by some to be contraindicated. Practicing Shoulderstand and other inversions while menstruating can temporarily stop the menstrual flow. This can result in mild to severe menstrual cramping and subsequent “flooding” when the flow begins again. In those cases, it’s best to practice alternative asanas such as Supported Matsyasana (Fish Pose) on yoga blocks or a bolster, or Supta Baddha Konasana (Reclining Bound Angle Pose) during menstrual periods.
How to Practice Shoulder Stand Pose
- Gather at least two thick, firm blankets—such as wool or cotton—or more depending on the length of your neck and the flexibility of your shoulder joints. People with longer necks generally need more blankets, as do people with tighter shoulders.
- Fold your blankets so that they are approximately 2 by 3 feet wide. Stack them on top of each other so that the folds are lined up over one another. Place the blankets at one end of your yoga mat with the folded edges closest to the end of the mat.
- Fold the opposite end of your yoga mat over the blankets to about halfway across the blankets.

- Lie down with your shoulders at the edge of the folds. The folded-over, sticky mat is there to provide friction for your elbows, so that they can more easily stay shoulders-width apart in the pose.

- Reach up and make sure there is about an inch of space between the top of your shoulders and the edge of the blankets.
- Place a yoga block on its lowest height, widthwise, under your sacrum.
- Inhale, and on an exhalation, roll your torso up off the block and blankets, and extend your legs up and over your head, moving right into Halasana (Plow Pose). Your feet will reach toward the ground, with the hips up in the air.
- Clasp your hands behind you, extending them out along your blanket stack. Externally rotate your shoulders, drawing the backs of your arms closer together underneath you so that you are resting on your shoulders instead of your neck. Your neck should not be bearing weight. Instead, your shoulders should be on the blankets with your head resting on the floor.

- Take a few breaths here, adjusting your torso to make it as vertical as possible.
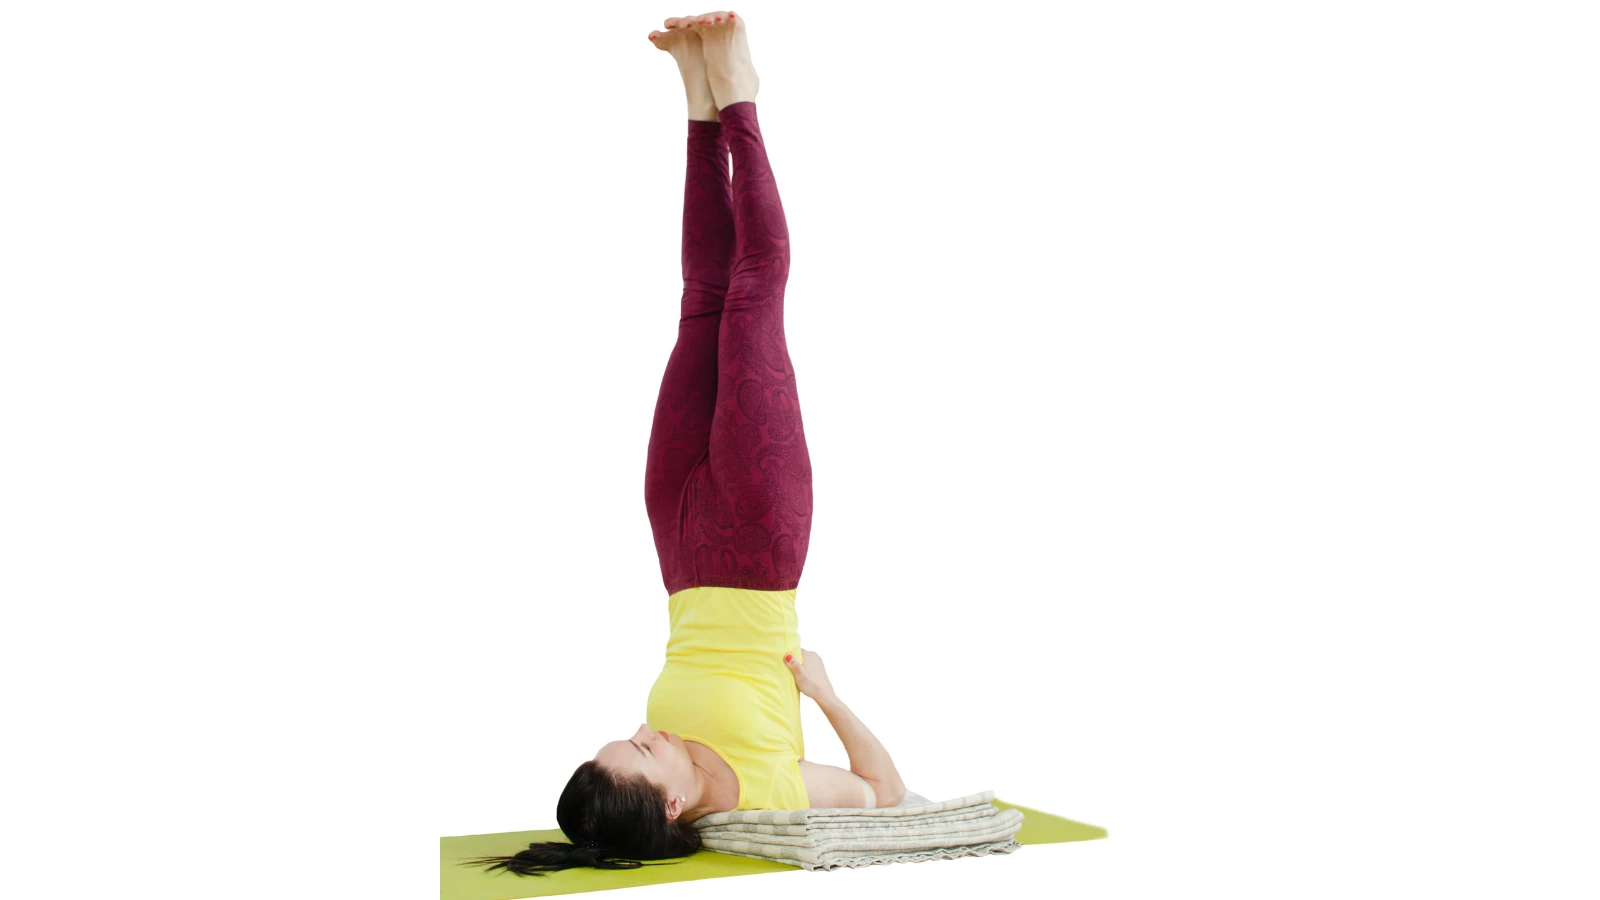
- Bend your elbows and place your hands on your low back, on either side of your spine, for support. When you feel steady and at ease, reach one leg and then the other up toward the ceiling.
- Ground your elbows and reach both big toe mounds—the inner balls of the feet—up toward the ceiling.
- Rotate your inner thighs away from one another as you draw the flesh of your buttocks up toward your heels.
- Ground your elbows to help create more lift through your torso. Every few breaths, walk your hands a little further down toward your shoulders, but make sure that you’re not compressing the front of your neck and pushing your torso toward your head.
- Breathe deeply. If your breath feels restricted, shallow or labored, move your hands slightly up toward your low back. You may want to add an extra blanket to your stack next time you practice Shoulderstand if your breathing feels restricted.
- After several breaths, exhale and move back into Plow Pose.
- Interlace your hands behind you and extend your arms along the blanket stack. Flex your ankles, then lower your legs so that your toes rest on the floor. Let your spine round a little bit.
- Stay for several breaths in this yoga pose.
- On an exhalation, release the interlace of your hands and extend your arms parallel on top of your blanket stack. Using your arm and belly strength, slowly roll your spine down onto your blanket stack. Once you feel your sacrum on the block, bend your knees deeply and place your feet on the floor.
- Rest with your feet flat on the ground for several breaths, allowing your body to relax into the floor.
- Give yourself ample time to rest after Shoulderstand to allow your body to adjust to being right-side up again. One option is to rest in Supta Baddha Konasana (Reclining Bound Angle Pose) with your pelvis on your blanket stack and your shoulder blades and head resting on the floor. This very slight inversion can help your body ease back into its normal orientation.

