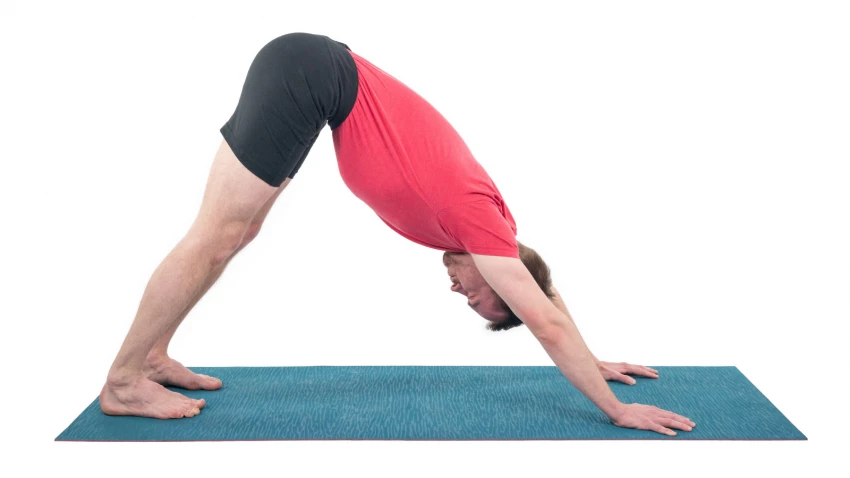
Downward Facing Dog Pose (Adho Mukha Svanasana) is a great full-body pose that strengthens your arms and legs, as well as your core stabilizer muscles. In this pose, your hands, arms, and shoulders bear much of your body’s weight, so this is a particularly good way to strengthen your upper body. And because you take your arms overhead, the strength you build in this pose is good preparation for Handstand (Adho Mukha Vrksasana) and other inversions. Because there are so many different variations of the pose, some of which I’ll show below, it’s an especially accessible way to strengthen your upper body.
An added benefit is that the pose also stretches your back body, including your spinal muscles, hamstrings, and calves. In Light on Yoga, BKS Iyengar says about this pose, “When one is exhausted, a longer stay in this pose removes fatigue and brings back the lost energy.” He calls it “an exhilarating pose,” and recommends it as an alternative to Headstand (Sirsasana).
Downward Facing Dog Pose is such a strong staple in most yoga practices that even people who’ve never taken a yoga class in their life know what the pose looks like. But the ubiquity of the pose makes it easier to settle into a habitual positioning.
Finding the Right Downward Facing Dog Pose for Your Body
As with all of the yoga asanas, in Downward Facing Dog you should consciously arrange your body in a position that allows you to cycle through different subtle inner body movements. Concentrating on the inner body is a big part of building strength through awareness, so the first step is to figure out what version of the pose is comfortable enough so you can stay in it long enough to focus on the strengthening aspects—instead of holding your breath and waiting for it to be over.
In finding the right version of the pose for your body, there are a few common areas to take into consideration: hands and wrists, shoulders, hamstrings and calves, and low back. So if you have problems in those areas or struggle with the classic version of the pose, here are some variations that you might find helpful. After introducing the variations, I’ll then discuss how you can focus on strength building in all the variations.
How to Practice Downward Facing Dog Pose Variations
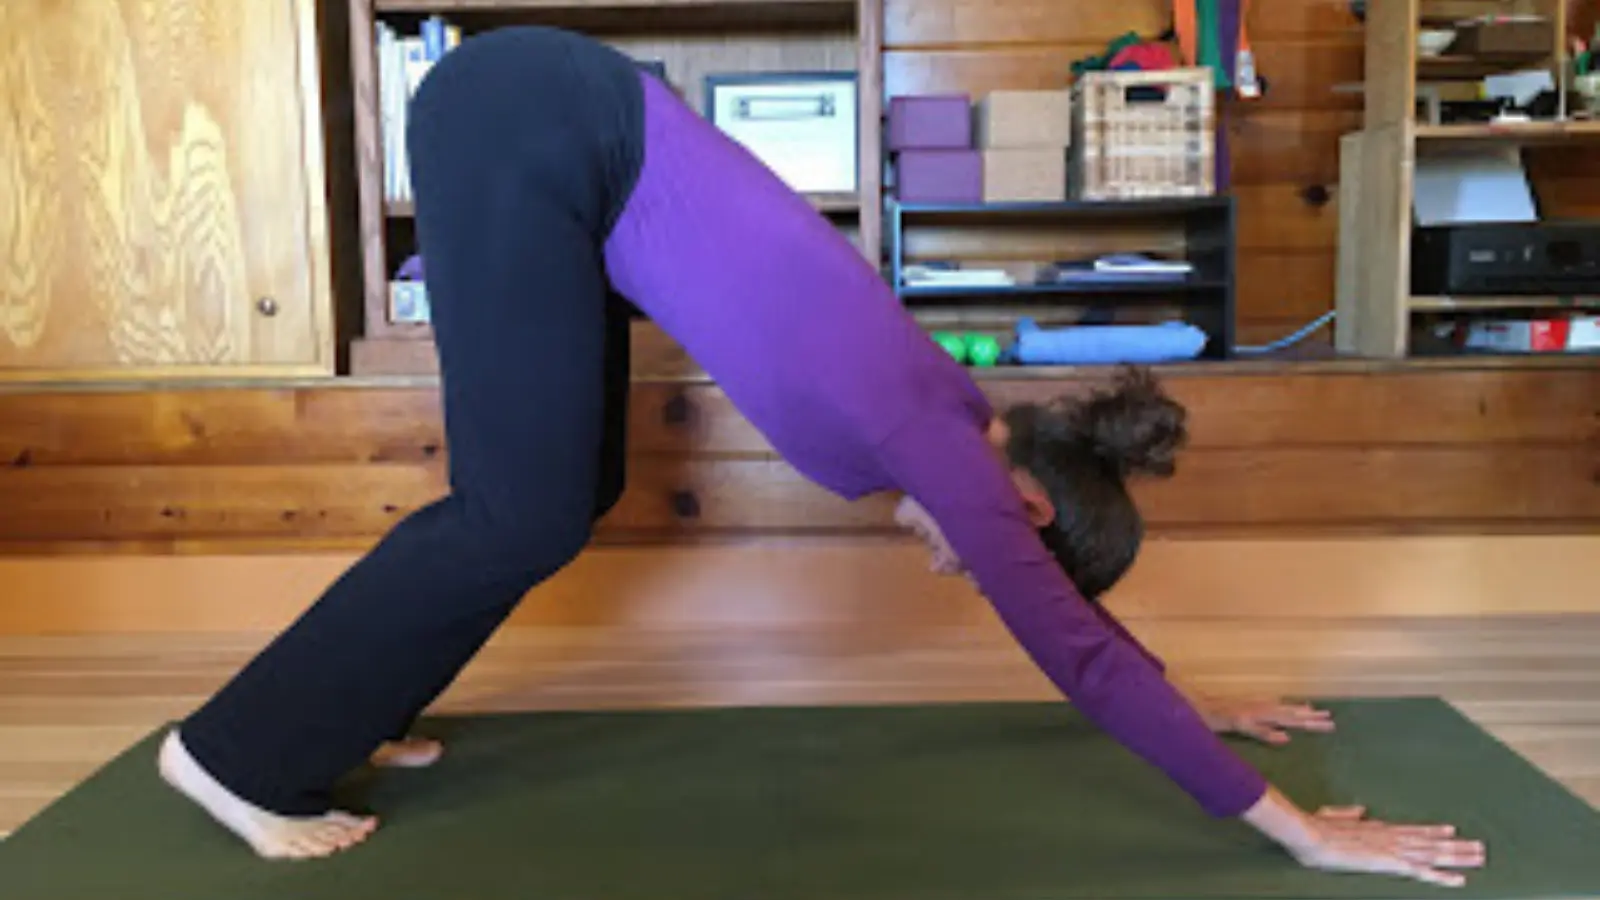
1. Knees Bent: If you have tight hamstrings (backs of your thighs), bending your knees in the classic Downward Facing Dog Pose (or any of the variations shown below) can help with lower back problems. Bending your knees takes tight hamstrings out of the equation and gives your back a chance to elongate. In the classic version, bending your knees can also remove some of the pressure from your hands, wrists, and shoulders.
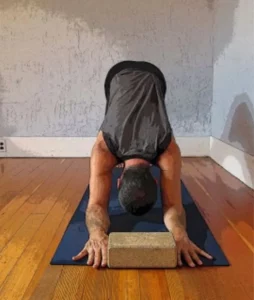
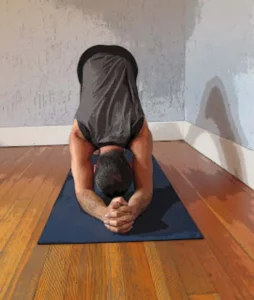 2. Forearm Variations: In a classic Downward Facing Dog Pose, there’s a lot of pressure on the wrists and hands. If you’ve got a wrist or hand injury or weak wrists, you can take the wrists and hands out of the pose by coming down onto your forearms. The version with clasped hands is easier on the shoulders for most people, but try both to see which you prefer.
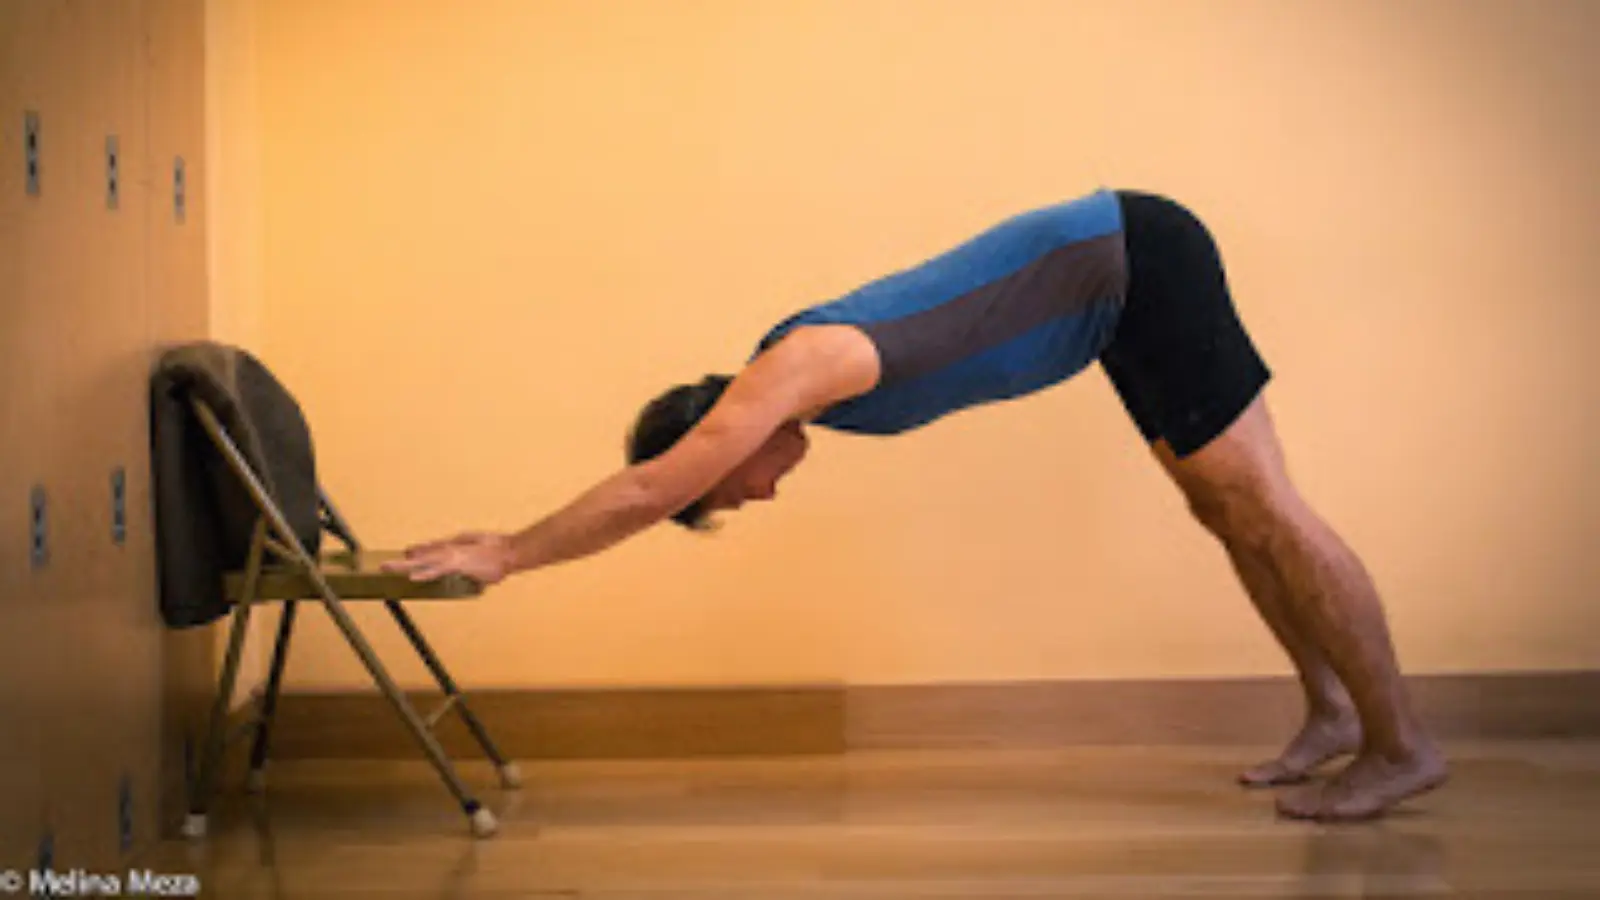
3. Hands on Chair Seat: If your shoulders are unhappy with the amount of weight they are supporting in the classic or forearm versions of the pose, you can lift up the pose by putting the hands (or forearms) onto a chair seat.This variation can also help with low back issues because the angle at the hips, between the thighs and torso, can be wider, which gives more space for the pelvis to untuck. Also, the arms and torso aren’t working as hard to support your body weight, so the ease in the upper body can give you a chance to focus on what your pelvis and lower back are doing.
4. Hands on Wall: If the chair version still puts too much weight on your wrists, hands, or shoulders, you can place your hands (or forearms) on the wall in a Half Downward Facing Dog Pose (sometimes called Right Angle). It’s important in this position to resist gravity and not let your body weight hang on your shoulders. You can do this by actively pressing your hands into the wall and simultaneously stretching your hips back. This way, you are engaging your back and core as you hold your arms overhead and press into the wall.
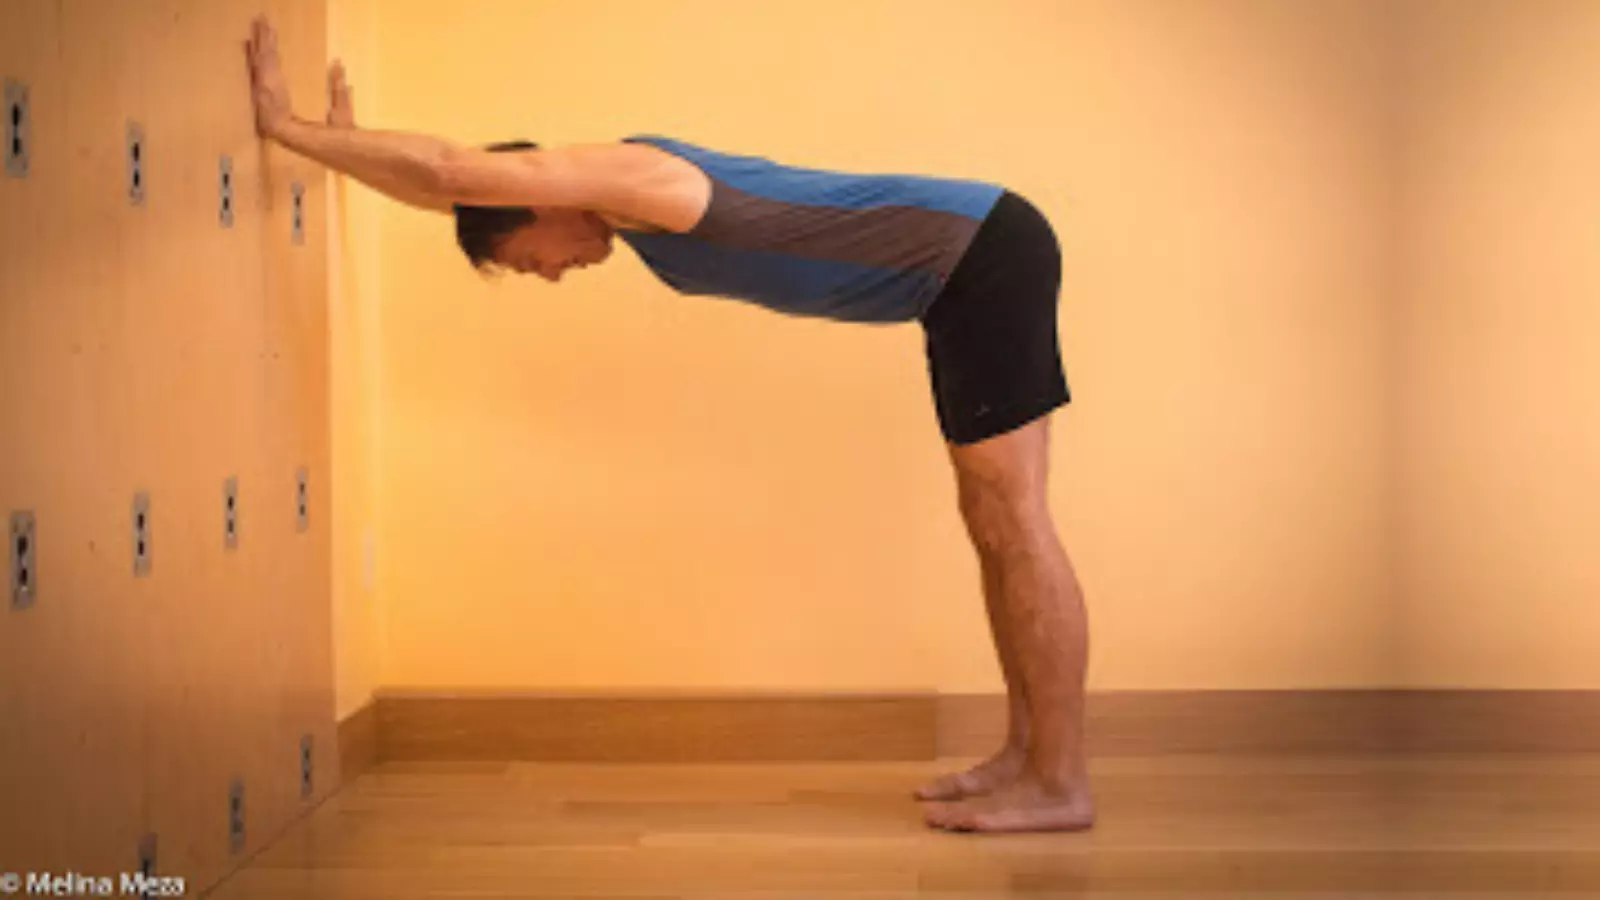
This variation is strengthening for your upper body, even though you’re putting less weight on your hands, arms, and shoulders. It can especially help with low back issues because your arms can be as high as they need to be on the wall, and the higher they get, the less of an angle you have at the hips, allowing you to concentrate on softening and lengthening the low back.
How to Work in the Poses: 3 Different Approaches
Once you’re in your comfortable pose, there are many approaches to strengthening.
Lift and Lengthen
- Start by finding a “lift” by engaging the muscles on either side of the spine to lift the vertebrae up—or lengthen them back if you’re in Half Downward Facing Dog Pose—toward the pelvis. At the same time, keep the hands or forearms grounded. Imagine each vertebra lifting up off the one below it, making space between them.
- Take your time and use your breath to lift even a tiny fraction of an inch more.
- Notice the shoulder blades extending toward the arms, soften the top shoulders and sides of the neck, and lift the ribcage toward the pelvis.
- Then lengthen the spine one more time before you come down to rest.
Stabilize Your Arms and Legs
Another approach is to focus on strengthening the limbs (arms and legs).
- Come into your Downward Facing Dog Pose and start by finding the same “lift” from the last version.
- Then squeeze the muscles in toward the bones, like there’s a tight ace bandage wrapped around them. I like to start at the base, squeezing my calves and forearms, then thighs and upper arms.
- Notice how the two efforts—lifting while engaging—seem to be working against one another, and try to keep doing them both anyway.
An Isometric Approach
You could also work on some isometric contraction (muscle length remains relatively constant while tension is produced).
- Start on your hands and knees in Tabletop Pose (Bharmanasana). You can also begin by standing with heels under your hips and hands on a chair seat.
- Gently press the hands down while lifting the ribcage up off of the arms. (This isn’t Cat Pose (Marjaryasana); the spine is still long.)
- Then keep your hands where they are, arms long, but pull them apart, as if you’re trying to tear your mat in half. You’ll feel the outer armpits engage here.
- Maintain this work with the arms as you tuck your toes under and lift your knees, or step your feet away from a chair.
- Then find the lift from the first Dog Pose, spine lengthening.
- Check that your arms are still working, then do the same with the legs—keep the feet where they are, legs long, but pull them apart and feel the outer hips engage.
- After a rest, you can start again, but reverse the isometric contraction, pressing the hands in toward each other, like you’re trying to scrunch up your mat between them, then pressing the feet/legs in toward each other as well.
Find Today’s “Perfect” Downward Facing Dog Pose
Remember, you’re not trying to arrive at a perfect pose. You are simply using Downward Facing Dog Pose to cycle through these different subtle inner movements, to be in a pose that works for your body, and then engage to find your way to strength.