Reclining Hand-to-Big-Toe Pose (Supta Padangusthasana) is a staple in many yoga classes. When students ask me the best pose to practice at home to loosen their hamstrings, Supta Padangusthasana is my go-to. Reclining Hand-to-Big Toe Pose lends itself to several variations. Adding these into the practice provides an all-around release of the hamstrings, adductors, and abductors—all while lying on your back. Today we’ll explore a lesser-known variation—Revolved Reclining Hand-to-Big Toe Pose (Parvrtta Supta Padangusthasana).
Reclining Hand-to-Big Toe Pose: A Safe Way to Stretch
Supta Padangusthasana, along with its variations, is a spine-safe way to stretch your hamstrings, adductors, and abductors. Unlike in seated poses, lying down exerts no axial pressure on your spine. It’s easy to keep your spine long and to preserve its natural curves when you’re lying on the floor.
There’s another advantage to stretching the hamstrings from a supine rather than a seated position. Flexing your hips while lying down makes it easy to bend from the hip joints rather than from the waist. Using a strap to hold onto your foot allows you to find just the right angle for your leg, one that stretches your hamstrings but preserves your spinal integrity.
Plus, lying on the floor gives you lots of tactile feedback. It’s easy to tell whether your spine is in a healthy position when you can feel your back against the floor. Hand-to-Big Toe Pose is a great way to zero in on a hamstring stretch with very low risks to your intervertebral discs.
A New Twist: Revolved Reclining Hand-to-Big Toe Pose
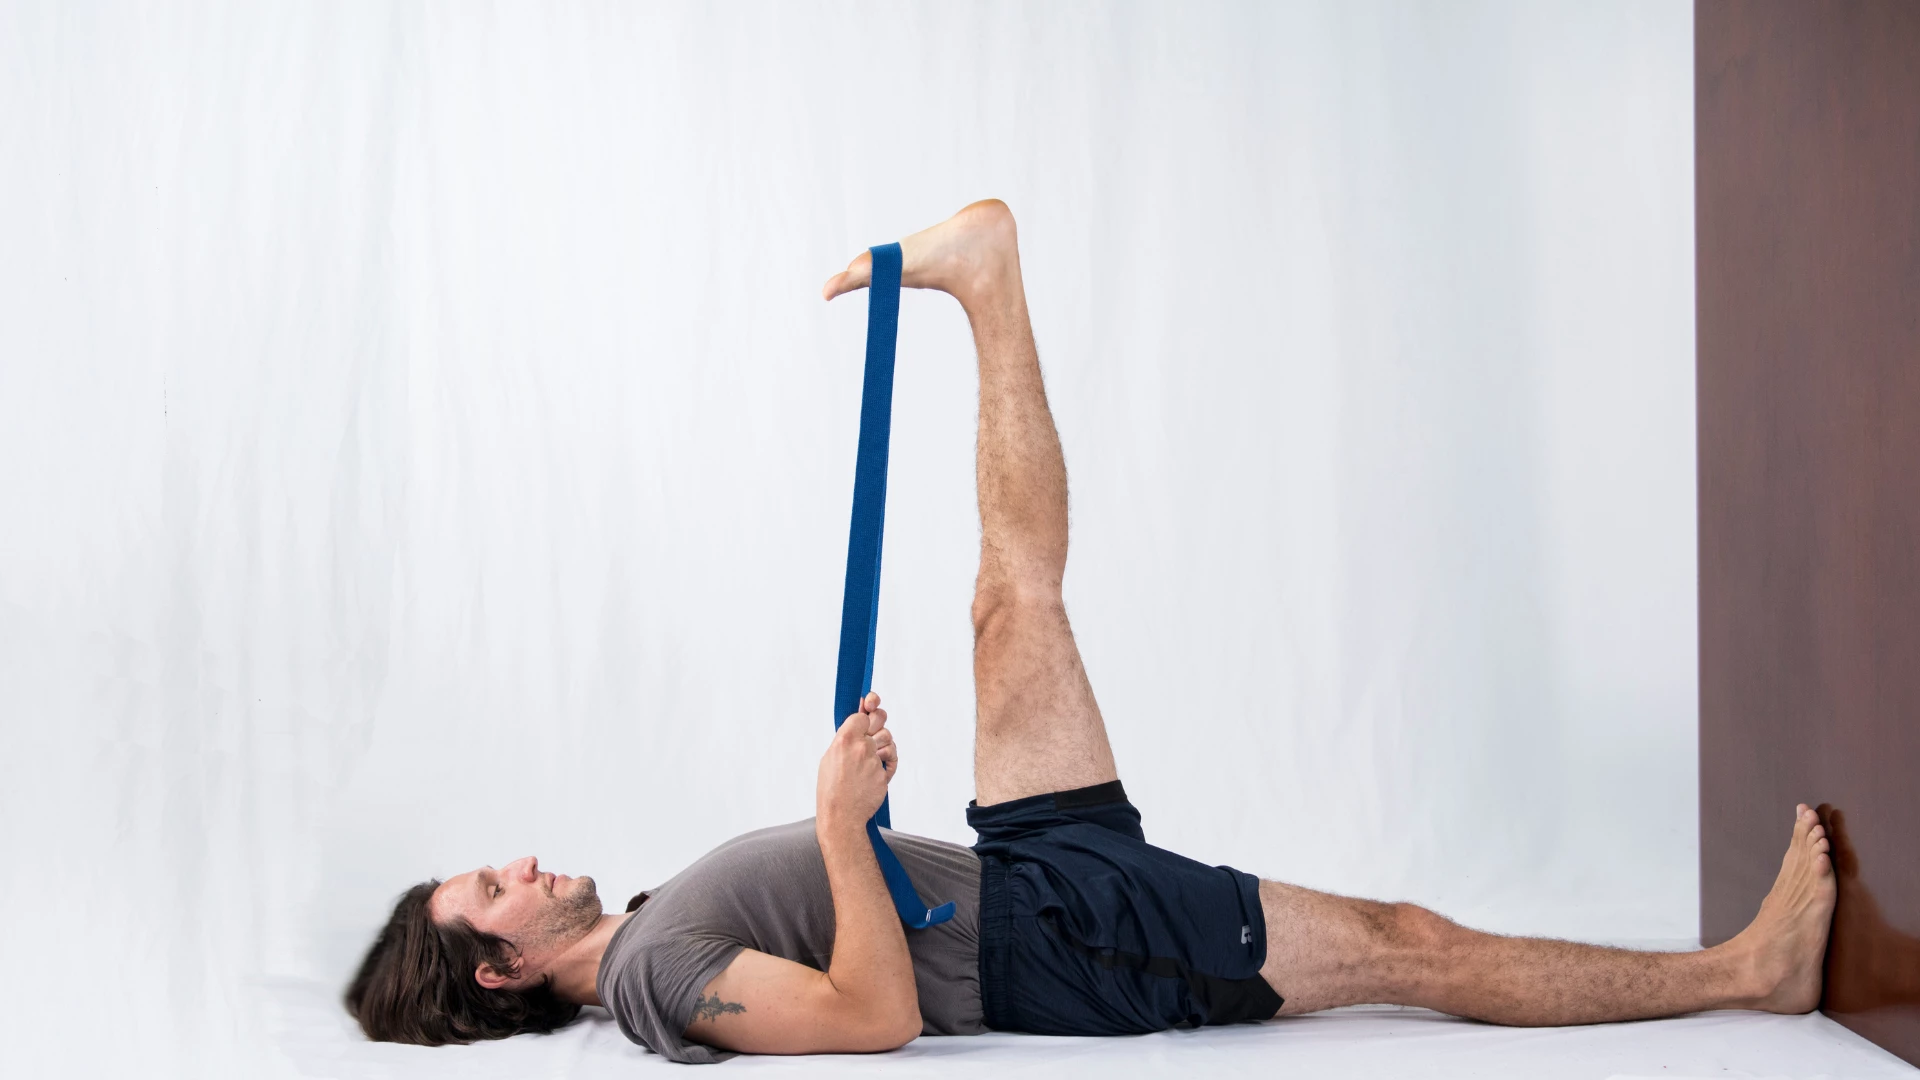
Most yoga practitioners are familiar with the base pose—lying down and extending one leg up toward the ceiling while maintaining a neutral, albeit supine, Mountain Pose (Tadasana) in the rest of the body. From there, it’s easy to add an adductor stretch by holding your strap in the same hand as the extended leg and then extending that leg out to the side. Again, it’s important to maintain a supine Tadasana in the rest of the body in order to maintain spinal and sacroiliac (SI) joint integrity.
After a few breaths in the extended side variation, you can lift your leg back up and extend it to the opposite side for Revolved Reclining Hand-to-Big Toe Pose. This adds an abductor stretch along with a spinal twist. As with the preceding poses, it’s relatively easy to maintain your axial extension in this twist, making it a healthy way to explore spinal rotation.
How to Practice Revolved Reclining Hand-to-Big Toe Pose in Yoga

- Gather your props: a yoga mat, a strap or belt, and a yoga block or bolster.
- Lie on your back on your mat with your legs stretched out along the floor. Place your block or bolster and your strap or belt close by where you can easily reach them.
- Take a moment to feel the contact points between your back body and the floor. Which parts of the torso are in contact with the floor, and which ones are curving away? Take care not to try to press the low back into the floor. Your lumbar should be curving naturally away from your mat.
- As much as possible, ground the backs of both legs into the floor. Because our legs are contoured, the entire surface of the leg won’t be grounded. That’s okay.

- Now draw your right knee toward your chest. Take a moment to explore drawing your knee in close to your torso. At what point does your left leg begin to lift away from the floor? When you feel the left leg lifting, back off a bit so that you can ground your left leg as much as possible. Grounding the left leg helps you keep your spine in integrity, so it’s important to maintain it throughout the pose.
- Loop your strap around the arch of your right foot and extend your leg upward. Find an angle for the leg that allows you to keep your left leg grounded and your right knee straight. Adjust the angle so that you feel a moderate stretch in your hamstrings and so that it’s easy to relax and breathe.
- Check in with the contact points between your torso and the floor. Make sure you maintain the same contact points that you were able to before you extended your leg. If you feel your lumbar rounding into the floor, change the angle of your right leg, increasing the distance between your thigh and your torso.
- Relax your arms and shoulders.
- Take 5 to 10 deep breaths in this position.
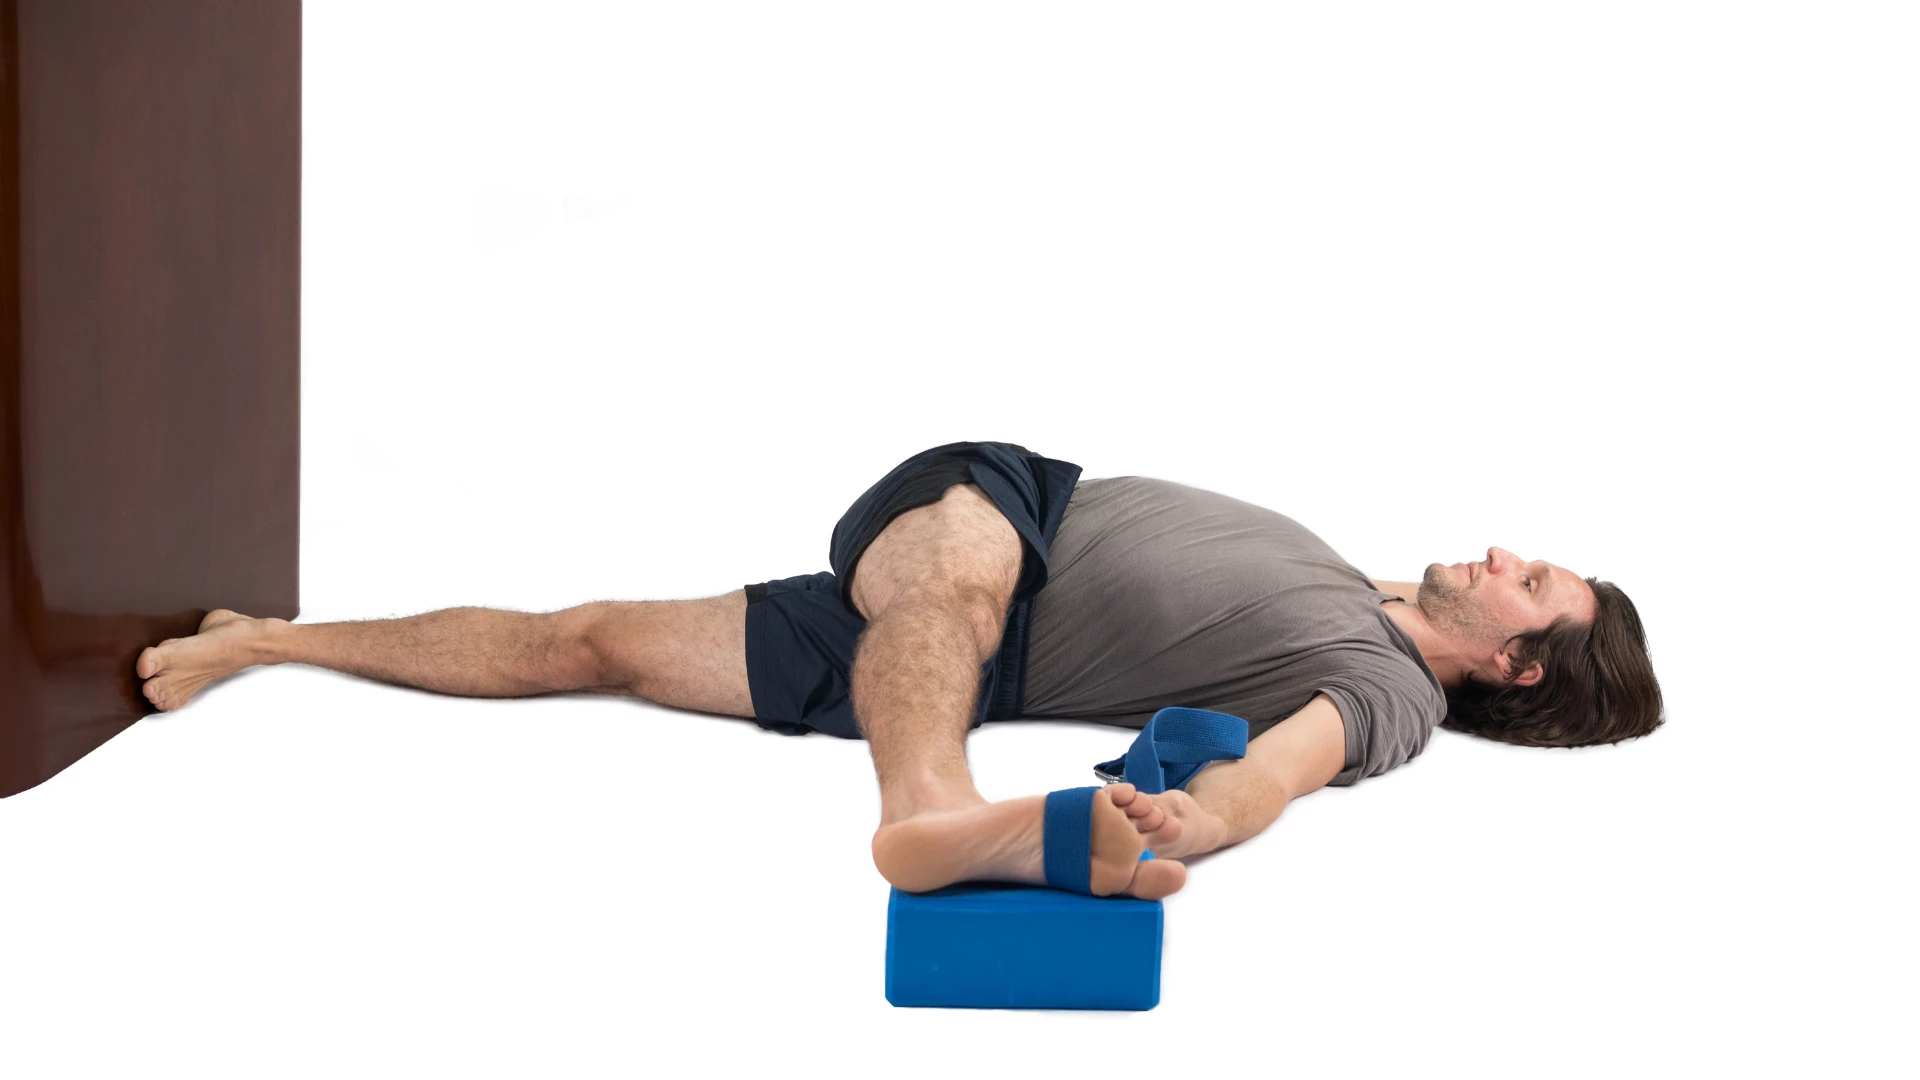
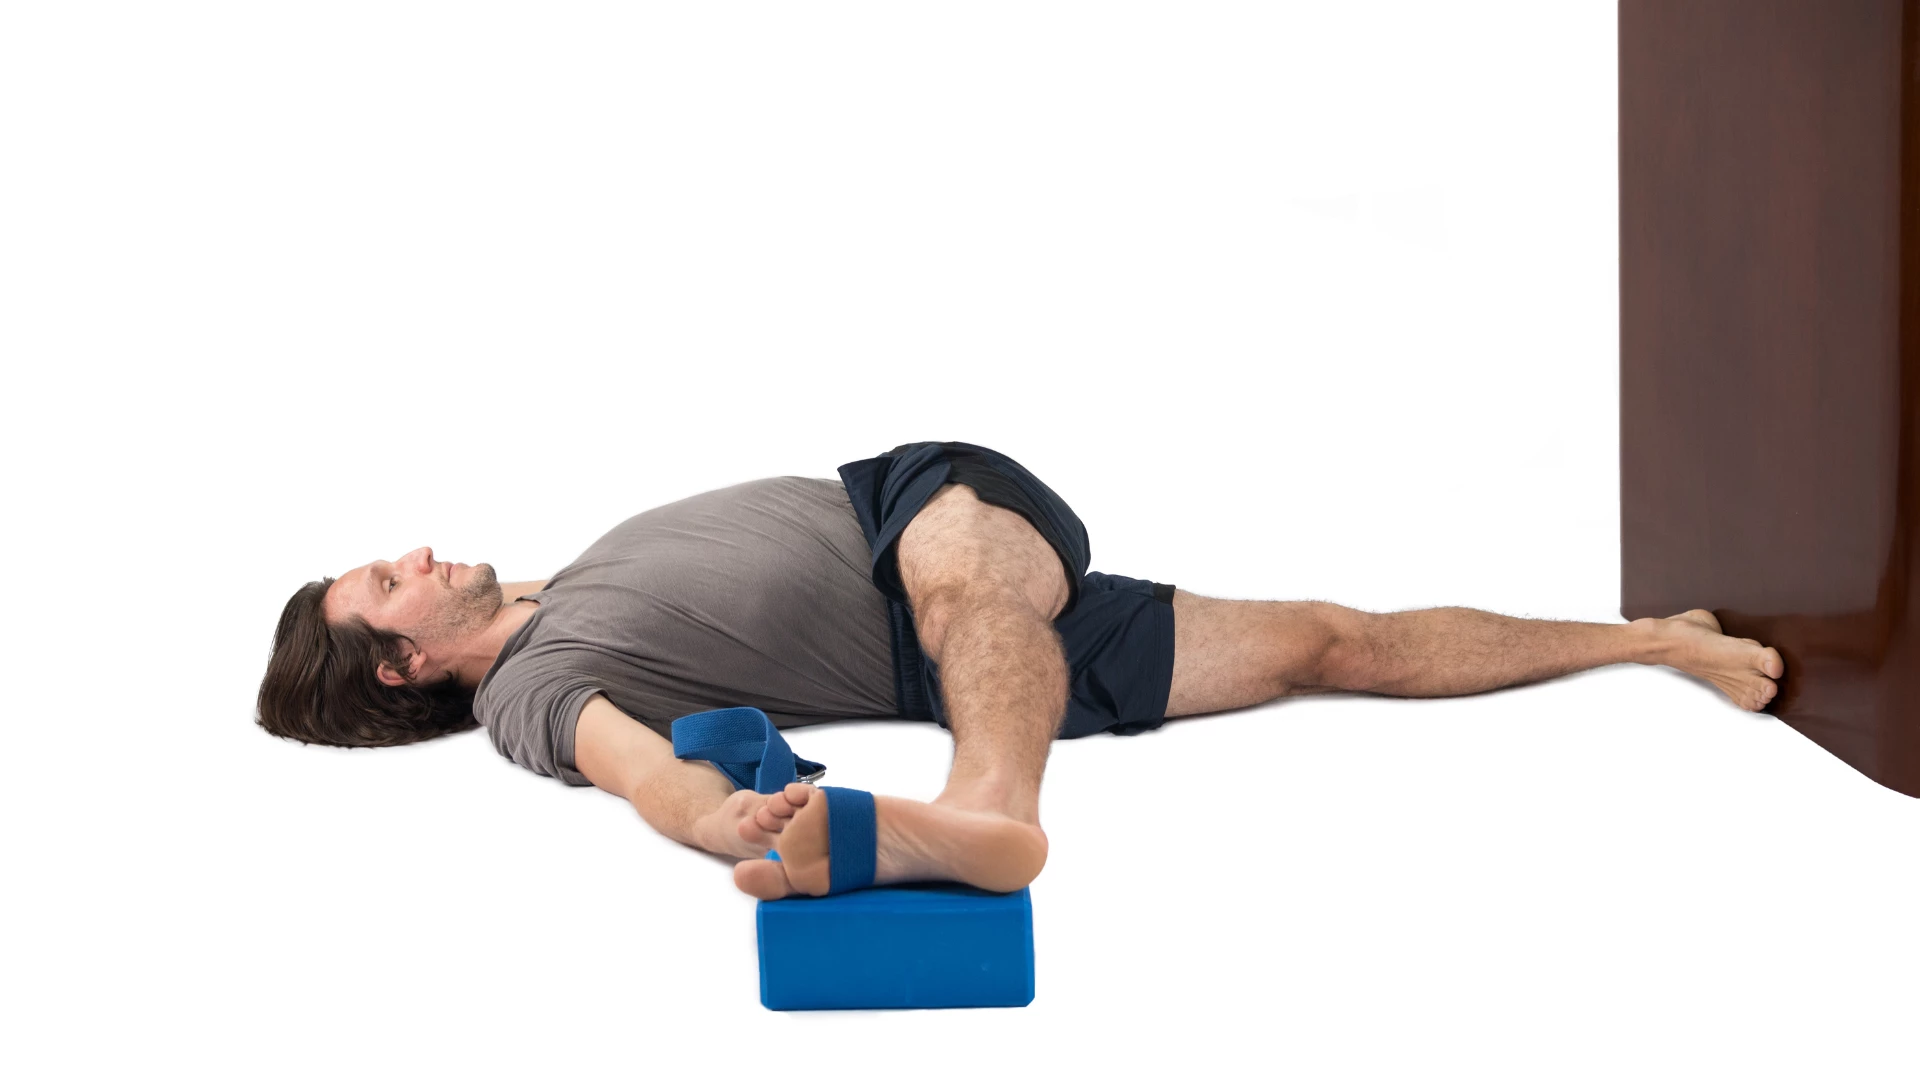
Add a Twist and Stretch Your Abductors
- Now take both ends of your strap in your left hand.
- Extend your right leg toward the left, allowing the right side of your pelvis to rotate along with the right leg.
- Make sure to allow your left leg to rotate so that the outer left leg and foot are on the floor. This will keep your knee from torquing.
- Extend your right leg to the left only to the extent that you can keep your right shoulder blade on the floor.

- If your right foot is close enough to the floor to place a block at any height, or a bolster under your ankle, place it there so you can rest in the pose.
- If your right shoulder feels strained, you can bend your right elbow and place your hand on your right ribcage.
- Relax here and take 5 to 10 deep breaths. As you breathe, imagine the breath expanding outward from your navel into your head and tailbone, arms and legs.
- Bend your right knee to shift back onto your back. Then stretch both legs out onto the floor and tune into what you feel. Do your legs feel different? How about the right and left sides of your lower, middle, and upper back?

- Now practice your second side.
Practice Video: Try a New Version of an Old Standby


