It’s happened to most yogis, I’d wager: You’re practicing a pose in a vinyasa sequence and feeling like you might just topple over. Our bodies are strong and stable, yet we can’t always tap into these qualities. In yoga poses commonly included in vinyasa practice—such as the Virabhadrasana (Warrior Poses), Anjaneyasana (Lunge Poses), and Phalankasana (Plank Pose)—the inability to tap into our strength, combined with the inherent physical difficulty of these poses, can make it so that gravity gets the best of us.
How to Balance in Vinyasa Yoga Sequences
A solution can be isometric contractions, engaging muscles while not notably changing their length. These contractions help to stabilize yoga poses through increasing how much the muscles work to hold bones in place. At the same time, they don’t change our alignment because they don’t change muscle length.
Isometric activation can also build heat, thereby preparing muscles for deep stretching. Working this way in asana practice can also contribute to its overall strengthening effects, as well as its many other health benefits. Read on for how to use isometrics to stabilize and strengthen three common vinyasa poses to make them even more effective at promoting health and wholeness.
Om Shanti!
4 Yoga Tips For Plank Pose, Lunge Pose & Warrior Pose
Follow these general guidelines in working with these three yoga poses:
-
Hold each pose for five to ten breaths.
-
After practicing the first pose (Phalankasana), practice the second pose with the right foot forward, followed by the third. Then take the second and third pose on the left side (perhaps taking the first pose again in between).
-
Try switching it up some days: Take the left side first and then switch to the right side.
-
Have two blocks handy.
Phalakasana (Plank Pose) 
-
Start in Bharmanasana (Tabletop Pose), shoulders over wrists and hips over knees. First ensure that your biceps are spinning forward and your triceps are spinning backward, while every part of your hand is grounded (nothing popping up). If you need to externally rotate your wrists so your fingers face slightly outward in order to properly align your arms, do so. Spread your fingers wide, like the legs of a starfish.
-
All of this established, step your feet back to where you’re on the balls of your feet, with your heels rising high. With your arms straight, keep your shoulders over your wrists. Fix your drishti (gaze) six inches to a foot in front of your mat—not out, not down, but a combination of the two. Roll your shoulders back to widen your collarbones.
-
Lift your hips just slightly. (Most people tend to let their hips dip too far down in this pose.) Feel your core activate through scooping your belly into your spine, beginning your isometric contractions.
-
Continue this engagement farther out to the periphery of your body, squeezing your toes toward heels of your hands and vice versa. Push out through heels, as if pushing into a wall behind them. Feel your inner thighs spiral slightly up toward the ceiling and hug them in towards each other, keeping them hip-distance apart. Breathe into the strength and stability you’ve created.
Anjaneyasana (Lunge Pose)
-
From Plank Pose, draw your right knee into your chest and step your right foot forward, planting it in between your thumbs. Align your front (right) knee directly above your front (right) ankle.
-
Put a block under each hand, adjusted to a height where your hands can lie flat. Engage your core to support your torso, rather than laying it all on your blocks–which are just there for a bit of support–or resting on your front thigh. Use that support to find a bit more length through your spine as you inhale. Soften around that length as you exhale. Find your drishti again, not out or down, but in between the two (six inches to one foot in front of the top of your mat).
-
Gently draw your right hip back. Your left hip will most likely draw slightly forward. Approach this hip squaring gently, slowly, and cautiously, so as to not aggravate your sacroiliac joint.
-
Now focus on your feet. Ground your right foot as in Tadasana (Mountain Pose): Ground your right big toe mound and lift up the right instep. Push out through your back (left) heel, so that it rises above your back (left) toes. Feel your back toes drawing toward your front heel. To further strengthen and stabilize the pose, squeeze your inner thighs in toward each other, though not actually coming together—a true isometric contraction.
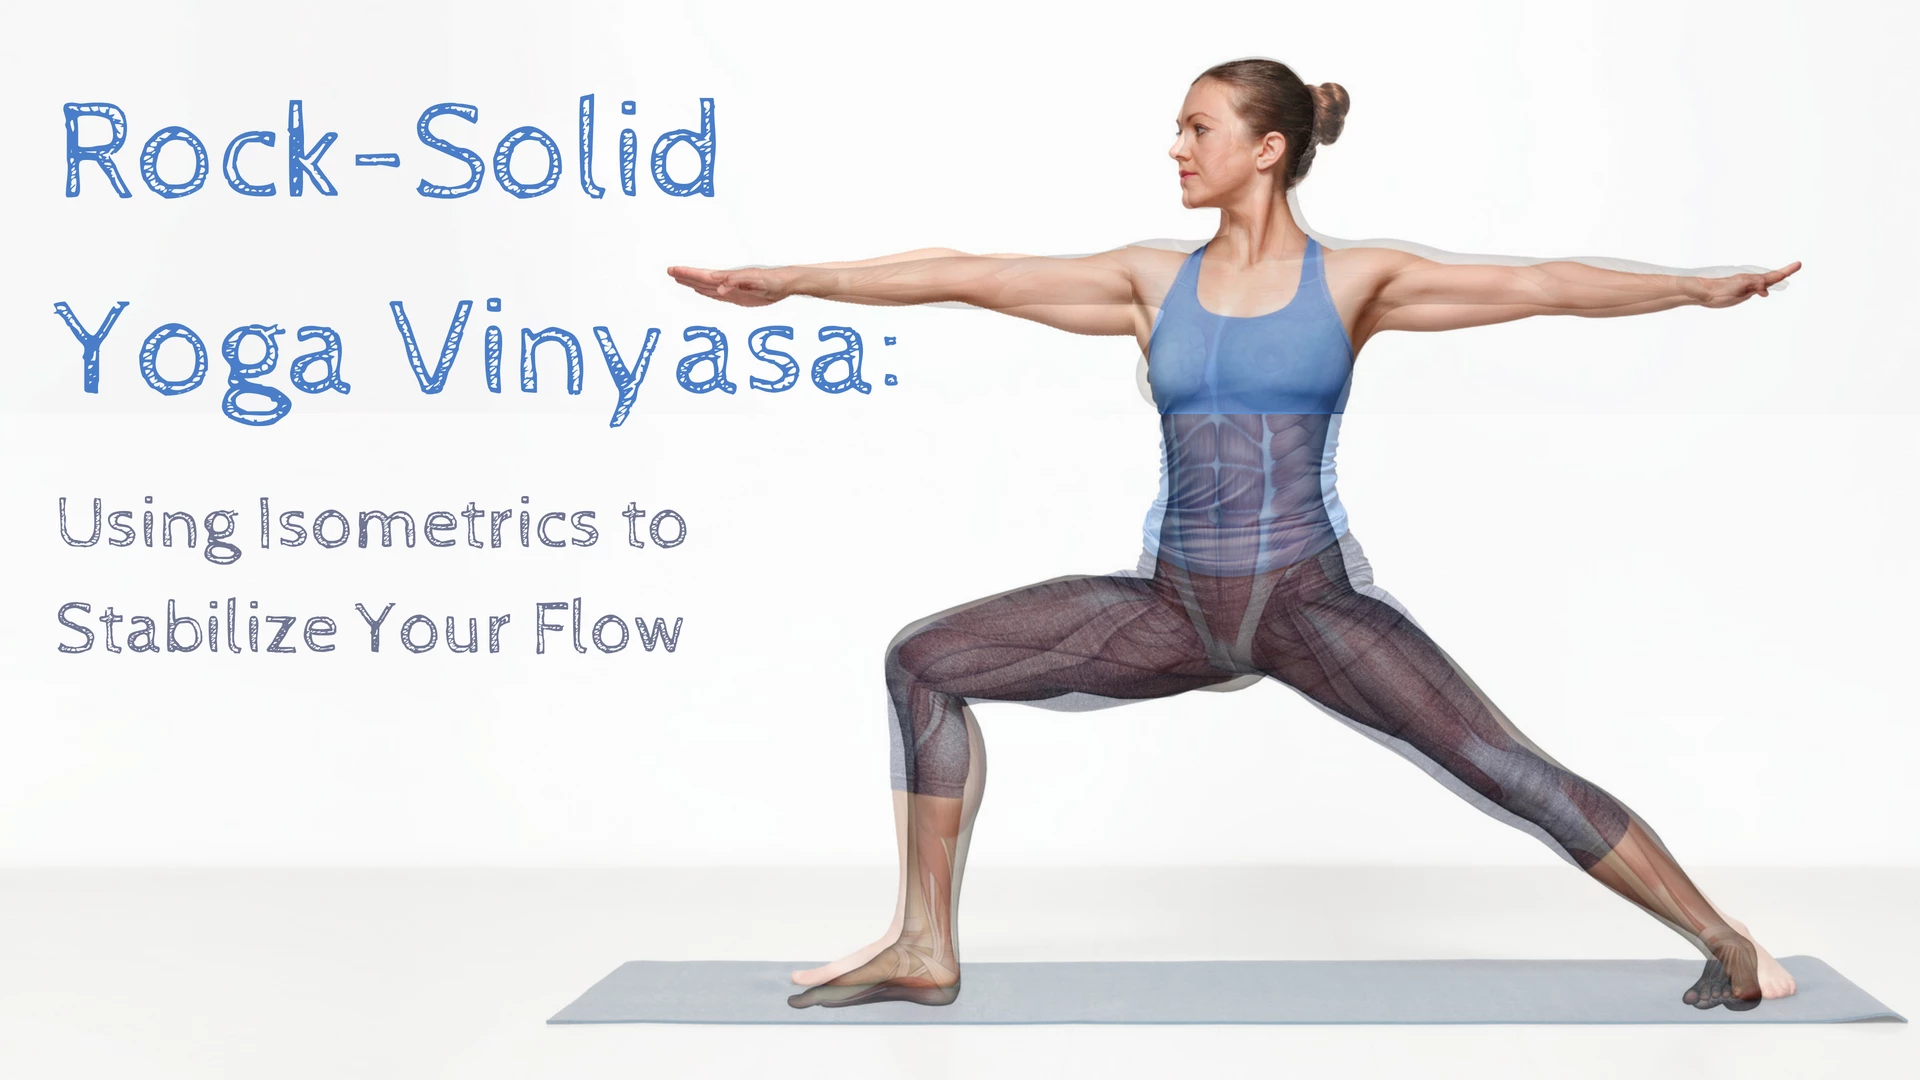
Virabhadrasana II (Warrior II) 
-
From Anjaneyasana, ground your back heel down, so that your toes point forward anywhere from 30 to 60 degrees (depending upon your anatomy—follow your body’s signals to know what angle is best for you). Let your back hip swivel just a bit farther forward, toward your front foot. This helps your front knee not fall inward. Make your tailbone heavy. Keep your front knee right over your front ankle, and maintain your Mountain Pose foot, bringing these same qualities to your back foot as you plant it down.
-
To set up your upper body in the pose, swing your left arm forward, up, and back as your torso rises to vertical (right over your hips). Extend your front (right) arm forward, directly out of your front (right) shoulder.
-
Bring in strength through your arms by imagining someone is pushing down on them, but you don’t want to let them move your arms downward. Fix your gaze over your front (right) fingers. Let that help you stay focused, along with your deep and rhythmic breathing. Lift your chin just slightly, so that it’s parallel with the floor, for a feeling of confident strength as well as an unobstructed flow of breath.
-
Drawing attention back to your feet, feel your heels draw apart from each other (the opposite of what you did in Anjaneyasana) to light up your inner thighs. At the same time, squeeze your inner thighs in toward each other, and your outer thighs outward, while actually not moving. A stable base in your legs thus created, you can feel strong and unwavering up through your torso.
-
Breathe here, creating length through your spine as you breathe in and softening into the pose (perhaps bending just a bit deeper into your front knee, so long as it doesn’t travel past the same ankle) as you breathe out. Recognize your own strength and stability!
Study with YogaUOnline and master teacher, Donna Farhi – Yoga for Lower Back Pain: Keys to Sacroiliac Stability and Ease of Movement.
Here's another yoga tips article from writer Kathryn Boland – Twisting Postures for Grounded Flexibility.
 Kathryn Boland is an RCYT and R-DMT (Registered Dance/Movement Therapist). She is originally from Rhode Island, attended The George Washington University (Washington, DC) for an undergraduate degree in Dance (where she first encountered yoga), and Lesley University for an MA in Clinical Mental Health Counseling, Expressive Therapies: Dance/Movement Therapy. She has taught yoga to diverse populations in varied locations. As a dancer, she has always loved to keep moving and flowing in practicing more active Vinyasa-style forms. Her interests have recently evolved to include Yin and therapeutic yoga, and aligning those forms with Laban Movement Analysis to serve the needs of various groups (such as Alzheimer’s Disease patients, children diagnosed with ADHD, PTSD-afflicted veterans – all of which are demographically expanding). She believes in finding the opportunity within every adversity, and doing all that she can to help others live with a bit more breath and flow!