While yoga practice usually promotes stretching tight muscles and increasing flexibility, an often-overlooked benefit is a myofascial release that can happen during your yoga practice.
“Myo” refers to muscles. Fascia is what wraps and connects the muscles, organs, bones, nerves and blood vessels of your body. Together, they make up the myofascial system of your body. The myofascial system is often described as a spider web-like substance or a lining that’s similar to the thick white membrane that separates citrus fruit from its peel.
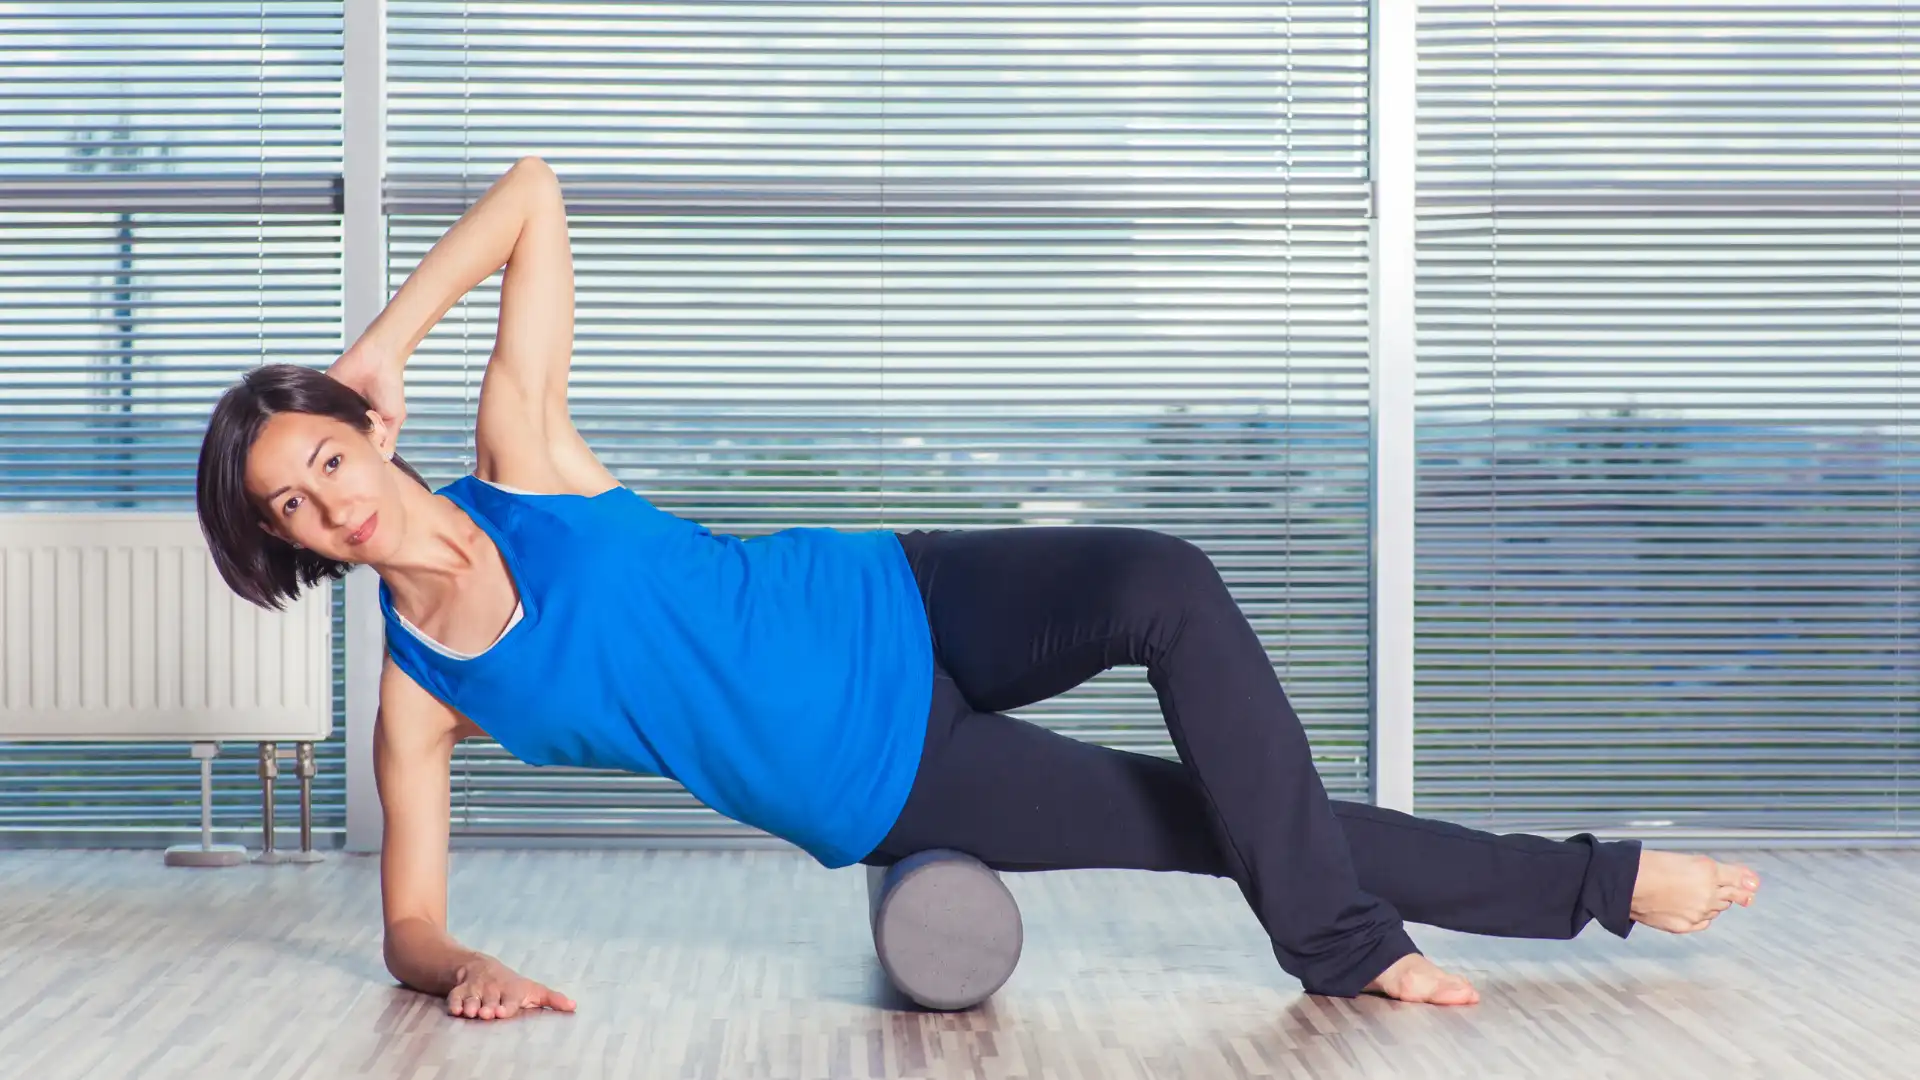
A Vinyasa yoga practice can encourage the release of tight muscle or fascia tissues. Myofascial massage, whether with a foam roller or myofascial release balls, is a technique using gentle pressure on the soft tissue area while simultaneously applying traction to the fascia.
Foam rolling can free up more mobility than passive stretching or a yoga practice alone.
Benefits of Myofascial Release
- Increased range of motion
- Increased blood flow to a specific area
- Reduced pain and stiffness
- Increased hydration through compression and release
- Elimination of toxins
- Improved nerve signal flow
- Break up of trigger points
Areas of tissue in your body can become thickened or inflamed due to injury, a sedentary lifestyle, and repetitive movement, such as from cycling or running, or lack of appropriate stretching. The deepest layers of tissue, where scar tissue most commonly builds up, often can be reached better with a combination of yoga and foam rolling.
Tips for Effective Foam Rolling
- Use a foam roller once your muscles are warmed up, rather than at the beginning of your yoga practice.
- Avoid rolling over bones or joints.
- Incorporate a foam rolling stretch as a preparation for a deeper hold or deeper stretching pose.
- Always support your body weight with your feet, hands or hips on the mat so as not to place all the weight of a specific body part onto the roller.
- Hold the roller in place over any tight or painful spots for about 8 to 10 deep breaths to encourage softening.
- Maintain a smooth, deep, and even breathing pattern during foam rolling just as you do during your yoga practice. Don’t hold your breath while rolling.
- Drink plenty of water after your session.
- Rest a day between foam rolling sessions.
- Note: If you have a diagnosed cardiovascular illness or chronic pain condition, consult your doctor before beginning any myofascial release therapy.
1. Bottoms of Your Feet
Your plantar fascia, the dense connective tissue on the bottom of your feet, both absorb and distribute the shock of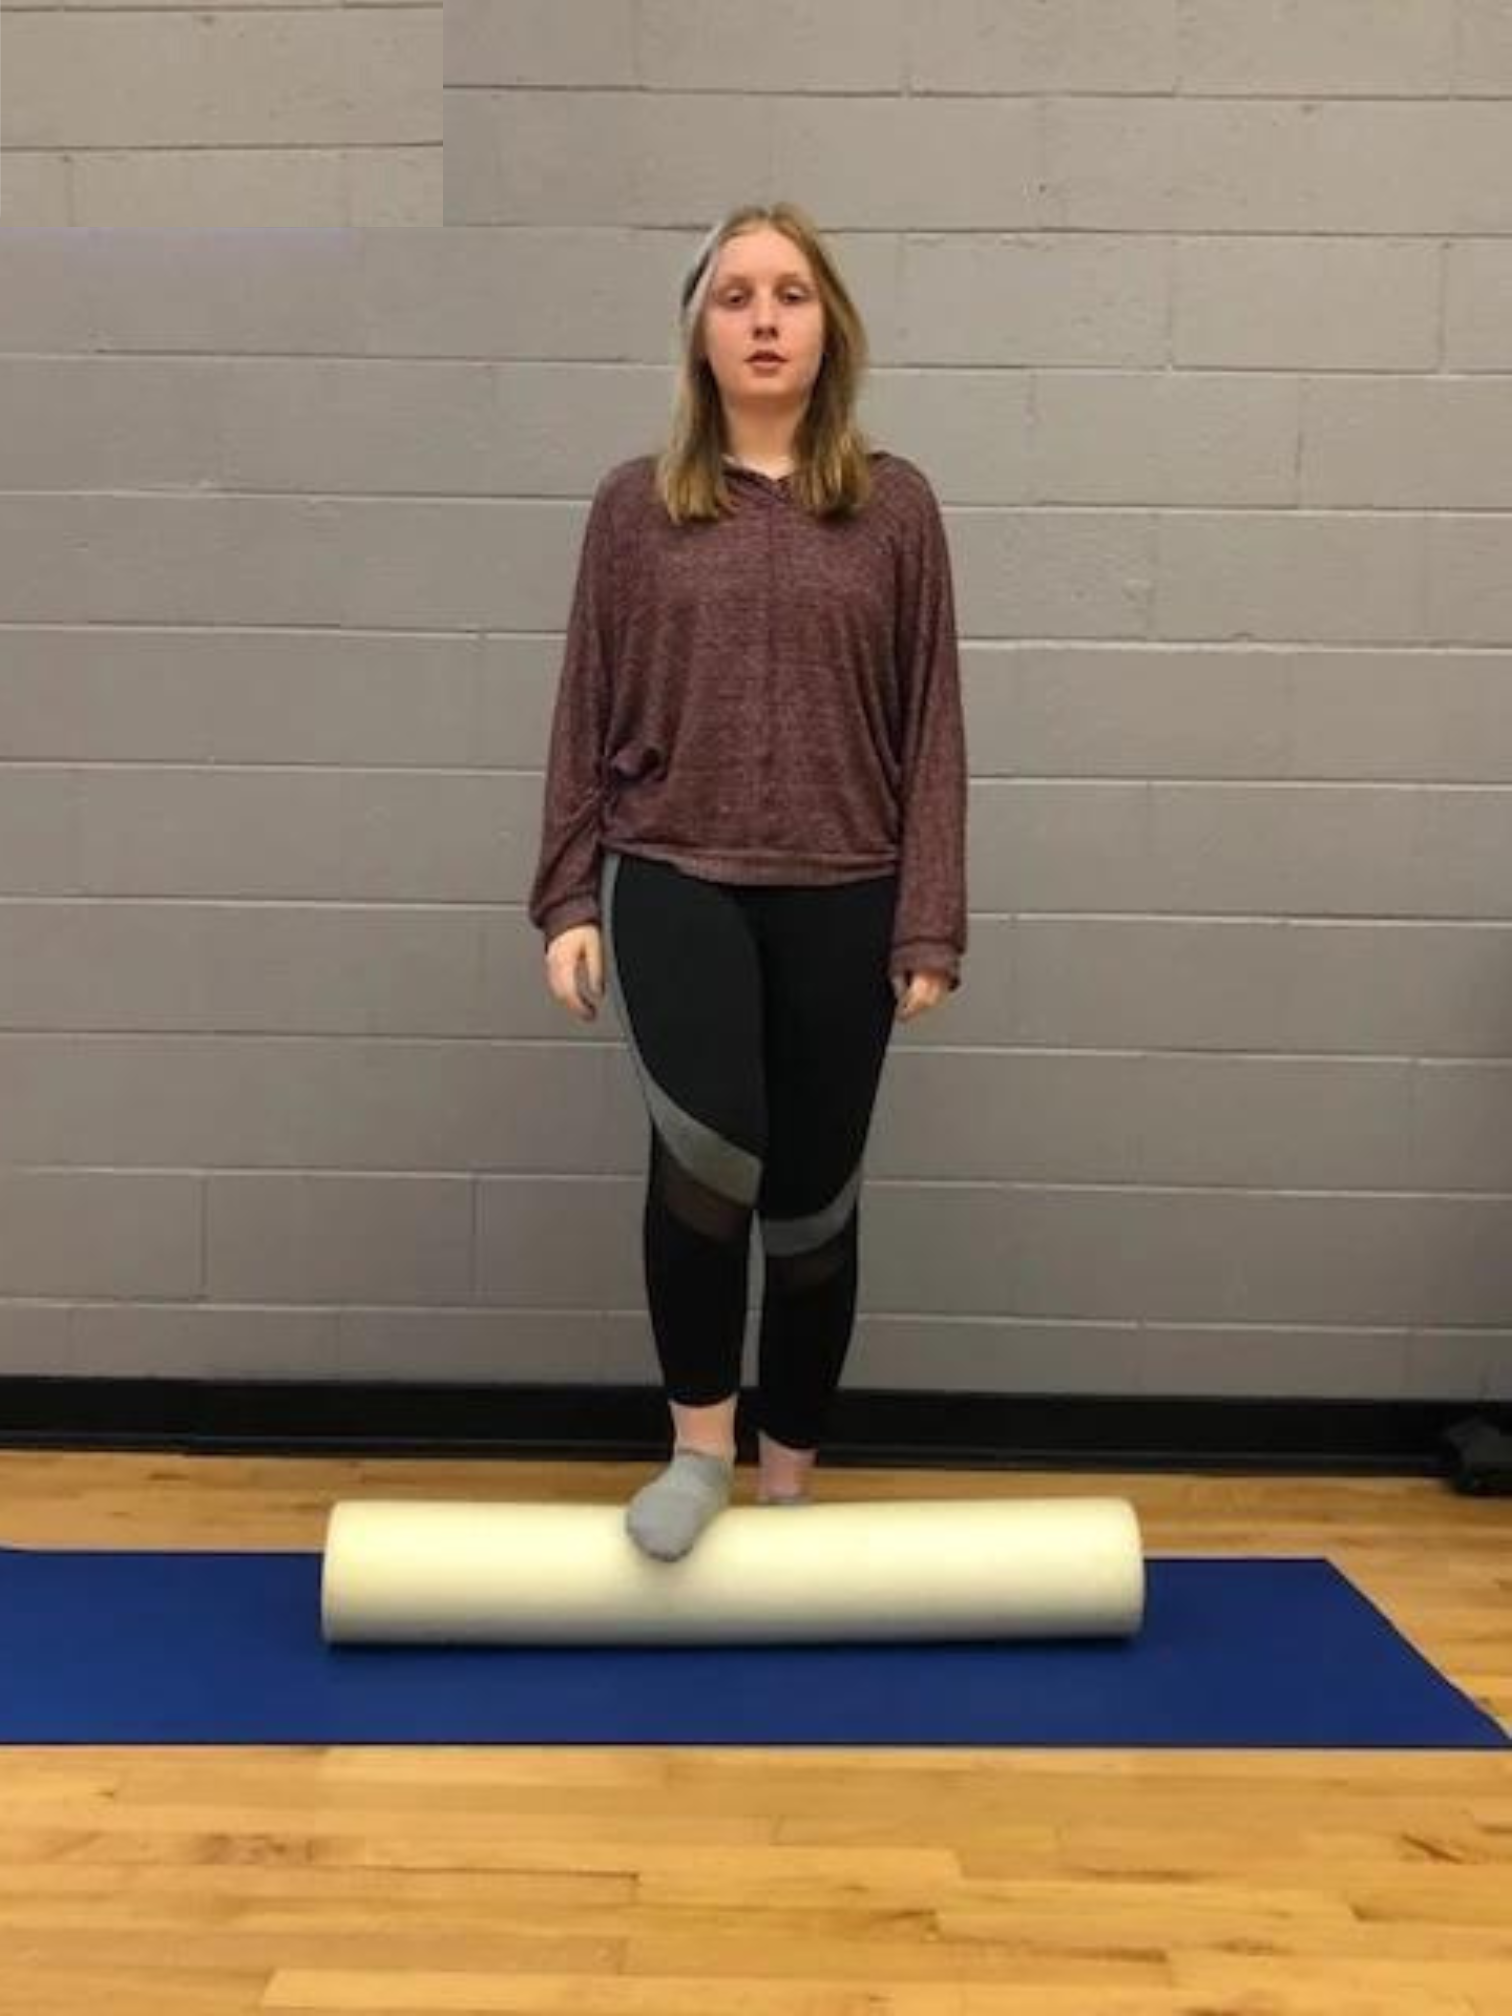 each step you take. Most people take on average between 5,000-7,000 steps daily. Those who run or are very active easily double this amount. The plantar fascia also helps with balance while stationary, such as holding a yoga pose.
The plantar fascia is part of the myofascial meridian line that runs from the bottom of the feet, up the back of the body and wraps around to the front of the skull. Therefore, foam rolling your feet could have benefits for the entire body.
- From a secure standing or seated position, place the foam roller horizontally under one foot. Feel free to stand next to a wall to stabilize your balance.
- Slowly roll the entire length of your foot along the foam roller.
- Switch feet.
2. Iliotibial (IT) Band Stretch

Although the iliotibial (IT) band is not a muscle, but rather a deep line of connective tissue that originates from the outer hip to the outer knee, it is still one of the most common foam rolling stretches. Rolling out your IT band has both pros and cons, so it’s best to be gentle and slow when using the foam roller on your outer thigh.
The IT band is designed to be somewhat tight to keep the hips stable. Therefore, overstretching it could create problems other than those caused by an overly tight IT band, a common side effect of long-distance running.
Gentle, controlled stretching and rolling of the IT band has been shown to increase the range of motion in both the knee and hip joints while maintaining stability. However, the tissue that makes up the IT band is very sensitive, so yoga students should be careful to use only light pressure to the area.
- Begin lying on your right side, propped on your right elbow for support.
- Place the foam roller horizontally across your body just below your right hip.
- Bend your left leg and place your left foot flat onto the mat in front of you to support yourself and relieve some of the pressure. Your top foot will also help with balance.
- Remember never to roll over a bone or joint; roll from just below your hip, to just above your right knee.
3. Thoracic Spine Opener
Matsyasana (Fish Pose) is perfect for opening the thoracic spine, the part of the spine (other than the sacrum) that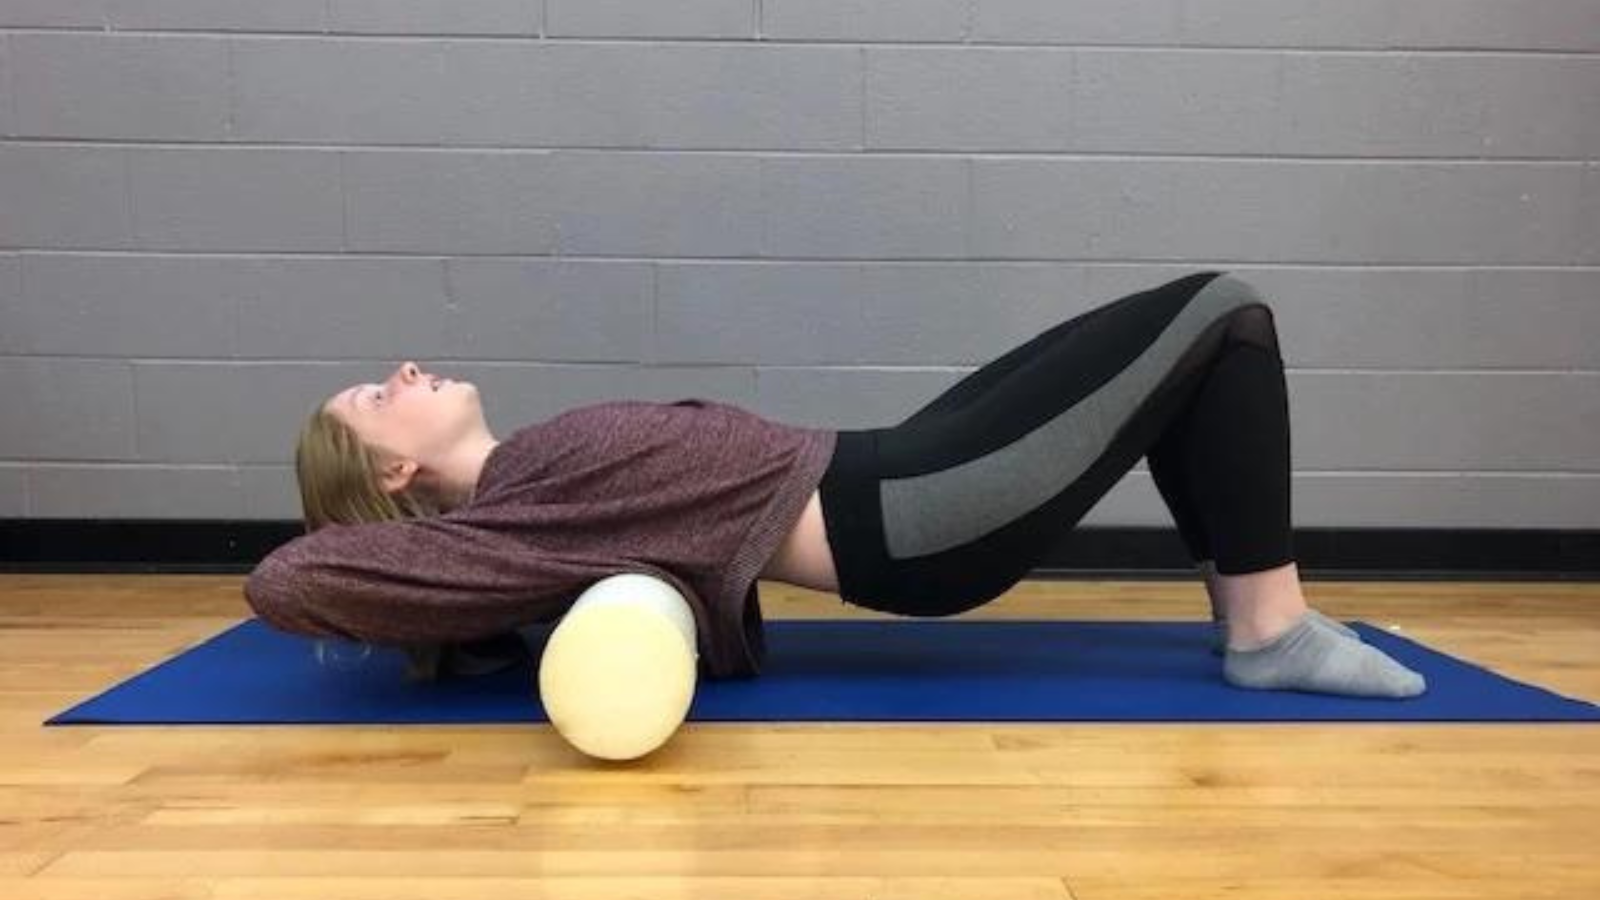 is the least flexible. Fish Pose is a deep stretch for the front of the body, including the chest and shoulders. It also strengthens the muscles in the back and neck, relieves spinal tension and improves posture.
Using the foam roller on your upper back can mobilize the thoracic spine and prepare it for a deeper and more relaxing Fish Pose.
- Sit on the front of your yoga mat with your knees bent and feet flat on the floor.
- Place the foam roller horizontally across your yoga mat behind you, slowly lowering yourself down onto the roller.
- As you lower yourself down to a reclining position, your back should land with the foam roller along the lower edges of your shoulder blades.
- Interlace your fingers behind your head to support your neck.
- Push into your feet to lift your hips off the mat.
- Roll toward the base of your neck, but not onto your neck, and down to the middle of your back.
4. Gluteus Muscles
Foam rolling the connective tissue of the gluteus muscles and the hips before coming into Eka Pada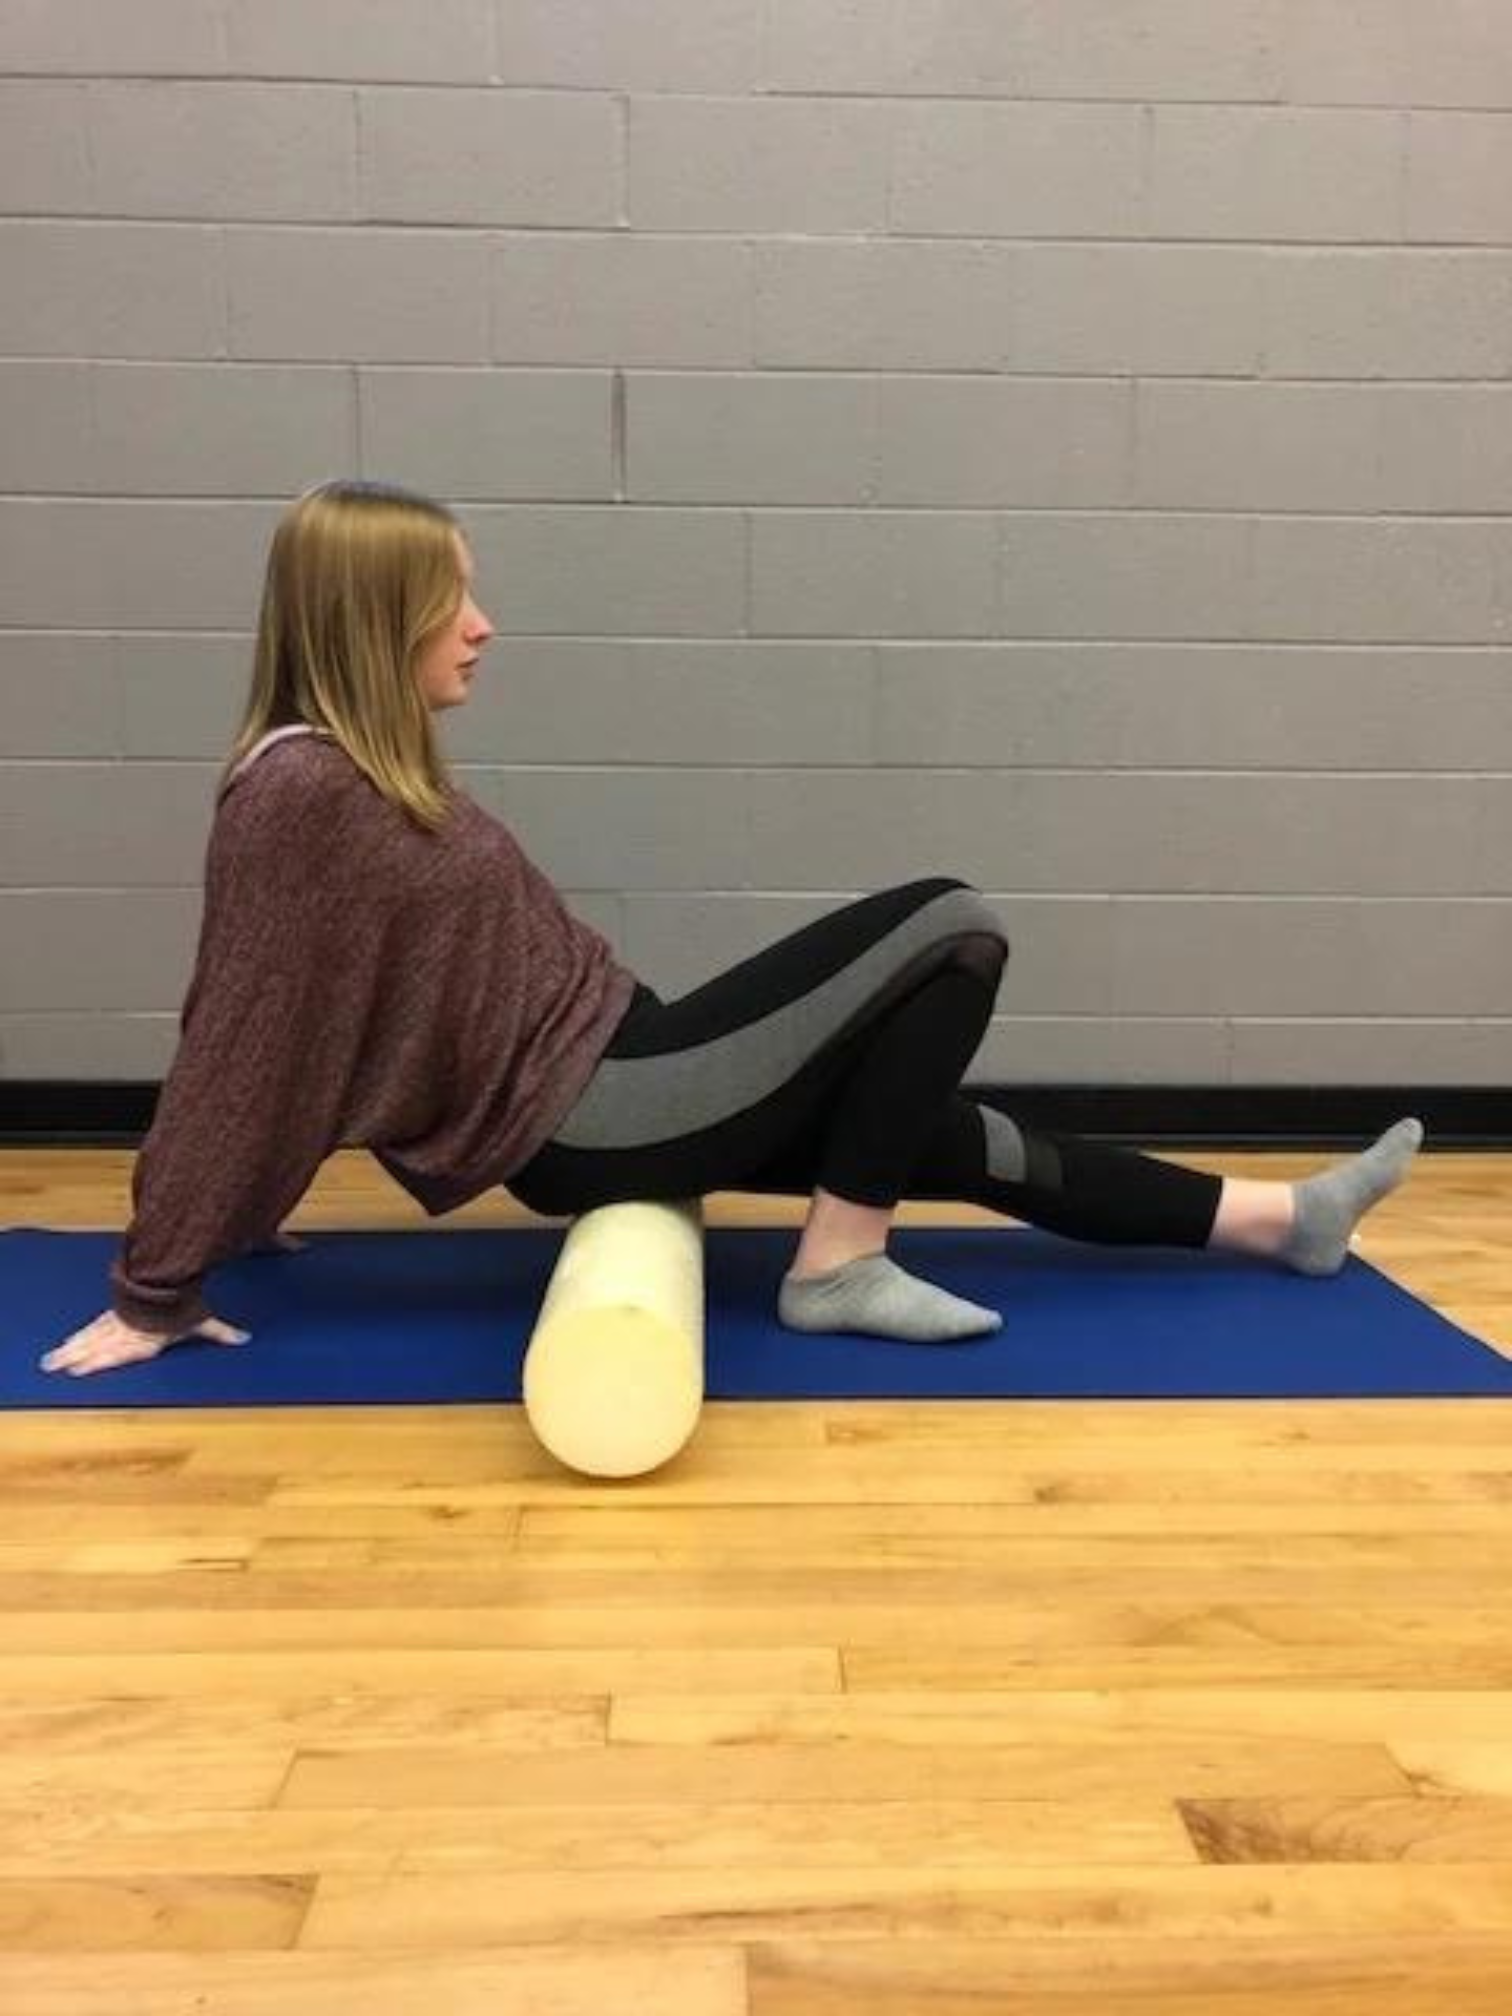 Rajakapotasana (Pigeon Pose), can make the yoga pose more comfortable and more accessible for many yoga students.
- Sit on the foam roller with both of your glutes squarely on the roller and your feet flat on the floor in front of you.
- Extend your right leg straight in front of you, keeping your left knee bent and your left foot planted on the floor for support
- Slowly roll back and forth.
- Switch sides by bringing your right foot securely to the floor and extending your left leg.
- For a deeper hip release, cross your right ankle onto your left thigh as you would in Seated Pigeon. Gently roll back and forth.
- Switch sides bringing your left hip into Seated Pigeon and roll.
5. Plank/Quad Release
A foam roller can help to release the quadriceps muscles, which may allow for greater flexibility in poses such as Dhanurasana (Bow Pose) or Ardha Bhekasana (Half Frog Pose).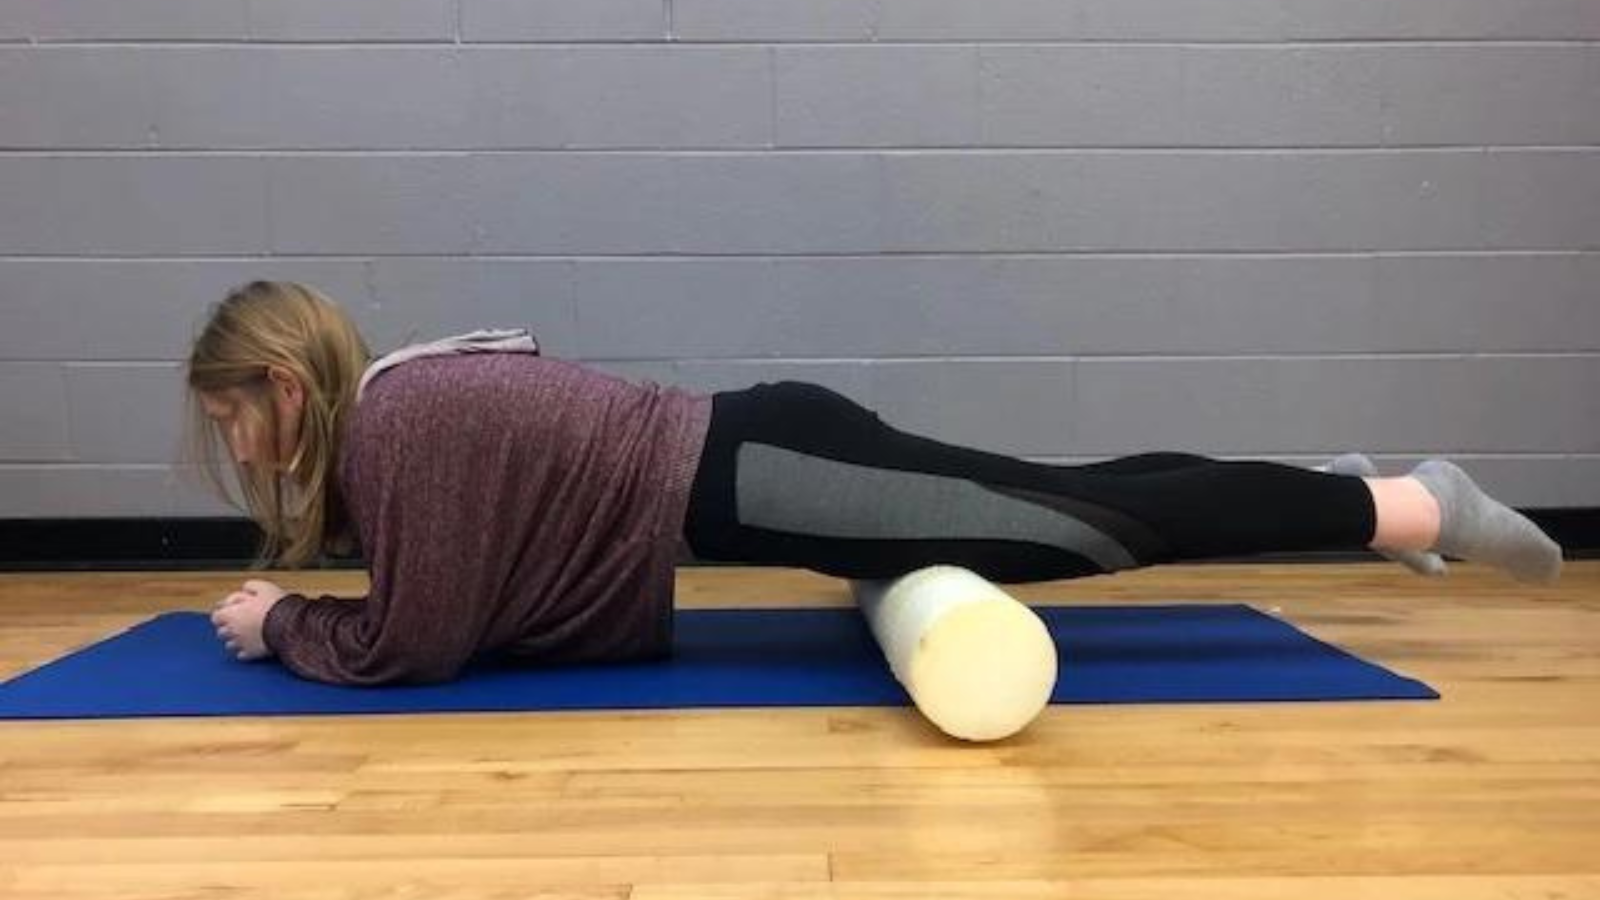
- Begin on your hands and knees. Slide the foam roller horizontally in front of your knees and lower down onto your forearms into a forearm plank position.
- With the middle of your thighs on the foam roller, walk your elbows forward and back rolling up and down the length of your thighs.
- Be sure to avoid rolling onto or over your kneecaps.
Another helpful asana practice tips article from Jennifer Williams-Fields-Restorative Yoga: A Sequence to Build and Maintain Resilience.
Interested in teaching Restorative Yoga? Study with Judith Hanson Lasater and YogaUOnline – Teaching Restorative Yoga: Revitalize and Rebalance.
 Jennifer Williams-Fields E-RYT 200 is passionate about writing, yoga, traveling, public speaking and being a fabulous single momma to six super kids. Doing it all at one time, however, is her great struggle. She has been teaching yoga since 2005 and writing since she first picked up a crayon. Although her life is a sort of organized chaos, she loves every minute of the craziness and is grateful for all she’s learned along the way. Her first book “Creating A Joyful Life: The Lessons I Learned From Yoga and My Mom” is now available on Amazon. She has had her essays featured on Yahoo! and Dr. Oz The Good Life. She is a regular writer for Elephant Journal Magazine, Your Tango and YogaUOnline. See more from Jennifer at jenniferwilliamsfields.com

