Keep Your Hips Happy With This Anatomically Sound Warrior 2 Alignment

Article At A Glance
Are you puzzled by proper Warrior 2 alignment in yoga? In the past, the “old-school” approach insisted on squaring your hips with the mat’s edge, but times have changed. Discover a smarter, anatomy-friendly way to align your body in wide-legged standing poses and improve your yoga practice for the long haul.
Confused about proper Warrior 2 alignment? In the “olden days” of yoga (I’m talking 10ish years ago when I did my 200-hour yoga teacher training), there was this notion that you should “square” your hips off with the long edge of your yoga mat in wide-legged standing poses like Warrior 2, Triangle, and Extended Side Angle.
I remember being told to imagine squeezing my body between two panes of glass. The idea was to try to keep both frontal hip points facing in the same direction.
I already knew this was probably not the most anatomically sound alignment from studying kinesiology and dabbling in biomechanics. But this notion was still commonplace in most Vinyasa Yoga classes I attended at that time in San Francisco. So I practiced this way as it was the norm.
A Smarter Way to Find Your Warrior 2 Alignment (And Alignment in Other Wide-Legged Standing Yoga Poses)
 Fortunately, a new wave of yoga teaching and practice is now emerging. It’s more common in yoga teacher training today to find an alignment philosophy that is better attuned to our anatomy.
Now we know that pure-plane movements are not natural or necessarily healthy for the body, and we shouldn’t force our bodies into these alignments for the sake of what we think a yoga pose “should” look like.
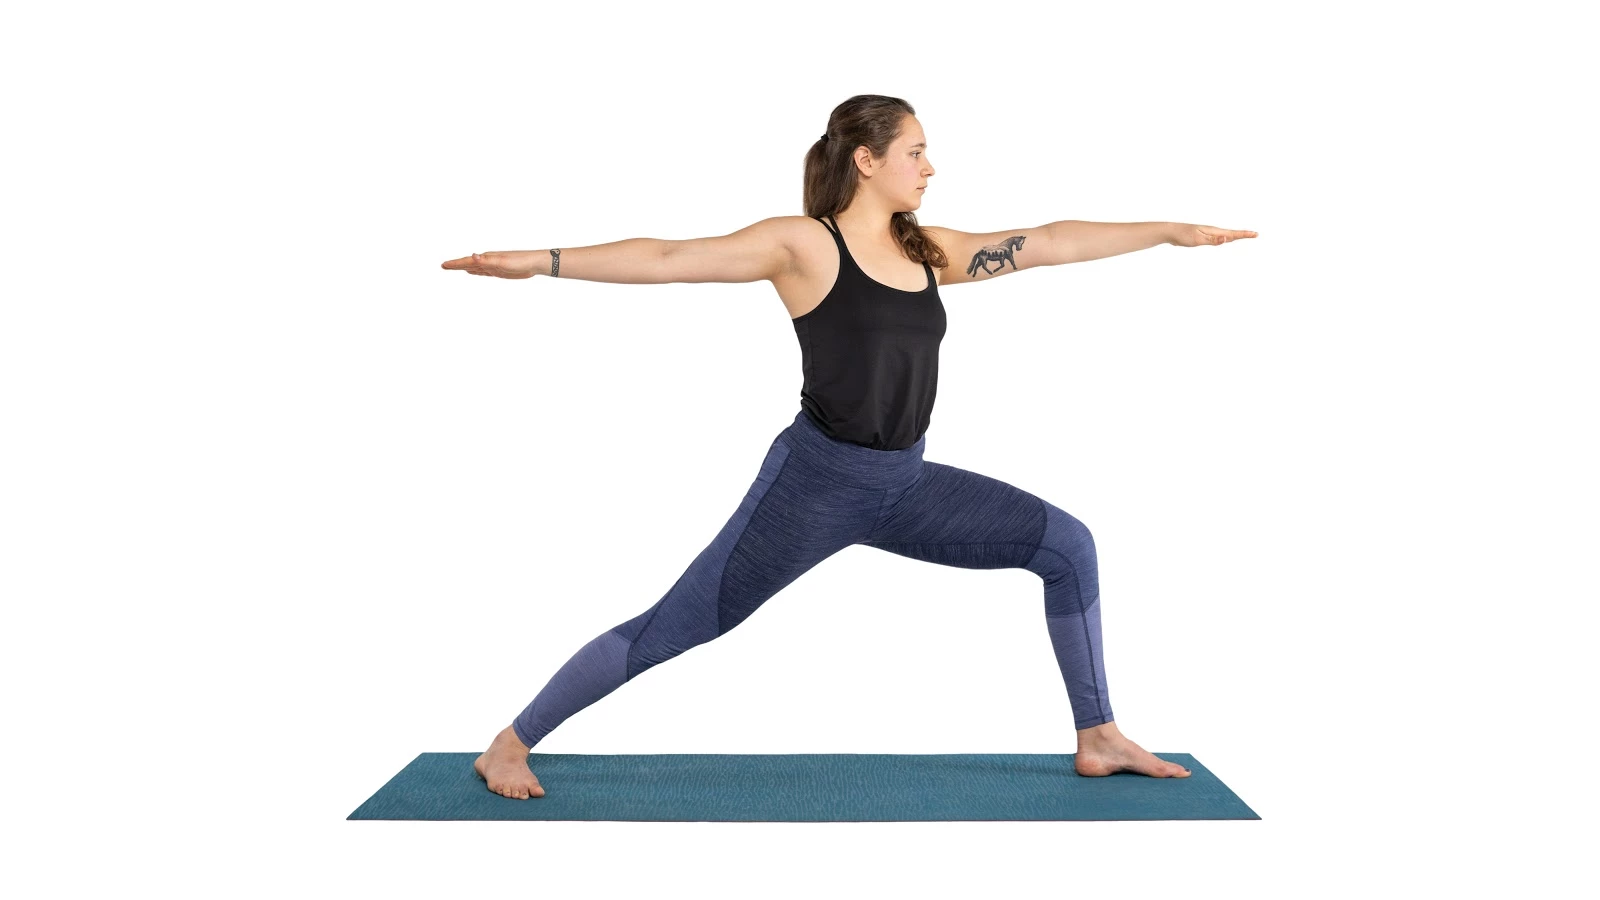
In the case of our friends in the wide-legged yoga pose category (like Warrior 2), this means we now allow the back hip to rotate forward slightly so the entire pelvis begins to face toward the front thigh (and the front of the mat).
This creates more space in the sacroiliac joints and also allows the femur (thigh bone) of the back leg to move out of pure-plane abduction (movement away from the midline) and into a combination of extension (in this case, the movement toward the back of the mat) and mild abduction. This is a much healthier and more sustainable position!
A slight internal rotation of the back hip also makes it easier for the front thigh to rotate more externally. That’s because when we force the hips to face the long edge of the mat, we also tug on the inner thigh muscles of the front leg. This, in turn, can pull the knee “off track,” which may cause strain in the joint over time.
How to Find Hip-Friendly Warrior 2 Alignment in Yoga
-
Take a Wide Stance To Improve Warrior 2 Alignment
Step your feet wide apart from each other on your yoga mat, so your feet are about as wide as your hands are when your arms are extended out in a “T” position from your body.
-
Externally Rotate Your Front Thigh
Rotate from deep within your hip joint to point your right toes and kneecap toward the top of your yoga mat. This external rotation will also help your front knee track more toward the middle of your front foot.
-
Slightly Internally Rotate Your Back Thigh

Now allow your back leg to internally rotate slightly – again, do this movement all the way from the hip – not just at the knee. This may make your back toes point a little more toward the top of your yoga mat – in the same direction that your front toes are pointing.
-
Activate Your Back Leg in Warrior 2
Keep pressing actively into your back foot, so your whole back leg stays very engaged in this position.

-
Rotate Your Whole Pelvis
As you internally rotate your back leg, also allow the left side of your pelvis to rotate forward a few degrees so your whole lower abdomen points more toward your front thigh.
-
Lengthen Your Spine
Lengthen your entire spine toward the ceiling. Think of lifting your ribcage up away from your pelvis to create more space in your back body.
Practice Anatomically Sound Yoga With Hip-Friendly Warrior 2 Alignment
These rules don’t only apply to Warrior 2, though!
Now that you know how to align your pelvis, you can adjust your hip alignment in all wide-legged standing poses, such as Triangle Pose, Warrior 2, Extended Side Angle Pose, and more.


