4 Ways to Change the Orientation of a Yoga Pose

One of my neighbors told me that her problem with yoga was that she couldn’t do any poses lying down because she always felt nauseated when she was lying down. And when she consulted her doctor about it, her doctor told her just not to do them. I said to her, “You don’t need to let that stop you! There are actually multiple ways you can do any yoga pose, so even if you can’t lie down, you could do a given pose standing up instead, for example.”
This reminded me of an important basic principle regarding making a pose accessible: change the orientation of the pose! (I introduced this concept in my post 6 Ways to Customize a Yoga Pose.) If I continue with my cooking metaphor, this is kind of like the time I took my children’s favorite soup recipe, Risi e Bisi (rice and pea), and turned it into a rice and pea salad because it was summer. They liked it!
Why Modify Your Orientation in Yoga Poses?
Yoga poses are classically divided into four groups: standing poses, seated poses, supine poses (on your back, same as the Sanskrit word supta and prone poses (on your belly). But for some, like my neighbor, all the poses in one of those groups aren’t accessible because that mode of practice isn’t available to them.
For example, maybe you can’t stand up at all due to illness, injury, or disability so you can’t do the classic versions of standing poses. Or maybe you can’t get down to and up from the floor so you can’t do the classic versions of seated, supine, and prone poses. Or maybe you need to do all your poses seated in a chair.
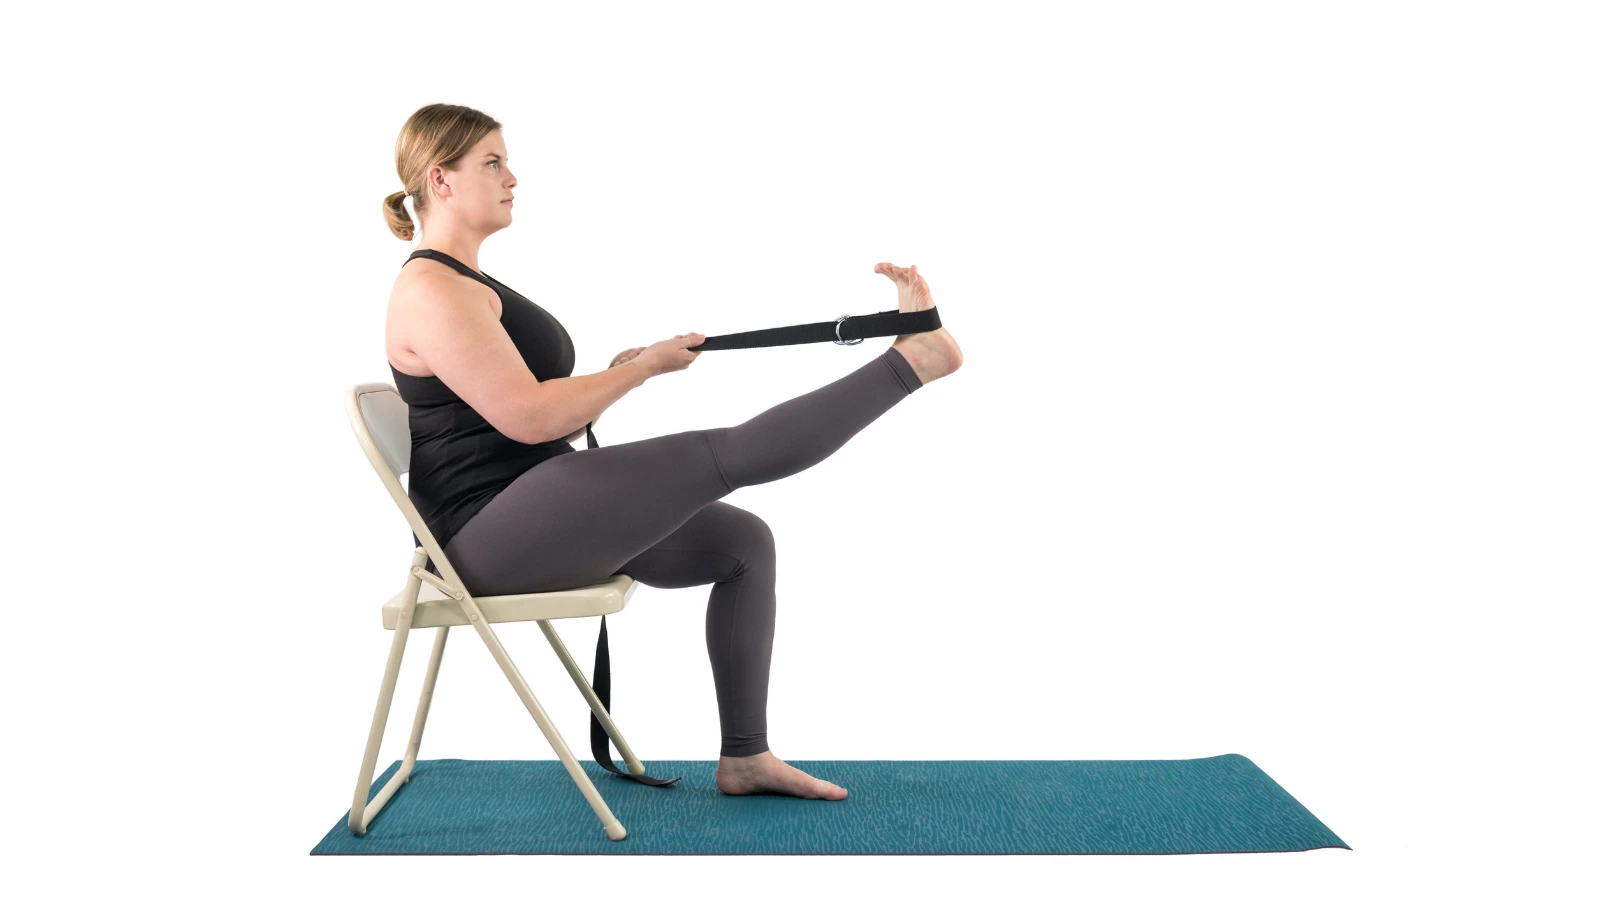
So if the classic version of a pose is not accessible to you because you can’t practice in that mode, try changing the orientation of the pose by practicing the basic shape of the pose in one of the modes that are accessible to you. In my neighbor’s case, for example, she could do a pose we usually do lying down, Reclining Hand-to-Toe Pose (Supta Padangusthasana), standing up instead, by practicing Extended Hand-to-Toe Pose (Utthita Hasta Padangusthasana) with the lifted leg supported by a chair or something higher, such as a countertop. For those in the opposite situation, you would do Supta Padangusthasana lying down or seated in a chair instead of standing up in Utthita Hasta Padangusthasana.

Sometimes, as in the case of Padangusthasana, a version of a given pose already exists in more than one orientation. If there are two poses with the same name but one begins with supta (supine) that gives you a clue. But when there isn’t, you can just go ahead and make up a new variation. For example, for Cobra Pose (Bhujangasana), which is normally done prone on the floor, someone (wish I knew who!) created a really nice variation that you do standing with your hands on the wall (you can see a picture of it below — under 3. Standing)
Once you start thinking along these lines, you’ll find a way to do almost any pose. Using this technique will not only give you more poses to practice at home on your own, but when you’re in class, it will allow you to figure out what to do on your own if your teacher is busy with something else and can’t help you. When I had a frozen shoulder, I used this technique in class all the time.
How to Modify Your Yoga Poses 4 Different Ways
1. Lying Down
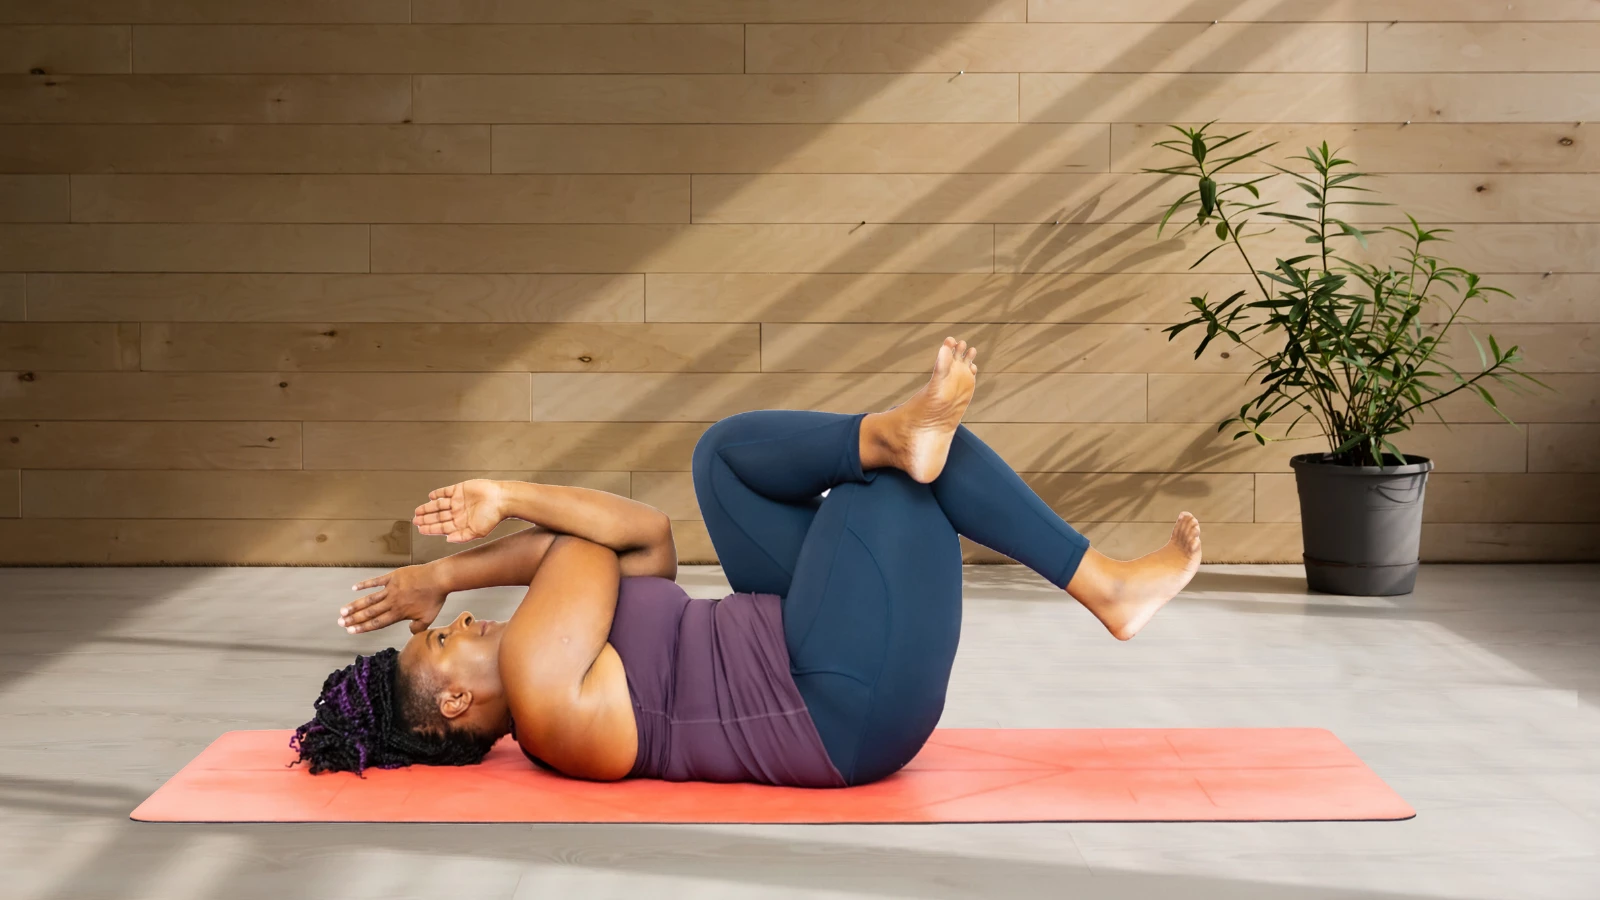
You can take the shape of many standing poses lying with your back on the floor with your feet on the wall, as if the wall was the floor and the floor was a wall. If you can’t get up and down from the floor, you could use a yoga platform, a dining room table, a sturdy coffee table, or even a firm bed as your floor. For example, you can practice Tree Pose (Vrksasana) on the floor.

When you do the standing pose lying on the floor, rather than just resting against the floor in the shape of the pose, activate the same muscles that you would as if you were standing, so you’re actively doing the pose. For example, in Tree Pose, firm your “standing” foot into the wall as you press the foot of your bent leg toward your thigh and press your inner thigh toward the foot. Reach your arms overhead and activate them, as if you were reaching them up toward the ceiling.
You can even do Handstand Pose (Adho Mukha Vrksasana) by lying on your back with your hands on the floor! Keep the image of the classic pose in your mind as you activate your entire body.

2. Seated on a Chair
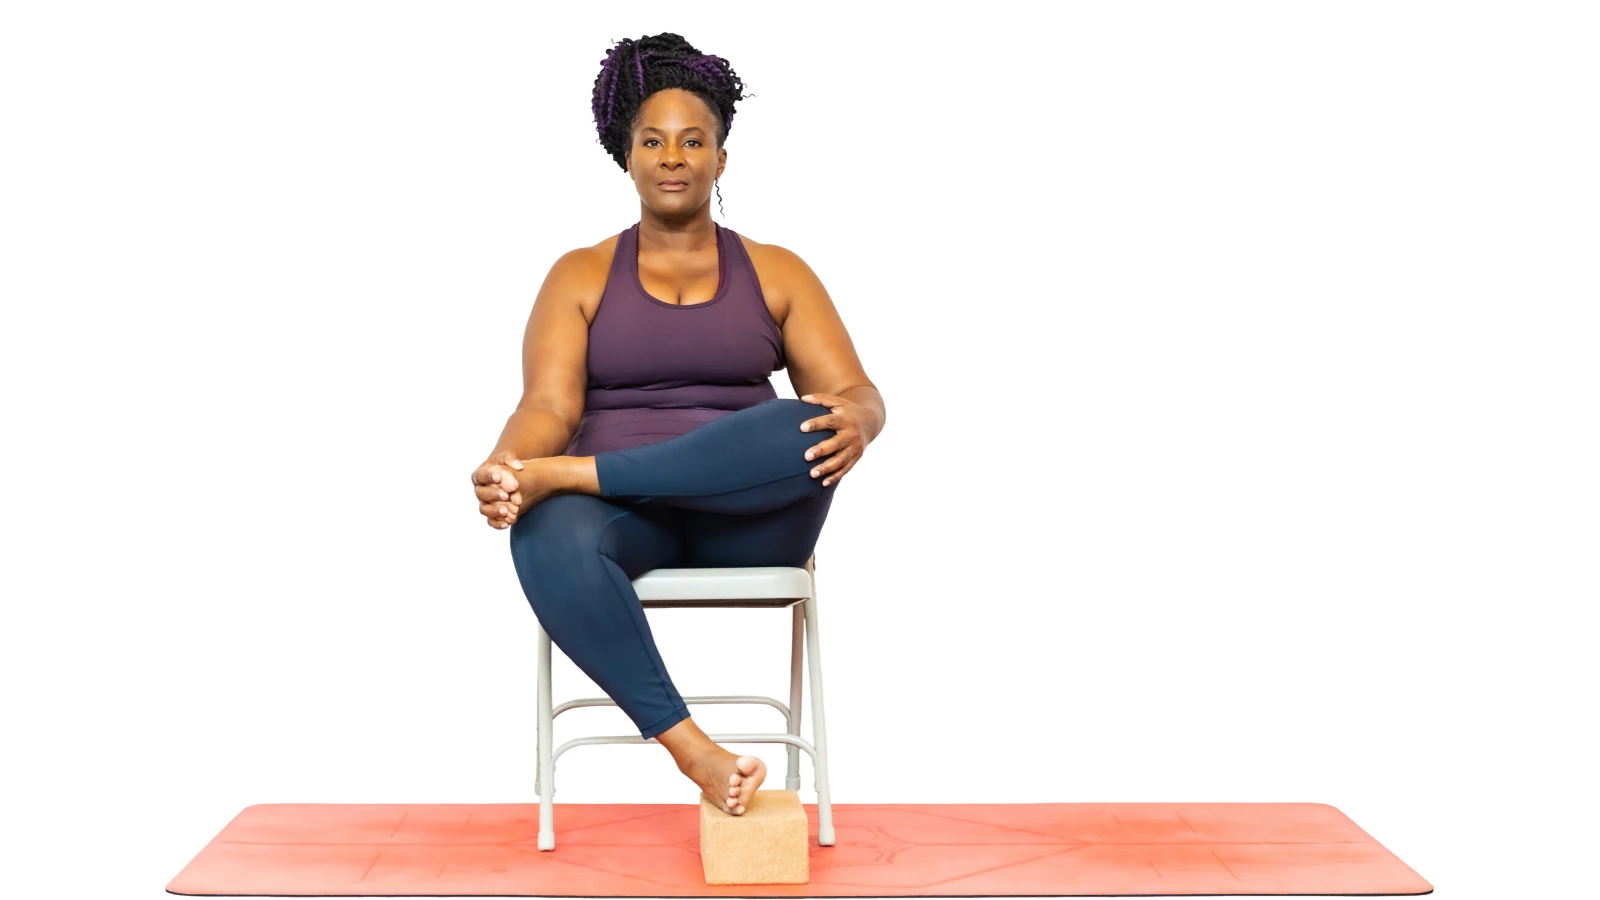
You can generally take the shape of any standing or seated pose with either part or all of your body when you are seated on a chair. If you can move your legs, your legs can take the same shape they would if you were standing without putting weight on them. Although your pelvis is supported by the chair, you will still be working against gravity to hold yourself up, so a chair version of a standing pose can be surprisingly physically demanding (I have tried them!). Here are some examples:
Tree Pose (Vrksasana) Modified by Sitting in a Chair

Eagle Pose Modification in a Chair

For those who can’t do supine or prone poses on the floor, you can often use two chairs and a lot of props to get into a close approximation of the pose.
These days I’m encouraging everyone who can get up and down to the floor, even with some help from a prop, and/or stand up even with support, to try to do some of your poses without sitting on a chair. Even if it’s very challenging for you, I think it’s worth your effort to maintain the agility and balance you do have by continuing to work on both these skills. So if they are at all possible, consider doing some floor and standing poses as well as chair poses. The photo above shows using a chair for Tree Pose to help with balance and strength.
3. Standing

If you think of the wall as the floor, there are many prone poses, such as Cobra Pose, that you can do standing with part of your body against the wall.
For example, I can see doing Locust Pose (Salabhasana) with your hip points against a wall and arms lifted behind you or Plank Pose (Phalakasana) with either hands or forearms on the wall. In his book Accessible Yoga, Jivana Heyman has a wall version of the entire Sun Salutation (Surya Namaskar)!
One advantage of standing at the wall over lying on the floor is that there is less weight on your hands, so these variations are very good for those with problems in the wrists or hands. Half Downward-Facing Dog Pose (Ardha Adho Mukha Svanasana) at the wall is the classic example of this. The wall version of Side Plank Pose (Vasisthasana) is another example.

And because your orientation to gravity is different—you no longer have to lift yourself up away from the ground—these versions are less physically demanding so they’re good for those who are weak or tired.
I can even imagine some supine poses against the wall, such as a passive backbend with a prop behind your shoulder blades and arms reaching up toward the ceiling or a wall version of Hasta Padangusthasana.
Obviously relaxing, reclined poses are not going to be relaxing if you do them standing up, so for restorative supine or prone poses, I would recommend using two chairs and a lot of props instead, as mentioned above. Even better, you could use a yoga platform, a dining room table, a sturdy coffee table, or even a firm bed as your floor.
4. Upside-Down vs. Right-Side Up
For those who cannot go upside down into a full inversion, if your condition allows it, you may be able to do a partial inversion in the form of a similar pose. For example, an alternative to Headstand Pose (Sirsasana) is to do a Standing Forward Bend Pose (Uttanasana) with your head on a block (or two) or with your head and arms on a chair or to do Wide-Legged Standing Forward Bend Pose (Prasarita Padottanasana) with head support. I did both of those when I had a frozen shoulder.

Instead of practicing Shoulderstand Pose (Sarvangasana), you could do a Supported Bridge Pose (Salamba Setu Bandha Sarvangasana), which is a much more gradual inversion that puts much less weight on your neck.
You can also try the pose right side up, such as Handstand with your feet on the floor and your hands in the air, as if they were touching the ceiling. I’ve seen fellow students doing that in class.
I hope you find these strategies useful and inspiring!
Also, read...
Teaching Svadhyaya: 3 Ways to Encourage Self-Study in Yoga
In Celebration of Gray-Haired Yoga – Busting the Myth of the Yoga Body
Related courses

Nina Zolotow, RYT 500, the author of the forthcoming book “Yoga for Times of Change” and the Editor-in-Chief of the Yoga for Healthy Aging blog, is both a yoga writer and a yoga teacher. She trained to be a yoga teacher at The Yoga Room in Berkeley, California, has studied yoga therapy with Shari Ser and Bonnie Maeda, and is especially influenced by the teachings of Donald Moyer. She also studied extensively with Rodney Yee and is inspired by the teachings of Patricia Walden on yoga for emotional healing. Her special area of expertise is yoga for emotional well-being (including yoga for stress, insomnia, depression, and anxiety). She teaches workshops and series classes on yoga for emotional well-being, stress management, better sleep, home practice, and cultivating equanimity.
Nina is the co-author with Baxter Bell of Yoga for Healthy Aging: A Guide to Lifelong Well-Being and co-author with Rodney Yee of Yoga: The Poetry of the Body (with its companion 50 Card Practice Deck) and Moving Toward Balance. She is also the author of numerous articles on yoga and alternative medicine.


