Supported Pigeon Pose (Kapotasana) is one of the most soothing yoga poses and a wonderful way to gently release the hips, sacrum, and lower back. Further, it helps to release constriction in the piriformis and psoas muscles. Gentle pressure on the belly relieves tension in the abdomen and stimulates the digestive system and kidneys. The upper body support helps alleviate stiffness in the neck, upper back, and shoulders. Supported Pigeon Pose is recommended for those who feel anxious or overwhelmed and for those who have trouble quieting their mind or keeping their eyes closed.
I practice this pose when I have an aching back, when my shoulders and neck are stiff, or when I just feel overwhelmed by the pace and demands of life and want to feel more grounded.
Cautions for Supported Pigeon Pose
Those with hip arthritis, unstable sacroiliac (SI) joints, and severe back issues should avoid this pose. If you have a pacemaker, it is recommended to place additional support under the chest and/or make an elbow rest for the head so there is no pressure on the device.
In general, to avoid injury, it is good to approach Supported Pigeon by doing other hip openers first, such as Supported Reclining Bound Angle Pose (Salamba Supta Baddha Konasana). This will help loosen the hip joints gradually and safely. Once your hips are more relaxed, you can more safely hold Supported Pigeon Pose in a way that benefits your body without injury to your knees or other joints.
Finally, although prone poses (face down) can be helpful for people with anxiety, those recovering from trauma may find they feel unsafe. If this is true for you, skip this pose for now and practice a supine pose (on your back) instead, such as Supported Reclining Bound Angle Pose or Empress Pose. And for everyone, if any restorative pose feels unsafe to you instead of relaxing, it’s best to find something else to do.
How to Practice Supported Pigeon Pose

Gather Your Props
To set up for the pose, you’ll need the following: a yoga mat, 1 to 2 bolsters, 1 to 3 blocks, and 1 to 2 blankets. A sandbag is optional. If you don’t have a bolster, you can use pillows or rolled-up blankets. If you don’t have a sandbag, you can use a bag of rice or other grains.
Start by spreading a yoga mat on the floor. Place a bolster vertically across the mat, placing it toward the top of the mat. Cover it with a towel if you have one. Place another bolster vertically toward the bottom of the mat and place a rolled-up blanket at the foot of it.
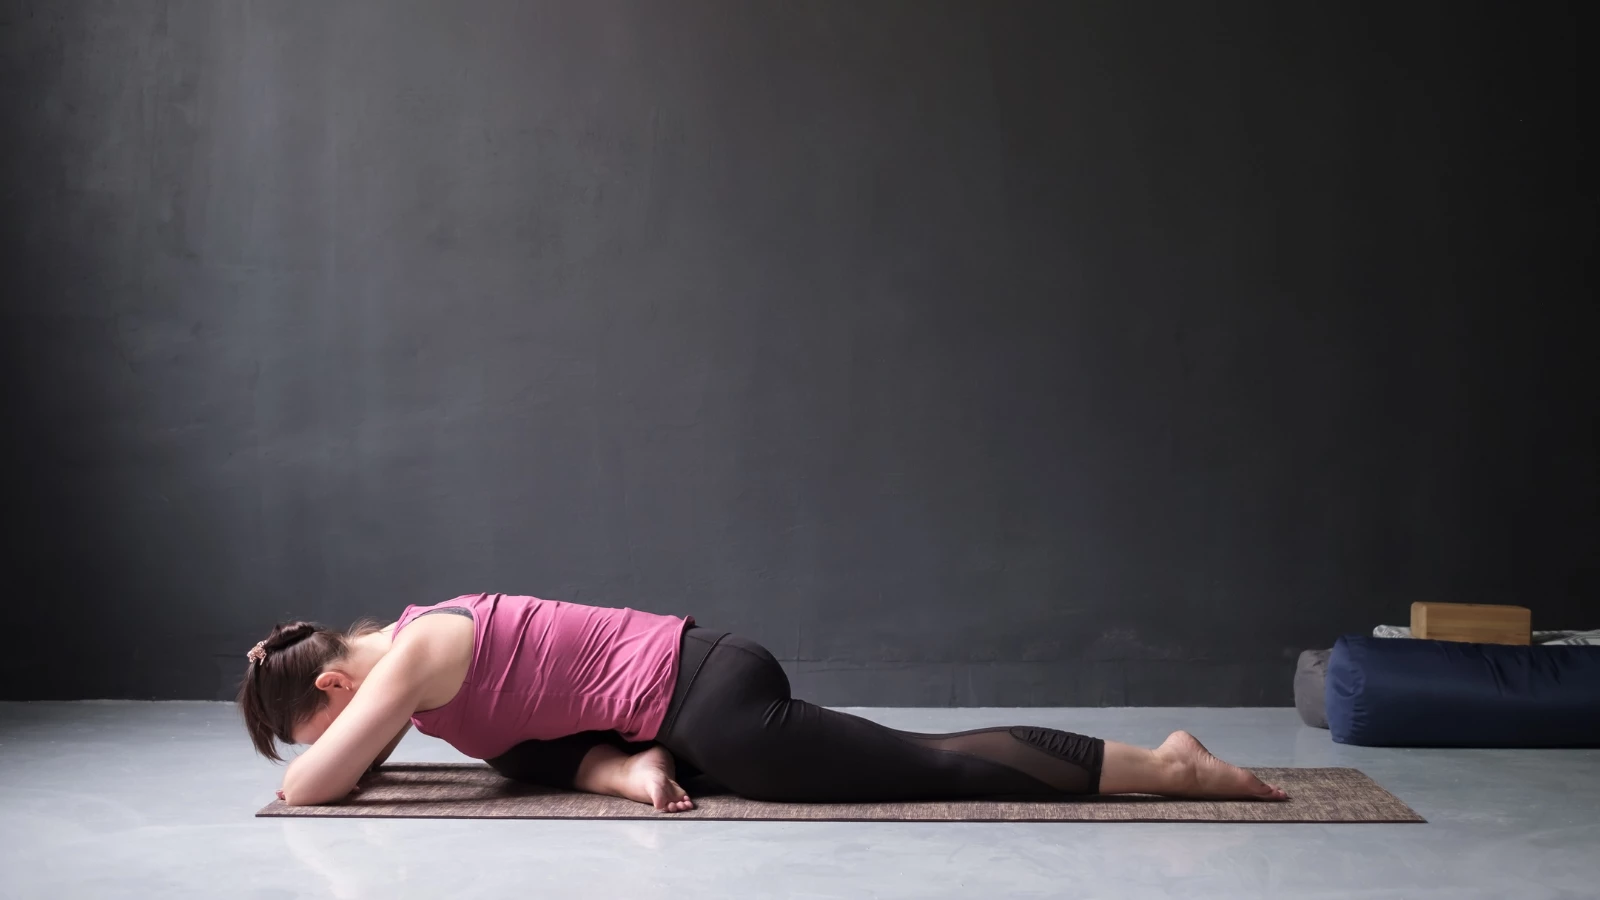
- Start in Tabletop Pose (Bharmanasana), placing your hands under your shoulders. Then move your hands forward and press up to Downward Facing Dog Pose (Adho Mukha Svanasana).
- Bend your left knee and bring your left leg forward, placing your knee on the floor just behind and slightly to the left of your left wrist, right up to the bolster.
- If your left hip doesn’t rest easily on the ground, slide a block or rolled-up blanket under it. (If your outer hip doesn’t have support, your body will fall to the left, making your hips uneven and distorting your sacrum. Or, if your hips are squared but your left hip is unsupported, there will be too much weight and pressure on your front knee.) Extend your back leg onto the top of the other bolster. Rest your back foot on the rolled-up blanket at the end of the bolster.
- Make sure you are evenly laid out, supported, and comfortable. Your left heel should point toward your right hip bone. Your back leg should be in a neutral position—not externally rotated. Make sure the back leg is straight.
- Avoid rolling your pelvis to the right and collapsing into your right hip. If possible, try to keep your pelvis level. Extend your hip bones mostly forward, but do not try to forcibly “square” your hips.
- Let your right thigh release to the back bolster, and move your left foot and shin toward the bolster, so your shin is parallel to the front edge.
- Flex your left foot to protect your knee. If your knee is comfortable, extend your torso forward over your left shin, walking your arms out in front of you and releasing your forehead onto the bolster, or turning to one cheek.
- As you fold forward, maintain the alignment of your hips and sacrum. Take your arms out to the sides of the bolster in a comfortable position.

- If needed, you can place support under your arms with blocks or rolled-up blankets. If it is difficult for you to go deep into the forward fold, raise the front bolster by sliding a block under it to slant the bolster. Or stack another bolster, blankets, or whatever is needed on top of the first bolster.
- Elongate the back of your neck. Allow your head to release toward the floor and let your shoulder blades draw towards one another. Allow your hips to sink down into the blanket and release. Try to avoid letting your pelvis pop up.
- Turn your attention inward and focus on the breath. Inhale to lengthen the heart forward and release into the support, exhale to soften and expand.
- Greet the sensations in the hips and entire body with an open mind, observing without judgment. If emotions arise, observe them and the changing sensations in loving awareness.
Supported Pigeon can be beneficial when we need to turn inward, such as during a time of grief, worry, stress or depletion. It can also be a good pose to quiet a busy mind.
Supported Pigeon Pose with a Sandbag

If you desire greater lengthening or slight weight to help keep your hips squared, place a sandbag on your lower back or on your upper buttocks.
Yoga Practice Tips
- Sense all the places you feel your body making contact with the props and the ground. Take several slow, deep breaths to release your weight, melting into the support.
- Bring your awareness to the outer hip of your bent leg. As you inhale, soften into any areas you feel need releasing. As you exhale, let go into the pose. Eventually bring your awareness to your entire back body—lower back, hips, upper back, shoulder blades, shoulders, head, and neck. Inhale deeply. As you exhale, melt into the support, releasing earthward.
- Notice the sensations in your body and any emotions that arise. Notice without judgment, holding them in loving awareness.
- You can also try releasing the tension, stress, anxiety, worry, and exhaustion during the exhalation and cultivating peace, self-love, and comfort during the inhalation.